Today, I created one python tool script with the artificial intelligence to merge sprites images.
I used the artificial intelligence to add unittest to create default images with PIL to test the result.
You can select your folder , select the align of merge features or test with unittest button.
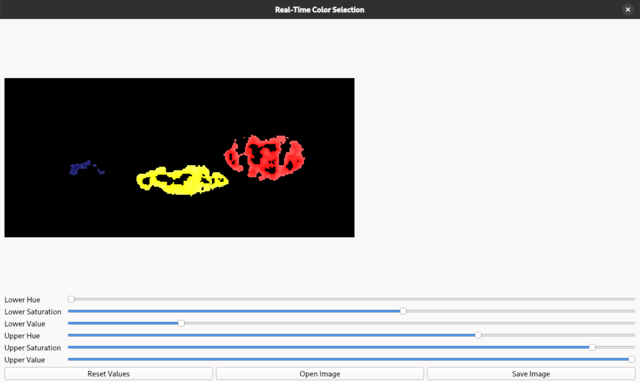
This is the result and works well:
import os
import unittest
from PIL import Image, ImageDraw, ImageFont, ImageQt
import shutil
from PyQt6.QtWidgets import QApplication, QMainWindow, QPushButton, QFileDialog, QLabel, QVBoxLayout, QWidget, QComboBox
from PyQt6.QtGui import QPixmap
from PyQt6.QtCore import Qt
import sys

def create_test_image(path, size, number):
    img = Image.new('RGBA', size, (255, 255, 255, 255))
    draw = ImageDraw.Draw(img)
    # Simplified to just draw the number with a basic color background
    draw.rectangle((0, 0, size[0], size[1]), fill=(0, 100 * number % 255, 0, 255))
    try:
        font = ImageFont.load_default()
    except:
        font = None
    draw.text((size[0]//2-5, size[1]//2-5), str(number), fill=(255, 255, 255, 255), font=font)
    img.save(path, 'PNG')

def merge_sprites(folder_path, output_horizontal, output_vertical):
    images = [Image.open(os.path.join(folder_path, f)) for f in os.listdir(folder_path) if f.endswith(('.png', '.jpg', '.jpeg'))]

    if not images:
        return None, None

    width, height = images[0].size

    # Horizontal merge
    total_width = width * len(images)
    horizontal_image = Image.new('RGBA', (total_width, height))
    for i, img in enumerate(images):
        horizontal_image.paste(img, (i * width, 0))
    horizontal_image.save(output_horizontal, 'PNG')

    # Vertical merge
    total_height = height * len(images)
    vertical_image = Image.new('RGBA', (width, total_height))
    for i, img in enumerate(images):
        vertical_image.paste(img, (0, i * height))
    vertical_image.save(output_vertical, 'PNG')

    return horizontal_image, vertical_image

class TestSpriteMerger(unittest.TestCase):
    def setUp(self):
        self.test_folder = 'test_images'
        self.size = (50, 20)
        os.makedirs(self.test_folder, exist_ok=True)
        for i in range(3):
            create_test_image(os.path.join(self.test_folder, f'test_{i+1}.png'), self.size, i+1)

    def test_merge_horizontal(self):
        output_h = 'test_merged_horizontal.png'
        output_v = 'test_merged_vertical.png'
        h_img, _ = merge_sprites(self.test_folder, output_h, output_v)

        self.assertIsNotNone(h_img, "Horizontal merge failed")
        self.assertEqual(h_img.size, (self.size[0] * 3, self.size[1]))

    def test_merge_vertical(self):
        output_h = 'test_merged_horizontal.png'
        output_v = 'test_merged_vertical.png'
        _, v_img = merge_sprites(self.test_folder, output_h, output_v)

        self.assertIsNotNone(v_img, "Vertical merge failed")
        self.assertEqual(v_img.size, (self.size[0], self.size[1] * 3))

    def tearDown(self):
        if os.path.exists(self.test_folder):
            shutil.rmtree(self.test_folder)
        for f in ['test_merged_horizontal.png', 'test_merged_vertical.png']:
            if os.path.exists(f):
                os.remove(f)

class SpriteMergerApp(QMainWindow):
    def __init__(self):
        super().__init__()
        self.setWindowTitle("Sprite Merger")
        self.setGeometry(100, 100, 800, 600)

        self.folder_path = ""

        layout = QVBoxLayout()

        self.select_button = QPushButton("Select Folder")
        self.select_button.clicked.connect(self.select_folder)
        layout.addWidget(self.select_button)

        self.merge_type = QComboBox()
        self.merge_type.addItems(["Horizontal", "Vertical"])
        layout.addWidget(self.merge_type)

        self.process_button = QPushButton("Process Selected Folder")
        self.process_button.clicked.connect(self.process_folder)
        layout.addWidget(self.process_button)

        self.test_button = QPushButton("Run Unit Test")
        self.test_button.clicked.connect(self.run_unit_test)
        layout.addWidget(self.test_button)

        self.result_label = QLabel("No image processed")
        layout.addWidget(self.result_label)

        self.image_label = QLabel()
        layout.addWidget(self.image_label)

        container = QWidget()
        container.setLayout(layout)
        self.setCentralWidget(container)

    def select_folder(self):
        self.folder_path = QFileDialog.getExistingDirectory(self, "Select Sprite Folder")
        self.result_label.setText(f"Selected: {self.folder_path}")

    def process_folder(self):
        if not self.folder_path:
            self.result_label.setText("Please select a folder first")
            return
        h_img, v_img = merge_sprites(self.folder_path, 'merged_horizontal.png', 'merged_vertical.png')
        selected_type = self.merge_type.currentText()

        img = h_img if selected_type == "Horizontal" else v_img
        if img:
            pixmap = QPixmap.fromImage(ImageQt.ImageQt(img))
            self.image_label.setPixmap(pixmap.scaled(700, 500, aspectRatioMode=Qt.AspectRatioMode.KeepAspectRatio))
            self.result_label.setText(f"{selected_type} merge completed")
        else:
            self.result_label.setText(f"{selected_type} merge failed")

    def run_unit_test(self):
        suite = unittest.TestLoader().loadTestsFromTestCase(TestSpriteMerger)
        result = unittest.TextTestRunner().run(suite)

        test_folder = 'test_images'
        os.makedirs(test_folder, exist_ok=True)
        for i in range(3):
            create_test_image(os.path.join(test_folder, f'test_{i+1}.png'), (50, 20), i+1)

        h_img, v_img = merge_sprites(test_folder, 'test_merged_horizontal.png', 'test_merged_vertical.png')
        selected_type = self.merge_type.currentText()

        img = h_img if selected_type == "Horizontal" else v_img
        if img:
            pixmap = QPixmap.fromImage(ImageQt.ImageQt(img))
            self.image_label.setPixmap(pixmap.scaled(700, 500, aspectRatioMode=Qt.AspectRatioMode.KeepAspectRatio))
            self.result_label.setText(f"Unit tests: {result.testsRun} run, {len(result.failures)} failed, showing {selected_type.lower()} merge")
        else:
            self.result_label.setText(f"Unit tests: {result.testsRun} run, {len(result.failures)} failed, merge failed")

if __name__ == '__main__':
    app = QApplication(sys.argv)
    window = SpriteMergerApp()
    window.show()
    sys.exit(app.exec())