In the last article tutorial, I show some simple examples with the sunpy python package.
Today I installed it again with all of these python packages using the pip tool.
You don't need all of these if you just start, but in time you will need to install them:
pip install sunpy --user
Collecting sunpy
  Downloading sunpy-4.1.3.tar.gz (3.6 MB)
     ---------------------------------------- 3.6/3.6 MB 3.6 MB/s eta 0:00:00
     ...
     Successfully installed PyYAML-6.0 aioftp-0.21.4 astropy-5.2.1 pyerfa-2.0.0.1 sunpy-4.1.3
...
pip install zeep --user
Collecting zeep
  Using cached zeep-4.2.1-py3-none-any.whl (101 kB)
  ...
  Successfully installed isodate-0.6.1 pytz-2022.7.1 requests-file-1.5.1 requests-toolbelt-0.10.1 zeep-4.2.1
  ...
pip install drms --user
Collecting drms
  Downloading drms-0.6.3-py3-none-any.whl (35 kB)
  ...
  Successfully installed drms-0.6.3 pandas-1.5.3
pip install hvpy --user
Collecting hvpy
  Downloading hvpy-1.0.1-py3-none-any.whl (44 kB)
     ---------------------------------------- 44.0/44.0 kB 359.5 kB/s eta 0:00:00
     ...
     Successfully installed hvpy-1.0.1
pip install scipy --user
Collecting scipy
  Downloading scipy-1.10.1-cp311-cp311-win_amd64.whl (42.2 MB)
     ---------------------------------------- 42.2/42.2 MB 7.4 MB/s eta 0:00:00
     ...
     Successfully installed scipy-1.10.1
pip install glymur --user
Collecting glymur
  Downloading Glymur-0.12.2-py3-none-any.whl (2.7 MB)
     ---------------------------------------- 2.7/2.7 MB 4.2 MB/s eta 0:00:00
     ...
     Successfully installed glymur-0.12.2
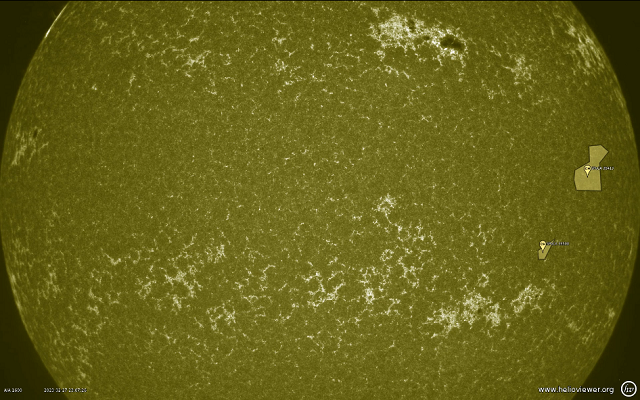
Let's use the 1600 Angstrom from these all data of spectral range: 335 Angstrom, 131 Angstrom, 191-195 Angstrom, 211 Angstrom, 1600 Angstrom, 1700 Angstrom, 4500 Angstrom, 171-175 Angstrom, 304 Angstrom, 94 Angstrom
from datetime import datetime
from hvpy import createMovie, DataSource, create_events, create_layers
createMovie(
     startTime=datetime(2023, 2, 27),                    # start from 1st September 2022
     endTime=datetime(2023, 2, 28),                      # end at 5th September 2022
     layers=create_layers([(DataSource.AIA_1600, 100)]), # use AIA_193 Lens with 100% Opacity
     events=create_events(["CH"]),                      # show the Active regions
     eventsLabels=True,                                 # event labels should be included
     imageScale=1,                                      # Image scale in arcseconds per pixel
     hq=True,                                           # Download a higher-quality movie file
     timeout=10,                                        # Wait 10 minutes to get a response
     overwrite=True
)
The result is a video that looks like this :

There are easier ways to get information about the sun…
You can take one screenshot using the api.helioviewer.org feature in your browser.
https://api.helioviewer.org/v2/takeScreenshot/?imageScale=1&layers=[SDO,AIA,AIA,304,1,100]&events=&eventLabels=true&scale=true&scaleType=earth&scaleX=0&scaleY=0&date=2023-02-28T15:00:00.000Z&x1=-1100.0&x2=1100.0&y1=-1100.0&y2=1100.0&display=true&watermark=true&events=[CH,all,1]