analitics

Pages

Showing posts with label PyQt4. Show all posts

Tuesday, May 26, 2020

Python Qt5 : PyQt5 and PyGame compatibility with source code.

This tutorial tries to solve from the objectives related to solving and stabilizing compatibility errors between PyQt4 and PyQt5 and creating a common interface between PyQt5 and PyGame.
There is always the same problem in programming when the developer for some reason has to change classes, methods and functions and reusing the old code is no longer valid.
In this case, common or other errors occur, which leads to a waste of time.
I will present a simple way to solve these problems.
I really like to use the PyQt5 module to create interfaces for my python programs and scripts.
Like any programmer who hasn't fully used all A.P.I, I always use the old source code I programmed in the past.
What the developer says about the transition from PyQt4 to PyQt5 we can see on the official page.
Obviously, you will have to move on to things to know but it is quite difficult to always come back and read this content when you have programming errors.
Today, I wanted to make a simple drawing interface in PyGame that would be included in a PyQt5 interface.
I tried to use an old code created by me in PyQt4 but I realized that I had encountered errors before switching to the new PyQt5.
This compatibility problem generates errors and can be solved as follows: by knowing the exact solution and fixing errors in real time, studying the changes created by the developer or the classic search for errors.
My solution comes with the help of these solutions and requires a simple step using the commented source code.
To show you how simple it is to understand I will show you the source code for the interface I built that simply to solves the problem of understanding compatibility by reading the developer source code with simple and useful comments.
#the old import for PyQt4
#from PyQt4 import QtGui

#the new import for PyQt5
#from PyQt5 import QtCore, QtGui, QtWidgets
#class MainWindow(QtWidgets.QMainWindow, UI.MainUI.Ui_MainWindow):

from PyQt5 import QtGui
from PyQt5 import QtWidgets
import pygame
import sys

# old definition for PyQt4 for QWidget
#class ImageWidget(QtGui.QWidget):
class ImageWidget(QtWidgets.QWidget):   
    def __init__(self,surface,parent=None):
        super(ImageWidget,self).__init__(parent)
        w=surface.get_width()
        h=surface.get_height()
        self.data=surface.get_buffer().raw
        self.image=QtGui.QImage(self.data,w,h,QtGui.QImage.Format_RGB32)

    def paintEvent(self,event):
        my_paint=QtGui.QPainter()
        # the definitions for PyQt4 and PyQt5 use QtGui.QPainter()     
        my_paint.begin(self)
        my_paint.drawImage(0,0,self.image)
        my_paint.end()
        
# old definition for PyQt4 for QMainWindow
#class MainWindow(QtGui.QMainWindow):
class MainWindow(QtWidgets.QMainWindow):
    def __init__(self,surface,parent=None):
        super(MainWindow,self).__init__(parent)
        self.setFixedSize(640, 480)
        self.setCentralWidget(ImageWidget(surface))
# this part of source code need to be updated if you want to use animation        
# init PyGame 
pygame.init()
# define a surface 
my_surface=pygame.Surface((640,480))
# fill the surface, see https://www.pygame.org/docs/ref/surface.html#pygame.Surface.fill
my_surface.fill((0,0,255,176))
# draw circle see https://www.pygame.org/docs/ref/draw.html#pygame.draw.circle
pygame.draw.circle(my_surface,(0,0,127,255),(76,76),76)
# draw ellipse (surface, color(R,G,B), size (x,y,x+dx, y+y+dy) )
pygame.draw.ellipse(my_surface,(127,0,0,0),(0,0,12,76))
 
# this part of source code will show 
# the my_surface created with PyGame in PyQt5
# old definition for PyQt4
#app=QtGui.QApplication(sys.argv)
app=QtWidgets.QApplication(sys.argv)
my_window=MainWindow(my_surface)
my_window.show()
app.exec_()
Saturday, July 8, 2017

Python Qt4 - part 006.

Today I will deal with QFileDialog widget.
You can read the more about this widget here.
This allows us to open a dialog to load a resource - a file.
The example comes with the base PyQt4 application window with a my_example dialog from fileDialogSample python class.
Into this python class, I have some variable for the file: file_name, data and my_file_open.
The my_text_edit for text area and my_button to open the QFileDialog.
Also, the vbox variable to put all on QVBoxLayout from the application.
Let's see the example:
import sys
from PyQt4 import QtGui
from PyQt4 import QtCore

class fileDialogSample(QtGui.QWidget):
    def __init__(self):
        QtGui.QWidget.__init__(self)

        #make text area and button
        self.my_text_edit = QtGui.QTextEdit()
        self.my_button = QtGui.QPushButton('Select File', self)

        #open the showDialog
        self.my_button.clicked.connect(self.showDialog)

        #put all into application area
        vbox = QtGui.QVBoxLayout()
        vbox.addWidget(self.my_text_edit)
        vbox.addWidget(self.my_button)
        self.setLayout(vbox)

        #set title and geometry of application
        self.setWindowTitle('File Dialog example')
        self.setGeometry(50, 50, 300, 300)

    #make a function with seeting for my QFileDialog
    def showDialog(self):
        file_name = QtGui.QFileDialog.getOpenFileName(self, 'Open file', 'C://')
        my_file_open = open(file_name)
        data = my_file_open.read()
        self.my_text_edit.setText(data)
        my_file_open.close()

#run the application 
app = QtGui.QApplication(sys.argv)
my_dialog = fileDialogSample()
my_dialog.show()
sys.exit(app.exec_())
Now, just press the Select File button, take a text file and open it.

Friday, July 7, 2017

Python Qt4 - part 005.

Another example with PyQt4 that allow seeing images over the internet.
Here's another simple example with PyQt4 that allows you to view images on the internet.
You can use any image on the internet to display with this python script.
This example is done in two steps:
  • take a single image from the internet - httplib python module;
  • displaying - PyQt4 python module
from PyQt4 import QtGui
import sys
import httplib

def getTempPNG():
   conn = httplib.HTTPConnection("www.meteoromania.ro")
   conn.request("GET", "/sateliti/img/id814/id814_2017070718.png")
   return conn.getresponse().read()

def main():
   app = QtGui.QApplication(sys.argv)
   png = getTempPNG()
   pixmap = QtGui.QPixmap()
   pixmap.loadFromData(png)
   label = QtGui.QLabel()
   label.setPixmap(pixmap)
   label.setWindowTitle('METEOSAT-10 Thermal Infrared Channel 10.8 micrometers Glowing temperature')
   label.show()
   app.exec_()

if __name__ == '__main__':
   main()
The result can be seen in this screenshot:

Python Qt4 - part 004.

Another tutorial about PyQt4 with QLCDNumber widget displays a number with LCD-like digits.
This tutorial will show you how to deal with this widget.
First, you need to know more about QLCDNumber, so take a look here.
The first example is very simple and will show just one digit, see:
import sys
from PyQt4.QtCore import *
from PyQt4.QtGui import *

class Digit(QWidget):

    def __init__(self, parent=None):
        QWidget.__init__(self, parent)
        self.setWindowTitle("One digit")
        lcd = QLCDNumber(self)

app = QApplication(sys.argv)
ls = Digit()
ls.show()
sys.exit(app.exec_())
Now, the next step is to send data to this digit.
One good example is with one slider.
The position of the slider will be send to the QLCDNumber.
How can do that? Will need a vbox to put the QLCDNumber and the slider and then using signal and slot.
Let's see the example:
import sys
from PyQt4.QtCore import *
from PyQt4.QtGui import *
class Digit(QWidget):

    def __init__(self, parent=None):
        QWidget.__init__(self, parent)
        #make widgets
        self.setWindowTitle("One digit with slider")
        lcd = QLCDNumber(self)
        slider = QSlider(Qt.Horizontal, self)
        #set layout variable vbox
        vbox = QVBoxLayout()
        #add widgests
        vbox.addWidget(lcd)
        vbox.addWidget(slider)
        #set the vbox to layout
        self.setLayout(vbox)
        #create signal to slot
        self.connect(slider, SIGNAL("valueChanged(int)"),lcd, SLOT("display(int)"))
        self.resize(200, 170)
if __name__ == '__main__':
    app = QApplication(sys.argv)
    ls = Digit()
    ls.show()
    sys.exit(app.exec_())
In the source code in the example, you can see the comments that mark the steps of creating and executing the python script.
Let's try another example with a digital clock:
import sys
from PyQt4 import QtCore, QtGui

class digital_clock(QtGui.QLCDNumber):
    def __init__(self, parent=None):
        super(digital_clock, self).__init__(parent)
        self.setSegmentStyle(QtGui.QLCDNumber.Filled)
        #the defaul is 5 , change to 8 for seconds
        self.setDigitCount(5)
        self.setWindowTitle("Digital Clock")
        self.resize(200, 70)
        timer = QtCore.QTimer(self)
        timer.timeout.connect(self.showTime)
        timer.start(1000)
        self.showTime()

    def showTime(self):
        time = QtCore.QTime.currentTime()
        text = time.toString('hh:mm')
        #if you setDigitsCount to 8
        #uncomment the next line of code
        #text = time.toString('hh:mm:ss')
        if (time.second() % 2) == 0:
            text = text[:2] + ' ' + text[3:]
        self.display(text)

if __name__ == '__main__':
    app = QtGui.QApplication(sys.argv)
    clock = digital_clock()
    clock.show()
    sys.exit(app.exec_())
If you want to see seconds, then you need to set the digit count of the LCD to 8 ( it's 5 by default) of setDigitCount.
Also you need to uncomment this line of code: text = time.toString('hh:mm:ss') and comment the old one.
You can solve multiple issues with this widget, like: stopwatch, timer, clock down timer ...

Thursday, July 6, 2017

Python Qt4 - part 003.

Today I've taken a simple example with PyQt4 compared to the other tutorials we have done so far.
The main reason was to understand and use PyQt4 to display an important message.
To make this example I have set the following steps for my python program.
  • importing python modules
  • creating the application in PyQt4 as a tray icon class
  • establishing an exit from the application
  • setting up a message to display
  • display the message over a period of time
  • closing the application
  • running the python application
Let's see my source code of my python application:
#! /usr/bin/env python
import sys
from PyQt4 import QtGui, QtCore

class SystemTrayIcon(QtGui.QSystemTrayIcon):
    def __init__(self, parent=None):
        QtGui.QSystemTrayIcon.__init__(self, parent)
        self.setIcon(QtGui.QIcon("mess.svg"))
        menu = QtGui.QMenu(parent)
        exitAction = menu.addAction("Exit")
        self.setContextMenu(menu)
        QtCore.QObject.connect(exitAction,QtCore.SIGNAL('triggered()'), self.exit)

    def click_trap(self, value):
        if value == self.Trigger: #left click!
            self.left_menu.exec_(QtGui.QCursor.pos())

    def welcome(self):
        self.showMessage("Hello user!", "This is a message from PyQT4")

    def show(self):
        QtGui.QSystemTrayIcon.show(self)
        QtCore.QTimer.singleShot(600, self.welcome)

    def exit(self):
        QtCore.QCoreApplication.exit()

def main():
    app = QtGui.QApplication([])
    tray = SystemTrayIcon()
    tray.show()
    app.exec_()

if __name__ == '__main__':
    main()
I used PyQt4 python module to make the application and sys python module for exit from application.
About running application: the main function will run the application.
The python class SystemTrayIcon will work only if we used QApplication to make like any application.
This is the reason I used the variable app.
The tray variable is used to run it like tray icon application.
Into the SystemTrayIcon class, I put some functions to help me with my issue.
Under __init__ I used all settings for my tray icon application: the icon, the exit menu, signal for the exit.
The next functions come with:
  • click_trap - take the click of the user ;
  • welcome - make a message to display;
  • show - display the welcome message;
  • exit - exit from the application
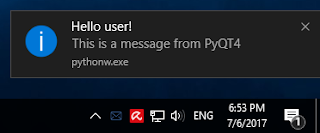
The result of my python script is this message:

About the showMessage then this helps you:

QSystemTrayIcon.showMessage (self, QString title, QString msg, MessageIcon icon = QSystemTrayIcon.Information, int msecs = 10000)

Shows a balloon message for the entry with the given title, message and icon for the time specified in millisecondsTimeoutHint. title and message must be plain text strings.
The message can be clicked by the user; the messageClicked() signal will be emitted when this occurs.
Note that the display of messages is dependent on the system configuration and user preferences and that messages may not appear at all. Hence, it should not be relied upon as the sole means for providing critical information.
On Windows, the millisecondsTimeoutHint is usually ignored by the system when the application has focus.
On Mac OS X, the Growl notification system must be installed for this function to display messages.
This function was introduced in Qt 4.3.

Friday, June 16, 2017

Python Qt4 - part 002.

This tutorial covers only part of the practice of using G.U.I. (graphical user interface) elements in PyQt4.
First of all, I will start with the theory and then I will simply exemplify how these work.
There are three basic elements called: Event, Signal, and Slot.
Since all GUI applications are driven by events, we will have several elements interconnected with signals and slots.
What do we need to know?
Events are generated mainly by the user of an application into the event processing system.
The event processing system in PyQt4 is built with the signal and slot mechanism.
The event processing system is an event model with three participants:
  • event source 
  • event object 
  • event target 
Signals and slots are used for communication between objects.
A signal is emitted when something of potential interest happens.
If a signal is connected to a slot then the slot is called when the signal is emitted.
Rules of signals and slots:
  • A signal may be connected to many slots.
  • A signal may also be connected to another signal.
  • Signal arguments may be any Python type.
  • A slot may be connected to many signals.
  • Connections may be direct (ie. synchronous) or queued (ie. asynchronous).
  • Connections may be made across threads.
  • Signals may be disconnected.
A signal (specifically an unbound signal) is an attribute of a class that is a subclass of QObject.
Signals are connected to slots using the connect() method of a bound signal.
Signals are disconnected from slots using the disconnect() method of a bound signal.
Signals are emitted from using the emit() method of a bound signal.
Example of a signal used into the myclassapp PyQt4 application:
I create a new signal called closeApp.
closeApp = QtCore.pyqtSignal()
This signal is emitted during a mouse press event.
def mousePressEvent(self, event):
    self.myclassapp.closeApp.emit()
The signal is connected to the close() slot of the QtGui.QMainWindow.
self.myclassapp.closeApp.connect(self.close)
I did not show the entire example here because the reason was to show the direct connection between the signal, the event and the slot.
The events are functions or methods are executed in response to user’s actions like clicking on a button, selecting an item from a collection or a mouse click etc.
Another simple example with o application with two buttons:
import sys
from PyQt4.QtCore import *
from PyQt4.QtGui import *

def window():
   app = QApplication(sys.argv)
   win = QDialog()
   mybutton1= QPushButton(win)
   mybutton1.setText("Button1")
   mybutton1.move(50,20)
   mybutton1.clicked.connect(mybutton1_clicked)

   mybutton2= QPushButton(win)
   mybutton2.setText("Button2")
   mybutton2.move(50,50)
   QObject.connect(mybutton2,SIGNAL("clicked()"),mybutton2_clicked)

   win.setGeometry(100,100,200,100)
   win.setWindowTitle("PyQt Event Signal Slot")
   win.show()
   sys.exit(app.exec_())

def mybutton1_clicked():
   print "Button 1 clicked"

def mybutton2_clicked():
   print "Button 2 clicked"

if __name__ == '__main__':
   window()
The result of clicking on these buttons is something like that:
Button 2 clicked
Button 2 clicked
Button 1 clicked
Button 1 clicked
Button 1 clicked
Button 2 clicked
Button 1 clicked
Button 2 clicked
All widgets used to build the G.U.I. (graphical user interface) act as the source of such events, see the mybutton1 source code part.
Now about this part of the source code, I just used to exemplify how the signals are connected to the slots:
QObject.connect(mybutton2,SIGNAL("clicked()"),mybutton2_clicked)
So each PyQt widget (which is derived from QObject class) is designed to emit a signal in response to one or more events.
The signal on its own does not perform any action. Instead, it is connected to a slot. The slot can be any callable Python function.
And this part of the source code is exemplified with mybutton2.
Signals are complex due to their use (how they are used).
More theory about the signals.
To send a signal across threads we have to use the Qt.QueuedConnection parameter.
There is also a special form of a PyQt4 signal known as a short-circuit signal.
The short-circuit signals implicitly declare each argument as being of type PyQt_PyObject.
Short-circuit signals do not have a list of arguments or the surrounding parentheses.
Short-circuit signals may only be connected to slots that have been implemented in Python.
They cannot be connected to Qt slots or the Python callables that wrap Qt slots.
The older style of connecting signals and slots will continue to be supported throughout the life of PyQt4.

Saturday, June 10, 2017

Python Qt4 - part 001.

Today I started with PyQt4 and python version :
Python 2.7.13 (v2.7.13:a06454b1afa1, Dec 17 2016, 20:42:59) [MSC v.1500 32 bit (Intel)] on win32
To install PyQt4 I used this link to take the executable named: PyQt4-4.11.4-gpl-Py2.7-Qt4.8.7-x32.exe.
The name of this executable shows us: can be used with python 2.7.x versions and come with Qt4.8.7 for our 32-bit python.
I start with a default Example class to make a calculator interface with PyQt4.
This is my example:
#!/usr/bin/python
# -*- coding: utf-8 -*-

import sys
from PyQt4 import QtGui

"""
Qt.Gui calculator example
"""

class Example(QtGui.QWidget):
    
    def __init__(self):
        super(Example, self).__init__()
        
        self.initUI()
        
    def initUI(self):
 title = QtGui.QLabel('Title')
        titleEdit = QtGui.QLineEdit()
        grid = QtGui.QGridLayout()
 grid.setSpacing(10)

 grid.addWidget(title, 0, 0)

 grid.addWidget(titleEdit,0,1,1,4)

        self.setLayout(grid)
 
        names = ['Cls', 'Bck', 'OFF',
                 '/', '.', '7', '8',
                '9', '*', 'SQR', '3',
                 '4', '5', '-', '=',
                '0', '1', '2', '+']
        
        positions = [(i,j) for i in range(1,5) for j in range(0,5)]
        
        for position, name in zip(positions, names):
            
            if name == '':
                continue
            button = QtGui.QPushButton(name)
            grid.addWidget(button, *position)
            
        self.move(300, 250)
        self.setWindowTitle('Calculator')
        self.show()
        
def main():
    app = QtGui.QApplication(sys.argv)
    ex = Example()
    sys.exit(app.exec_())

if __name__ == '__main__':
    main()
The example is simple.
First, you need a QGridLayout - this makes a matrix.
I used labels, line edit and buttons all from QtGui: QLabel, QLineEdit and QPushButton.
First into this matrix - named grid is Title and edit area named titleEdit.
This two is added to the grid - matrix with addWidget.
The next step is to put all the buttons into one array.
This array will be added to the grid matrix with a for a loop.
To make this add from array to matrix I used the zip function.
The zip function makes an iterator that aggregates elements from each of the iterable.
Also, I set the title to Calculator with setWindowTitle.
I have not implemented the part of the events and the calculation.
The main function will start the interface by using the QApplication.
The goal of this tutorial was the realization of the graphical interface with PyQt4.
This is the result of my example:

Friday, May 26, 2017

OpenGL and OpenCV with python 2.7 - part 005.

In this tutorial, I will show you how to mount OpenCV in the Windows 10 operating system with any python version.
You can use the same steps for other versions of python.
Get the wheel binary package opencv_python-3.2.0.7-cp27-cp27m-win32.whl from here.
C:\Python27>

C:\Python27>cd Scripts

C:\Python27\Scripts>pip install opencv_python-3.2.0.7-cp27-cp27m-win32.whl
Processing c:\python27\scripts\opencv_python-3.2.0.7-cp27-cp27m-win32.whl
Requirement already satisfied: numpy>=1.11.1 in c:\python27\lib\site-packages (from opencv-python==3.2.0.7)
Installing collected packages: opencv-python
Successfully installed opencv-python-3.2.0.7

C:\Python27\Scripts>python
Python 2.7.13 (v2.7.13:a06454b1afa1, Dec 17 2016, 20:42:59) [MSC v.1500 32 bit (Intel)] on win32
Type "help", "copyright", "credits" or "license" for more information.
Let's test it with default source code:

>>> import cv2
>>> dir(cv2)
['', 'ACCESS_FAST', 'ACCESS_MASK', 'ACCESS_READ', 'ACCESS_RW', 'ACCESS_WRITE', 
'ADAPTIVE_THRESH_GAUSSIAN_C', 'ADAPTIVE_THRESH_MEAN_C', 'AGAST_FEATURE_DETECTOR_AGAST_5_8', 
'AGAST_FEATURE_DETECTOR_AGAST_7_12D', 'AGAST_FEATURE_DETECTOR_AGAST_7_12S',
 'AGAST_FEATURE_DETECTOR_NONMAX_SUPPRESSION', 'AGAST_FEATURE_DETECTOR_OAST_9_16',
...
Now we can test this python script example with PyQt4 python module and cv2.resize function very easy.
The example loads an image with PyQt4 python module.
from PyQt4.QtGui import QApplication, QWidget, QVBoxLayout, QImage, QPixmap, QLabel, QPushButton, QFileDialog
import cv2
import sys
app = QApplication([])
window = QWidget()
layout = QVBoxLayout(window)
window.setLayout(layout)
display = QLabel()
width = 600
height = 400
display.setMinimumSize(width, height)
layout.addWidget(display)
button = QPushButton('Load', window)
layout.addWidget(button)

def read_image():
    path = QFileDialog.getOpenFileName(window)
    if path:
        print str(path)
        picture = cv2.imread(str(path))
        if picture is not None:
            print width, height
            picture = cv2.resize(picture, (width, height))
            image = QImage(picture.tobytes(),  # The content of the image
                           picture.shape[1],  # The width (number of columns)
                           picture.shape[0],  # The height (number of rows)
                           QImage.Format_RGB888)  # The image is stored in 3*8-bit format
            display.setPixmap(QPixmap.fromImage(image.rgbSwapped()))
        else:
            display.setPixmap(QPixmap())

button.clicked.connect(read_image)
window.show()

app.exec_()
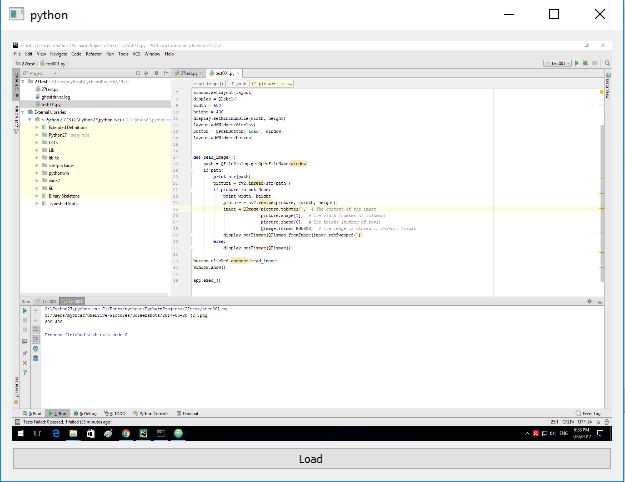
See the result for this python script: