For those who want to learn Python in order to:
- become a really good developer;
- to take the exam to get into university;
- to be interviewed for a job.
You cam see the project on this GhitHub account.
import sys
from PyQt6.QtWidgets import QApplication, QMainWindow, QWidget, QVBoxLayout, QHBoxLayout, QLineEdit, QPushButton, QProgressBar, QDialog, QComboBox, QLabel, QMessageBox
from PyQt6.QtGui import QIcon, QPixmap
from pytube import YouTube
from PyQt6.QtCore import Qt
from PyQt6.QtWidgets import QDialogButtonBox


class FormatChecker:
    def __init__(self, url):
        self.url = url

    def check_formats(self):
        try:
            yt = YouTube(self.url)
            formats = []
            streams = yt.streams.filter(only_video=True)
            for stream in streams:
                if stream.url:
                    format_info = {
                        'resolution': stream.resolution,
                        'file_extension': stream.mime_type.split("/")[-1]
                    }
                    formats.append(format_info)
                    print(" format_info ",format_info)
            return formats
        except Exception as e:
            print("Error:", str(e))
            return []


class FormatInfo:
    def __init__(self, resolution, file_formats):
        self.resolution = resolution
        self.file_formats = file_formats


class ResolutionDialog(QDialog):
    def __init__(self, formats, parent=None):
        super().__init__(parent)
        self.setWindowTitle("Select Resolution and File Format")
        self.formats = formats

        layout = QVBoxLayout(self)

        self.resolution_combo = QComboBox(self)
        for format_info in formats:
            resolution = format_info.resolution
            self.resolution_combo.addItem(resolution)
        layout.addWidget(self.resolution_combo)

        self.file_format_combo = QComboBox(self)
        self.update_file_formats(self.resolution_combo.currentText())
        layout.addWidget(self.file_format_combo)

        button_box = QDialogButtonBox(QDialogButtonBox.StandardButton.Ok | QDialogButtonBox.StandardButton.Cancel)
        button_box.accepted.connect(self.accept)
        button_box.rejected.connect(self.reject)
        layout.addWidget(button_box)

        self.resolution_combo.currentIndexChanged.connect(self.on_resolution_changed)

    def update_file_formats(self, resolution):
        self.file_format_combo.clear()
        for format_info in self.formats:
            if format_info.resolution == resolution:
                file_formats = format_info.file_formats
                self.file_format_combo.addItems(file_formats)

    def selected_resolution(self):
        return self.resolution_combo.currentText()

    def selected_file_format(self):
        return self.file_format_combo.currentText()

    def on_resolution_changed(self, index):
        resolution = self.resolution_combo.currentText()
        self.update_file_formats(resolution)


class MainWindow(QMainWindow):
    def __init__(self):
        super().__init__()
        self.setWindowTitle("YouTube Downloader - selected - only_video =True")
        self.setFixedWidth(640)

        central_widget = QWidget(self)
        self.setCentralWidget(central_widget)

        layout = QVBoxLayout(central_widget)

        self.url_edit = QLineEdit()
        layout.addWidget(self.url_edit)

        download_button = QPushButton("Download")
        download_button.clicked.connect(self.show_resolution_dialog)
        layout.addWidget(download_button)

        progress_layout = QHBoxLayout()
        layout.addLayout(progress_layout)

        self.progress_bar = QProgressBar()
        self.progress_bar.setTextVisible(True)
        progress_layout.addWidget(self.progress_bar)

        self.progress_icon_label = QLabel(self)
        pixmap = QPixmap("youtube.png")  # Înlocuiți "path_to_icon.png" cu calea către iconul dorit
        self.progress_icon_label.setPixmap(pixmap)
        progress_layout.addWidget(self.progress_icon_label)

    def show_resolution_dialog(self):
        url = self.url_edit.text()
        if url:
            format_checker = FormatChecker(url)
            formats = format_checker.check_formats()
            format_infos = []
            for format in formats:
                resolution = format['resolution']
                file_extension = format['file_extension']
                format_info = next((info for info in format_infos if info.resolution == resolution), None)
                if format_info:
                    format_info.file_formats.append(file_extension)
                else:
                    format_info = FormatInfo(resolution, [file_extension])
                    format_infos.append(format_info)

            dialog = ResolutionDialog(format_infos, self)
            if dialog.exec() == QDialog.DialogCode.Accepted:
                resolution = dialog.selected_resolution()
                file_format = dialog.selected_file_format()
                self.download_video(url, resolution, file_format)
        else:
            print("Please enter a valid YouTube URL.")

    def download_video(self, url, resolution, file_format):
        try:
            yt = YouTube(url)
            stream = yt.streams.filter(only_video=True, resolution=resolution, mime_type="video/" + file_format).first()
            if stream:
                stream.download()
                print("Download completed!")
                QMessageBox.question(self, "Download Completed", "The video has been downloaded successfully.", QMessageBox.StandardButton.Ok)
            else:
                print("Error: The selected video format is not available for download.")
                QMessageBox.question(self, "Download Error", "The selected video format is not available for download.", QMessageBox.StandardButton.Ok)
        except Exception as e:
            print("Error:", str(e))
            QMessageBox.question(self, "Download Error", "An error occurred during the download.", QMessageBox.StandardButton.Ok)


def main():
    app = QApplication(sys.argv)
    window = MainWindow()
    window.show()
    sys.exit(app.exec())


if __name__ == "__main__":
    main()
C:\PythonProjects>mkdir exo-lang_001

C:\PythonProjects>cd exo-lang_001

C:\PythonProjects\exo-lang_001>pip install exo-lang --user
Collecting exo-lang
  Downloading exo_lang-0.0.2-py3-none-any.whl (142 kB)
  ...
Successfully installed PySMT-0.9.5 asdl-0.1.5 asdl-adt-0.1.0 astor-0.8.1 exo-lang-0.0.2 tomli-2.0.1
yapf-0.33.0 z3-solver-4.12.2.0C:\PythonProjects\exo-lang_001>pip install virtualenv --user
...
C:\PythonProjects\exo-lang_001>python -m venv venv
C:\PythonProjects\exo-lang_001>venv\Scripts\activate.bat
(venv) C:\PythonProjects\exo-lang_001>python -m pip install -U setuptools wheel
Successfully installed setuptools-67.8.0 wheel-0.40.0
[notice] A new release of pip available: 22.3 -> 23.1.2
[notice] To update, run: python.exe -m pip install --upgrade pip
(venv) C:\PythonProjects\exo-lang_001>python.exe -m pip install --upgrade pip
Requirement already satisfied: pip in c:\pythonprojects\exo-lang_001\venv\lib\site-packages (22.3)
Collecting pip
Using cached pip-23.1.2-py3-none-any.whl (2.1 MB)
...
Successfully installed pip-23.1.2
(venv) C:\PythonProjects\exo-lang_001>python -m pip install exo-lang
...
Installing collected packages: z3-solver, PySMT, asdl, tomli, numpy, attrs, astor, yapf, asdl-adt, exo-lang
Successfully installed PySMT-0.9.5 asdl-0.1.5 asdl-adt-0.1.0 astor-0.8.1 attrs-23.1.0 exo-lang-0.0.2 numpy-1.24.3
tomli-2.0.1 yapf-0.33.0 z3-solver-4.12.2.0
(venv) C:\PythonProjects\exo-lang_001>notepad example.py
# example.py
from __future__ import annotations
from exo import *

@proc
def example_sgemm(
    M: size,
    N: size,
    K: size,
    C: f32[M, N] @ DRAM,
    A: f32[M, K] @ DRAM,
    B: f32[K, N] @ DRAM,
):
    for i in seq(0, M):
        for j in seq(0, N):
            for k in seq(0, K):
C[i, j] += A[i, k] * B[k, j](venv) C:\PythonProjects\exo-lang_001>cd out
(venv) C:\PythonProjects\exo-lang_001\out>dir
...
example.c example.hpip install jupyterlabjupyter lab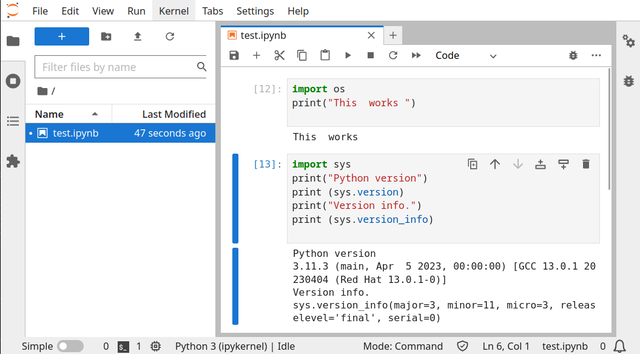
#!/usr/bin/env python
# coding=utf-8
#
# Copyright (C) 2023 Catalin George Festila, catafest@yahoo.com
#

"""
Simple test extension for inkscape
"""

import inkex
# add by me

from lxml import etree
def draw_SVG_square(w,h, x,y, parent):
    style = { 'stroke'        : 'none',
              'stroke-width'  : '1',
              'fill'          : '#0000FF'
            }

    attribs = {
        'style'     : str(inkex.Style(style)),
        'height'    : str(h),
        'width'     : str(w),
        'x'         : str(x),
        'y'         : str(y)
            }
    patrat = etree.SubElement(
        parent, inkex.addNS('rect','svg'), attribs )
    return patrat

class MyExtension(inkex.Effect):
    def __init__(self):
        super().__init__()

    def effect(self):
        self.msg("This is an empty extension created by catafest !")
        parent = self.svg.get_current_layer()
        draw_SVG_square(100,100, 0,0, parent)

if __name__ == '__main__':
    MyExtension().run()
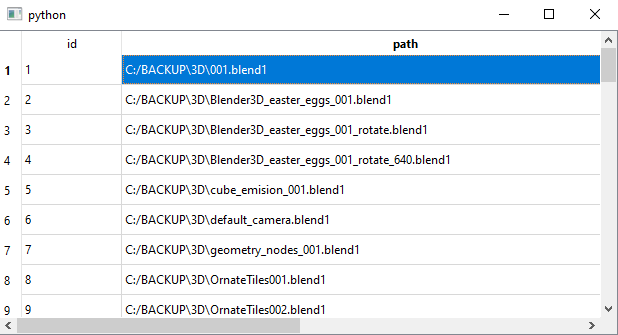
import sys
from PyQt6.QtWidgets import QApplication, QMainWindow, QTableView
from PyQt6.QtSql import QSqlDatabase, QSqlQuery, QSqlTableModel

class MainWindow(QMainWindow):
    def __init__(self):
        super().__init__()

        # Initialize the database
        self.init_db()

        # Set up the GUI
        self.table_view = QTableView(self)
        self.setCentralWidget(self.table_view)

        # Set up the model and connect it to the database
        self.model = QSqlTableModel(self)
        self.model.setTable('files')
        self.model.select()
        self.table_view.setModel(self.model)

    def init_db(self):
        # Connect to the database
        db = QSqlDatabase.addDatabase('QSQLITE')
        db.setDatabaseName('file_paths.db')
        if not db.open():
            print('Could not open database')
            sys.exit(1)

    def create_table(self):
        # Create the 'files' table if it doesn't exist
        query = QSqlQuery()
        query.exec('CREATE TABLE IF NOT EXISTS files (id INTEGER PRIMARY KEY, path TEXT)')

if __name__ == '__main__':
    app = QApplication(sys.argv)
    window = MainWindow()
    window.show()
    sys.exit(app.exec())
python.exe -m pip install --upgrade pip --user
...
Successfully installed pip-23.1pip install PyQt6 --user
Requirement already satisfied: PyQt6 in c:\python311\lib\site-packages (6.4.1)
...import sys
import os
import re
from PyQt6.QtWidgets import *
from PyQt6.QtCore import *
import sqlite3
class FindFiles(QWidget):
def __init__(self):
super().__init__()
self.setWindowTitle("Find Files")
self.setGeometry(100, 100, 500, 300)
self.folder_button = QPushButton("Choose Folder")
self.folder_button.clicked.connect(self.choose_folder)
self.pattern_edit = QLineEdit()
self.pattern_edit.setPlaceholderText("Enter regular expression pattern")
self.pattern_edit.setFixedWidth(250)
self.find_button = QPushButton("Find Files")
self.find_button.clicked.connect(self.find_files)
layout = QVBoxLayout()
layout.addWidget(self.folder_button)
layout.addWidget(self.pattern_edit)
layout.addWidget(self.find_button)
self.setLayout(layout)
self.folder_path = ""
self.conn = sqlite3.connect("file_paths.db")
self.cursor = self.conn.cursor()
self.cursor.execute("CREATE TABLE IF NOT EXISTS files (id INTEGER PRIMARY KEY, path TEXT)")
def choose_folder(self):
self.folder_path = QFileDialog.getExistingDirectory(self, "Choose Folder")
if self.folder_path:
self.folder_button.setText(self.folder_path)
def find_files(self):
if not self.folder_path:
QMessageBox.warning(self, "Warning", "Please choose a folder first!")
return
pattern = self.pattern_edit.text()
if not pattern:
QMessageBox.warning(self, "Warning", "Please enter a regular expression pattern!")
return
file_paths = []
for root, dirs, files in os.walk(self.folder_path):
for file in files:
if re.match(pattern, file):
file_path = os.path.join(root, file)
file_paths.append(file_path)
self.cursor.execute("INSERT INTO files (path) VALUES (?)", (file_path,))
self.conn.commit()
QMessageBox.information(self, "Information", f"Found {len(file_paths)} files that match the pattern!")
if __name__ == "__main__":
app = QApplication(sys.argv)
find_files = FindFiles()
find_files.show()
sys.exit(app.exec())
python main.py
pip install console-menu --user# Import the necessary packages
from consolemenu import *
from consolemenu.items import *
# Create the menu
menu = ConsoleMenu("Title", "Subtitle")
# Create some items
# MenuItem is the base class for all items, it doesn't do anything when selected
menu_item = MenuItem("Menu Item")
# A FunctionItem runs a Python function when selected
function_item = FunctionItem("Call a Python function", input, ["Enter an input"])
# A CommandItem runs a console command
command_item = CommandItem("Run a console command", "touch hello.txt")
# A SelectionMenu constructs a menu from a list of strings
selection_menu = SelectionMenu(["item1", "item2", "item3"])
# A SubmenuItem lets you add a menu (the selection_menu above, for example)
# as a submenu of another menu
submenu_item = SubmenuItem("Submenu item", selection_menu, menu)
# Once we're done creating them, we just add the items to the menu
menu.append_item(menu_item)
menu.append_item(function_item)
menu.append_item(command_item)
menu.append_item(submenu_item)
# Finally, we call show to show the menu and allow the user to interact
menu.show()import bpy
import math
# Define the parameters of the ovoid
a = 1.9
b = 1.5
c = 1.5
# Define the number of vertices in each direction
n_long = 32
n_lat = 16
# Create a new mesh
mesh = bpy.data.meshes.new(name="Ovoid")
# Create the vertices
verts = []
for j in range(n_lat):
lat = (j / (n_lat - 1)) * math.pi
for i in range(n_long):
lon = (i / (n_long - 1)) * 2 * math.pi
x = a * math.sin(lat) * math.cos(lon)
y = b * math.sin(lat) * math.sin(lon)
z = c * math.cos(lat)
verts.append((x, y, z))
# Create the faces
faces = []
for j in range(n_lat - 1):
for i in range(n_long - 1):
v1 = j * n_long + i
v2 = j * n_long + i + 1
v3 = (j + 1) * n_long + i + 1
v4 = (j + 1) * n_long + i
faces.append((v1, v2, v3, v4))
# Create the mesh and object
mesh.from_pydata(verts, [], faces)
obj = bpy.data.objects.new(name="Ovoid", object_data=mesh)
# Add the object to the scene
scene = bpy.context.scene
scene.collection.objects.link(obj)import execnet
def multiplier(channel, factor):
while not channel.isclosed():
param = channel.receive()
channel.send(param * factor)
gw = execnet.makegateway()
channel = gw.remote_exec(multiplier, factor=10)
print(channel)
for i in range(5):
channel.send(i)
result = channel.receive()
print(result)
assert result == i * 10
gw.exit()<Channel id=1 open>
0
10
20
30
40import execnet
gw = execnet.makegateway()
channel = gw.remote_exec("""
def multiply(x, y):
return x * y
result = 0
for i in range(10):
result += multiply(i, 1)
print("This is result for ",i," ",result)
channel.send(result)
""")
result = channel.receive()
print("This is channel receive result : ", result)
assert result == 45This is channel receive result : 45