analitics

Pages

Saturday, June 4, 2022

Blender 3D and python scripting - part 011.

Today I show you how to create a branch using the Blender 3D A.P.I. together with the python programming language.
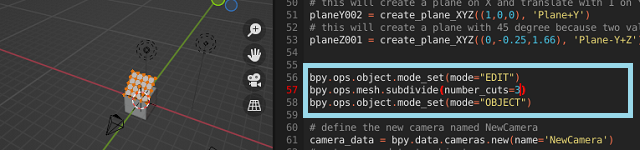
The source code seems complicated but if you follow the attached comments then you will understand how it works.
It contains two parts, one for creating the coordinates on the initial position of the branch (0,0,0) and one for creating the skin with different thicknesses.
Of note is the sorting of lists generated in the python language to get a nice increase as well as gradual thicknesses.
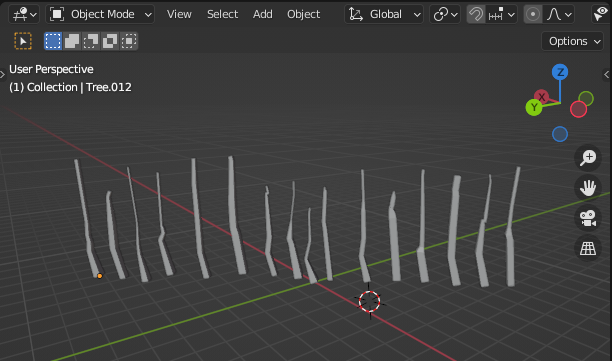
I've used the script several times to show you in the screenshot below some branches created with it.
Here is the source code used.
import bpy
import random
MinNubmer = -10
MaxNumber = 10

# Clean up the area , uncoment the next two row to keep
# branch after running the script
#bpy.ops.object.select_all(action="SELECT")
#bpy.ops.object.delete()

# Number of branches
branch = 6
# Create the verts array
verts = [(0,0,0)]
# Create the edges array
edges = [(0,0)]
# Create the faces array
faces = []

# Create the mesh for branch 
mesh = bpy.data.meshes.new("TreeMesh") 

# define random number for X and Y axis 
def RN():
    return  random.randint(MinNubmer, MaxNumber) / 20 

# define random number for positive Z axis
def RNZ():
    return  random.randint(10, 50) / 10  

# create a list of branch thicknesses
rand_list =[]
for i in range(1,branch):
    rand_list.append(RNZ()/30)
    # sort all reverse by thicknesses
    rand_list.sort(reverse=True)

# generate vertices list for drawing the branch
for i in range(1,branch):
    rand_list.append(RN())
    verts.append((rand_list[i-1] +0.1,rand_list[i-1]+0.1,RNZ()))
    edges.append((i-1,i))

# sort the list of vertices by last number witch is Z axis 
verts.sort(key=lambda x: x[2])

# create branch update and validate, see documentation
mesh.from_pydata(verts, edges, faces) 
mesh.update()
mesh.validate()

# Create object to hold the mesh branch 
obj = bpy.data.objects.new('Tree', mesh)

# ... and add it to the scene
scene = bpy.context.scene
scene.collection.objects.link(obj)

# add the skin modifier
obj.modifiers.new(name="SK", type="SKIN")
bpy.context.view_layer.objects.active = obj  
# get the skin vertices layers
skin_vertices = obj.data.skin_vertices
# get the layer
skin_layer = skin_vertices[0]

for i in range(1,branch):
    # assigns radius for each vertice to sized the branch 
    skin_layer.data[i-1].radius = (rand_list[i-1], rand_list[i-1]) #Indices 0 and 1 are the vertex indices
    skin_layer.data[i].radius = (rand_list[i-1],rand_list[i-1])

# set modes for user 
bpy.ops.object.mode_set(mode="EDIT", toggle=False)
bpy.ops.object.skin_root_mark()
bpy.ops.object.mode_set(mode="OBJECT", toggle=False)

Thursday, June 2, 2022

Blender 3D and python scripting - part 010.

In this tutorial, I will use the source code from the previous tutorial and with the selected mesh I will resize and translate it on an axis then I will select the newly selected mesh and I will rotate it to obtain a roof shape.
This is the source code I used:
bpy.ops.object.mode_set(mode = 'EDIT') 

# let set the object mode 
bpy.ops.object.mode_set(mode="OBJECT")
# resize the selected areas 
bpy.ops.transform.resize(value=(1, 2, 1))
# translate 
bpy.ops.transform.translate(value=(0, 0.25, 0.31))

# rotate selected only if not is the initial mesh 
for ob in bpy.context.selected_objects:
    if ob.name != 'Plane-Y+Z':
        ob.rotation_euler[0] = pi/-4
        ob.convert_space(from_space='LOCAL', to_space='WORLD')

# define the new camera named NewCamera
See the result of this source code:

Wednesday, June 1, 2022

Blender 3D and python scripting - part 009.

In this tutorial I will show you a source code in python that allows the selection of vertices by a coordinate, and separates this selection into a new object according to the faces.
The source code is presented below and is commented on accordingly to understand how it works.
bpy.ops.object.mode_set(mode="EDIT")
bpy.ops.mesh.subdivide(number_cuts=3)
bpy.ops.object.mode_set(mode="OBJECT")

# add this source code     
bpy.ops.object.mode_set(mode = 'EDIT') 
# need to use bmesh
import bmesh
# select the plane and get data mesh 
plane_obj = bpy.data.objects['Plane-Y+Z']
plane_mesh = plane_obj.data
bm = bmesh.from_edit_mesh(plane_mesh)

# select vertices by points 
for v in bm.verts:
    v.select_set(v.co.y < 0.5)
#get mode 
bm.select_mode = {'VERT', 'EDGE', 'FACE'}
# this will update the selection 
bm.select_flush_mode()
# select by FACE   
bpy.context.tool_settings.mesh_select_mode = (False, False, True)
# separate selection by face
bpy.ops.mesh.separate(type='SELECTED')
# select by EDGE
bpy.context.tool_settings.mesh_select_mode = (True, False, False)

# define the new camera named NewCamera

Python 3.7.13 : My colab tutorials - part 024.

In this colab notebook I test how to install pytorch and torchvision python packages on colab notebook and save the model to Google drive.
I tried to save the model.ptl file but I got a network error and uploaded the file to googe drive and then downloaded it.
You can see the full source code on this GitHub repo.

Monday, May 30, 2022

Blender 3D and python scripting - part 008.

In this tutorial I will show you how to use the subdivision operation using the python language and A.P.I from the Blender 3D software.
To use the subdivision operation you must have an active object and be in edit mode.
This is the source code used for this operation with tree cuts for subdivision operation.
bpy.ops.object.mode_set(mode="EDIT")
bpy.ops.mesh.subdivide(number_cuts=3)
bpy.ops.object.mode_set(mode="OBJECT")
You can see in the screenshot below where I added this source code in the old script used in the last tutorial and how the subdivision operation was performed.

Thursday, May 26, 2022

Blender 3D and python scripting - part 007.

In this tutorial I will show you how you create and use lights.
I used the same old source sode from the last tutorial.
Depending on the type of light created, their properties may change. Changing the on-fly light type cannot be done by a simple source code. Obviously you can recreate a new type of light with the new type you want.
This source code I added after this line of source code: scene = bpy.context.scene
# this create a light by type ['POINT', 'SUN', 'SPOT', 'HEMI', 'AREA']
light_data = bpy.data.lights.new('light', type='POINT')
# set light object 
light = bpy.data.objects.new('light', light_data)
# link light to collections
bpy.context.collection.objects.link(light)

light.location[0] = -1
light.location[1] = 3
light.location[2] = 3

light.data.color = (1.0, 0.0, 0.0)
light.data.energy=200.0
light.data.specular_factor = 0.5
# if you use another type like 'SUN' 
# then you can change properties like: angle 
#light.data.angle = pi * 10.0 / 180.0 

# get the name of the object light 
lamp = bpy.data.lights[light.name]