analitics

Pages

Sunday, November 8, 2015

WinPython - news and old stuff.

First good news: the team tells us about the WinPython will come with new release of WinPython.
This will be 3.4.3.7 version of WinPython and this will be great for most of users.
I love this portable python because first is easy to use and can easy test my python scripts.
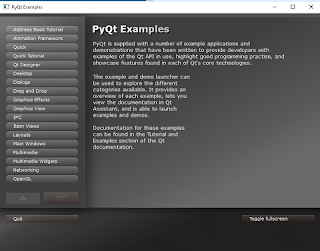
One goal of this portable python it's the demos. I found some great demos with PyQt4 and networkx.

Also you can use Spyder to make your python scripts.
It's a free open-source development environment for the Python programming language.
This visual interface similar to MATLAB where you can run commands, edit and debug programs, check the values of variables and the definitions of functions, etc.
If you just getting started with Python then just take a look at google.com/edu/python.
The WinPython Control Panel allows to register your WinPython distribution to Windows with Advanced - Register distribution ...:
...and this allow you to:
  • associate file extensions .py, .pyc and .pyo to Python interpreter
  • register Python icons in Windows explorer
  • add context menu entries Edit with IDLE and Edit with Spyder for .py files
  • register WinPython as a standard Python distribution in the registry (the same way as the standard Python Windows installers will do)
Also you can use Jupyter Notebook web application.
This allow you to:
The Jupyter Notebook is a web application that allows you to create and share documents that contain live code, equations, visualizations and explanatory text. Uses include: data cleaning and transformation, numerical simulation, statistical modeling, machine learning and much more.

Sunday, August 23, 2015

Testing the SymPy python module with Python 3.4.1 .

SymPy is a Python library for symbolic mathematics.
This module is a computer algebra system (CAS) written in the Python programming language.
A large can be found on this blog aggregator at planet.sympy.org.
First, You need to install it using pip3.4.
C:\Python34\Scripts>pip3.4.exe install sympy
Collecting sympy
  Downloading sympy-0.7.6.tar.gz (6.4MB)
    100% |################################| 6.4MB 35kB/s
Building wheels for collected packages: sympy
...
Successfully built sympy
Installing collected packages: sympy
Successfully installed sympy-0.7.6
For a short introduction into SymPy python module I will show you the printing features.
The most common printers available in SymPy are:
  • str
  • repr
  • ASCII pretty printer
  • Unicode pretty printer
  • LaTeX
  • MathML
  • Dot
Let's test it this first example:
C:\Python34>python
Python 3.4.1 (v3.4.1:c0e311e010fc, May 18 2014, 10:45:13) [MSC v.1600 64 bit (AMD64)] on win32
Type "help", "copyright", "credits" or "license" for more information.
>>> from sympy import *
>>> x,y,z = symbols('x y z')
>>> Integral(sqrt(1+1/x),x)
Integral(sqrt(1 + 1/x), x)
>>> init_session(quiet=True)
Python console for SymPy 0.7.6 (Python 3.4.1-64-bit) (ground types: python)

>>> Integral(sqrt(1+1/x),x)
  /
 |
 |     _______
 |    /     1
 |   /  1 + -  dx
 | \/       x
 |
/
>>>
How to print one matrix :
>>> x, y, z = symbols('x, y, z')
>>> init_session(quiet=True)
Python console for SymPy 0.7.6 (Python 3.4.1-64-bit) (ground types: python)

>>> mat = Matrix([x*y, 1,0,3,-2, sin(z)])
>>> mat
[ x*y  ]
[      ]
[  1   ]
[      ]
[  0   ]
[      ]
[  3   ]
[      ]
[  -2  ]
[      ]
[sin(z)]
>>>
Next example come with this issue: equations can be solved with SymPy python module.
>>> solve(x*x+x+2)
         ___            ___
   1   \/ 7 *I    1   \/ 7 *I
[- - - -------, - - + -------]
   2      2       2      2
>>> solve(Eq(x*x+x+2))
         ___            ___
   1   \/ 7 *I    1   \/ 7 *I
[- - - -------, - - + -------]
   2      2       2      2
>>> solve(Eq(x*x+2*x+4))
        ___           ___
[-1 - \/ 3 *I, -1 + \/ 3 *I]
>>> solve(x*x+2*x+4)
        ___           ___
[-1 - \/ 3 *I, -1 + \/ 3 *I]
>>>

Pillow python module with Python 3.4.1 .

This simple tutorial about PIL and Pillow python modules can show you how to install the Pillow python module.
I used pip3.4 and python 3.4.1 version.
Some problems about how to write your source code can be found : porting pil to pillow.

Saturday, August 22, 2015

Simple tutorial about haralyzer python module.

This is a simple usage of haralyzer python module.
This tutorial I make can be found : the-haralyzer-python-module.

Thursday, May 7, 2015

The numpy - install over python 3.4 version.

The last version 1.9.2 of python module can solve instalation over python from sourceforge.net -projects.
This link from Numerical Python module come with exe file over python versions: 3.4 , 3.3 and 2.7.
I test the 3.4 version - 32 bits but I got this great error:
>>> import numpy
Traceback (most recent call last):
File "", line 1, in 
File "C:\Python34\lib\site-packages\numpy\__init__.py", line 170, in 
from . import add_newdocs
File "C:\Python34\lib\site-packages\numpy\add_newdocs.py", line 13, in 
from numpy.lib import add_newdoc
File "C:\Python34\lib\site-packages\numpy\lib\__init__.py", line 8, in 
from .type_check import *
File "C:\Python34\lib\site-packages\numpy\lib\type_check.py", line 11, in 
import numpy.core.numeric as _nx
File "C:\Python34\lib\site-packages\numpy\core\__init__.py", line 6, in 
from . import multiarray
ImportError: DLL load failed: %1 is not a valid Win32 application.
How to fix this:
Also the pip3.4 don't want to install the numpy python module just if you use this link.
You can do this with :
C:\Python34\Scripts>pip3.4.exe install --upgrade wheel
Requirement already up-to-date: wheel in c:\python34\lib\site-packages
C:\Python34\Scripts>pip3.4.exe install "C:\Users\...\Downloads\numpy-1.9.2+m
kl-cp34-none-win_amd64.whl"
After that you can import the numpy module 

PySide - Introduction - part 002.

First, PySide itself is licensed under LGPLv2.1, most of the examples are licensed under GPLv2.
After importing PySide then you can see all PySide python submodule:
>>> import PySide
>>> from PySide import *
>>> dir(PySide)
['QtCore', 'QtGui', 'QtNetwork', 'QtOpenGL', 'QtScript', 'QtSql', 'QtSvg', 'QtTe
st', 'QtWebKit', '__all__', '__builtins__', '__doc__', '__file__', '__name__', '
__package__', '__path__', '__version__', '__version_info__', '_setupQtDirectorie
s', '_utils']
Also this can help you to see all about Qt components and versions using by PySide:
Let's how can do it:
# prints PySide version
>>> print PySide.__version__
1.2.2
# gets a tuple with each version component
>>> print PySide.__version_info__
(1, 2, 2, 'final', 0)
# prints the Qt version used to compile PySide
>>> print PySide.QtCore.__version__
4.8.5
# gets a tuple with each version components of Qt used to compile PySide
>>> print PySide.QtCore.__version_info__
(4, 8, 5)
Something about PySide submodules:
QtCore - core non-GUI functionality;
QtGui - extends QtCore with GUI functionality;
QtNetwork - offers classes that allow you to write TCP/IP clients and servers;
QtOpenGL - offers classes that make it easy to use OpenGL in Qt applications;
QtScript - provides classes for making Qt applications scriptable;
QtSql - helps you provide seamless database integration to your Qt applications;
QtSvg - provides classes for displaying the contents of SVG files;
QtWebkit - provides a Web browser engine;
The QtTest submodule can be used to test your PySide script code.
The structure PySide application can be see under my first tutorial.
About this PySide application most of this can be created with classes
To make one GUI ( ) just import QtGUI with your class ...
This source code can be used also you can get some errors:
>>> import sys
...
>>> from PySide import QtGui
...
>>> app = QtGui.QApplication(sys.argv)
You need sys python module also the application can have this option : sys.argv .
You can searching and used all your widgets.
For example :
>>> import sys
>>> import PySide
>>> from PySide import *
>>> myapp = QtGui.QApplication(sys.argv)
>>> mywidgets = QtGui.QWidget()
>>> mywidgets.show()
The title of your application will be python.
You can set this title bellow show method , with :
mywidgets.setWindowTitle('my app title ')
About my class Example from pyside-introduction-part-001 then I will tell you how to make one simple class example.
First I used this class named Example with this methods:
class Example(QtGui.QWidget):
...
#defaul init class method 
__init__(self)
...
#make and show the window application
initUI(self)
...
#my method to put the window to the desktop screen
center(self)
...
#method to deal with events and also close the application
closeEvent(self, event)
...
Into __init___ I used super() method.
The main reason I used this it's :
-super() method lets you avoid referring to the base class explicitly and let you to use multiple inheritance.
The main function come with some source code:
Make the application :
app = QtGui.QApplication(sys.argv)
and also put my widgets under this with this python code:
ex = Example()
About events I will make another tutorial ...