analitics

Pages

Saturday, August 31, 2024

Python 3.13.0rc1 : Using pydoc python module.

This is default python module.
You can find pydoc - documentation.
Simple use of this python module for example: sys python module to see the documentation.
PythonProjects\test_pydoc>python -m pydoc sys
Using the w argument willcreate a HTML file with the documentation.
In this example will be sys.html, because is sys python module.
PythonProjects\test_pydoc>python -m pydoc -w sys
wrote sys.html
Best feature is search by word and show the result as python modules, in this case will show a list ...
PythonProjects\test_pydoc>python -m pydoc -k url
nturl2path - Convert a NT pathname to a file URL and vice versa.
test_sqlite3: testing with SQLite version 3.45.3
test.test_urllib - Regression tests for what was in Python 2's "urllib" module
test.test_urllib2
test.test_urllib2_localnet
test.test_urllib2net
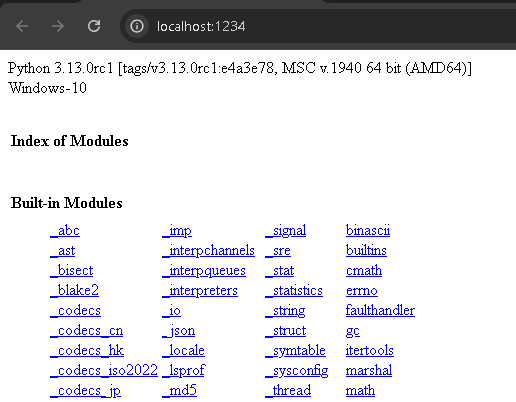
Share the documentation with an server, in this case is set to localhost:
\PythonProjects\test_pydoc>python -m pydoc -p 1234
Server ready at http://localhost:1234/
Server commands: [b]rowser, [q]uit
You can create your python module script named test.py formated and then use pydoc.
"""
my python module
====
This is documentation
"""
def test():
"""
Function test
"""
    print("test")
Use this to show the text from your python source script module:
python -m pydoc test
PythonProjects\test_pydoc>python -m pydoc test
Help on module test:

NAME
    test

FILE
...

Thursday, August 29, 2024

News : ... august 2024

... news for Python users and developers.
Python 3.12.5 released, see the official webpage.
... new Python 3.13.0 release candidate 1 released, you can read on this webpage.
the last one: Announcing Python Software Foundation Fellow Members for Q1 2024! from this webpage.
About the releases, I can say that all kinds of improvements are coming, I liked that they made the shell more interactive.

Monday, August 19, 2024

Python 3.12.1 : Web server with SQLite database using flask - update.

Update with new URL with params, see the first tutorial:
from flask import Flask, request, jsonify, render_template_string
import sqlite3
from datetime import datetime

app = Flask(__name__)

# Clasa pentru serverul SQL
class SQLiteServer:
    def __init__(self, db_name):
        self.db_name = db_name
        self.init_db()

    def init_db(self):
        conn = sqlite3.connect(self.db_name)
        c = conn.cursor()
        c.execute('''
            CREATE TABLE IF NOT EXISTS users (
                id INTEGER PRIMARY KEY,
                first_name TEXT,
                last_name TEXT,
                occupation TEXT,
                hobby TEXT,
                year_of_birth INTEGER,
                age INTEGER
            )
        ''')
        conn.commit()
        conn.close()

    def calculate_age(self, year_of_birth):
        # Adjust year_of_birth if only two digits are provided
        if len(str(year_of_birth)) == 2:
            if year_of_birth > int(str(datetime.now().year)[-2:]):
                year_of_birth += 1900
            else:
                year_of_birth += 2000
        current_year = datetime.now().year
        return current_year - year_of_birth

    def add_user(self, first_name, last_name, occupation, hobby, year_of_birth):
        age = self.calculate_age(year_of_birth)
        conn = sqlite3.connect(self.db_name)
        c = conn.cursor()
        c.execute('''
            INSERT INTO users (first_name, last_name, occupation, hobby, year_of_birth, age)
            VALUES (?, ?, ?, ?, ?, ?)
        ''', (first_name, last_name, occupation, hobby, year_of_birth, age))
        conn.commit()
        conn.close()

    def get_users(self):
        conn = sqlite3.connect(self.db_name)
        c = conn.cursor()
        c.execute("SELECT * FROM users")
        users = c.fetchall()
        conn.close()
        return users
    def get_users_jsonify():
        conn = sqlite3.connect('sqlite_database.db')
        c = conn.cursor()
        c.execute("SELECT * FROM users")
        users = c.fetchall()
        conn.close()
        return jsonify(users)

# Clasa pentru serverul web
class WebServer:
    def __init__(self, sqlite_server):
        self.sqlite_server = sqlite_server

    def run(self):
        app.run(debug=True)
    #   adauga user si buton de redirect la pagina users
    @app.route('/')
    def index():
        users = sqlite_server.get_users()
        return render_template_string('''
            <!DOCTYPE html>
            <html lang="en">
            <head>
                <meta charset="UTF-8">
                <meta name="viewport" content="width=device-width, initial-scale=1.0">
                <title>Flask website for testing cypress with sqlite</title>
            </head>
            <body>
                <h2>Add User</h2>
                <form action="/add_user" method="post">
                    First Name: <input type="text" name="first_name"><br>
                    Last Name: <input type="text" name="last_name"><br>
                    Occupation: <input type="text" name="occupation"><br>
                    Hobby: <input type="text" name="hobby"><br>
                    Year of Birth: <input type="text" name="year_of_birth"><br>
                    <input type="submit" value="Add User">
                </form>
                <a href="http://127.0.0.1:5000/users"><button type="button">Show Users</button></a>
            </body>
            </html>
        ''', users=users)
    @app.route('/add_user', methods=['POST'])
    def add_user():
        first_name = request.form['first_name']
        last_name = request.form['last_name']
        occupation = request.form['occupation']
        hobby = request.form['hobby']
        year_of_birth = int(request.form['year_of_birth'])
        sqlite_server.add_user(first_name, last_name, occupation, hobby, year_of_birth)
        return 'User added successfully! <a href="/">Go back</a>'
    @app.route('/users', methods=['GET'])
    def get_users():
        query_type = request.args.get('query_type', 'simple')
        
        conn = sqlite3.connect('sqlite_database.db')
        c = conn.cursor()
        
        try:
            c.execute('SELECT name FROM sqlite_master WHERE type="table" AND name="users"')
            if not c.fetchone():
                return jsonify({"error": "Table 'users' does not exist"})

            if query_type == 'advanced':
                # Advanced query logic
                first_name = request.args.get('first_name')
                last_name = request.args.get('last_name')
                occupation = request.args.get('occupation')
                hobby = request.args.get('hobby')
                year_of_birth = request.args.get('year_of_birth')

                query = 'SELECT * FROM users WHERE 1=1'
                params = []
                # Exemple query simple 
                # Basic query: /users
                # Simple query: /users?query_type=simple for simple selection
                # Addvanced query: /users?query_type=advanced&first_name=John&occupation=Engineer for advanced querying
                # Advanced query with name search: /users?query_type=advanced&first_name=John&last_name=Doe
                # Query by occupation: /users?query_type=advanced&occupation=Engineer
                # Query by hobby: /users?query_type=advanced&hobby=Reading
                # Query by year of birth: /users?query_type=advanced&year_of_birth=1990

                if first_name:
                    query += ' AND first_name LIKE ?'
                    params.append(f'%{first_name}%')
                if last_name:
                    query += ' AND last_name LIKE ?'
                    params.append(f'%{last_name}%')
                if occupation:
                    query += ' AND occupation LIKE ?'
                    params.append(f'%{occupation}%')
                if hobby:
                    query += ' AND hobby LIKE ?'
                    params.append(f'%{hobby}%')
                if year_of_birth:
                    query += ' AND year_of_birth = ?'
                    params.append(year_of_birth)

                # Query by minimum age: /users?query_type=advanced&min_age=30
                # Query by maximum age: /users?query_type=advanced&max_age=50
                # Query with ordering: /users?query_type=advanced&order_by=last_name
                # Query with limit: /users?query_type=advanced&limit=10
                # Combined query: /users?query_type=advanced&first_name=John&occupation=Engineer&min_age=25&order_by=year_of_birth&limit=5          
                # Additional advanced query options
                for param, value in request.args.items():
                    match param:
                        case 'min_age':
                            query += ' AND (? - year_of_birth) >= ?'
                            params.extend([datetime.now().year, int(value)])
                        case 'max_age':
                            query += ' AND (? - year_of_birth) <= ?'
                            params.extend([datetime.now().year, int(value)])
                        case 'order_by':
                            query += f' ORDER BY {value}'
                        case 'limit':
                            query += ' LIMIT ?'
                            params.append(int(value))
                c.execute(query, params)
            else:
                # Simple query logic
                c.execute('SELECT * FROM users')

            users = c.fetchall()
        except sqlite3.OperationalError as e:
            return jsonify({"error": str(e)})
        finally:
            conn.close()
        
        return jsonify(users)

# Instanțierea serverului SQL și a serverului web
sqlite_server = SQLiteServer('sqlite_database.db')
web_server = WebServer(sqlite_server)

if __name__ == '__main__':
    web_server.run()

Wednesday, August 14, 2024

Python 3.12.1 : Web server with SQLite database using flask.

This python surce script can be used to start a web server with an SQLite server.
For example, you can use this to test with javascript on sql server, see next image:
This is the source code:
from flask import Flask, request, jsonify, render_template_string
import sqlite3
from datetime import datetime

app = Flask(__name__)

# Clasa pentru serverul SQL
class SQLServer:
    def __init__(self, db_name):
        self.db_name = db_name
        self.init_db()

    def init_db(self):
        conn = sqlite3.connect(self.db_name)
        c = conn.cursor()
        c.execute('''
            CREATE TABLE IF NOT EXISTS users (
                id INTEGER PRIMARY KEY,
                first_name TEXT,
                last_name TEXT,
                occupation TEXT,
                hobby TEXT,
                year_of_birth INTEGER,
                age INTEGER
            )
        ''')
        conn.commit()
        conn.close()

    def calculate_age(self, year_of_birth):
        # Adjust year_of_birth if only two digits are provided
        if len(str(year_of_birth)) == 2:
            if year_of_birth > int(str(datetime.now().year)[-2:]):
                year_of_birth += 1900
            else:
                year_of_birth += 2000
        current_year = datetime.now().year
        return current_year - year_of_birth

    def add_user(self, first_name, last_name, occupation, hobby, year_of_birth):
        age = self.calculate_age(year_of_birth)
        conn = sqlite3.connect(self.db_name)
        c = conn.cursor()
        c.execute('''
            INSERT INTO users (first_name, last_name, occupation, hobby, year_of_birth, age)
            VALUES (?, ?, ?, ?, ?, ?)
        ''', (first_name, last_name, occupation, hobby, year_of_birth, age))
        conn.commit()
        conn.close()

    def get_users(self):
        conn = sqlite3.connect(self.db_name)
        c = conn.cursor()
        c.execute("SELECT * FROM users")
        users = c.fetchall()
        conn.close()
        return users

# Clasa pentru serverul web
class WebServer:
    def __init__(self, sql_server):
        self.sql_server = sql_server

    def run(self):
        app.run(debug=True)

    @app.route('/')
    def index():
        users = sql_server.get_users()
        return render_template_string('''
            <h1>Users</h1>
            <ul>
                {% for user in users %}
                    <li>{{ user[1] }} {{ user[2] }} - {{ user[3] }} - {{ user[4] }} - {{ user[5] }} ({{ user[6] }} years old)</li>
                {% endfor %}
            </ul>
            <h2>Add User</h2>
            <form action="/add_user" method="post">
                First Name: <input type="text" name="first_name"><br>
                Last Name: <input type="text" name="last_name"><br>
                Occupation: <input type="text" name="occupation"><br>
                Hobby: <input type="text" name="hobby"><br>
                Year of Birth: <input type="text" name="year_of_birth"><br>
                <input type="submit" value="Add User">
            </form>
        ''', users=users)

    @app.route('/add_user', methods=['POST'])
    def add_user():
        first_name = request.form['first_name']
        last_name = request.form['last_name']
        occupation = request.form['occupation']
        hobby = request.form['hobby']
        year_of_birth = int(request.form['year_of_birth'])
        sql_server.add_user(first_name, last_name, occupation, hobby, year_of_birth)
        return 'User added successfully! <a href="/">Go back</a>'

# Instanțierea serverului SQL și a serverului web
sql_server = SQLServer('example.db')
web_server = WebServer(sql_server)

if __name__ == '__main__':
    web_server.run()

Saturday, August 3, 2024

Blender 3D and python scripting - part 029.

This is a simple Blender 3D script that render images from myimage_000 to myimage_035 around object named Cube.
The script can be changed with any object and any steps for 0 to 360 degree.
import bpy
import math
# Set the object that the camera will orbit around
#target_object = bpy.data.objects["MyObject"]

# Create a new empty object
empty = bpy.data.objects.new("Empty", None)

# Set the empty object's location to the origin point
empty.location = (0, 0, 0)

# Set the starting position for the camera
camera = bpy.data.objects["Camera"]

# Set the number of degrees to rotate the camera around the object
degrees = 360

# Set the distance that the camera should be from the object
distance = 7.6

# Set the speed at which the camera should orbit
speed = 10

# Set the direction in which the camera should orbit (1 for clockwise, -1 for counter-clockwise)
direction = 1

# Set the camera to track the object
bpy.ops.object.select_all(action="DESELECT")
camera.select_set(True)

# Set the distance to origin point
camera.location = (-distance, 0, 0)
bpy.context.view_layer.objects.active = camera

# Remove all constraints from the object "Cube"
bpy.data.objects['Cube'].select_get()
bpy.context.view_layer.objects.active = bpy.data.objects['Cube']
bpy.ops.object.constraints_clear()

# Add a track to constraint to the object and set it
bpy.ops.object.constraint_add(type="TRACK_TO")
bpy.ops.object.track_set(type="TRACKTO")

# Set the target object as the tracking target
bpy.data.objects['Cube'].select_get()
bpy.context.view_layer.objects.active = bpy.data.objects['Cube']

# Select the file image format
bpy.context.scene.render.image_settings.file_format = 'PNG'

# Animate the camera orbiting around the object
for frame in range(0, 36):
    # Set the current frame
    bpy.context.scene.frame_set(frame)

    # Calculate the new position for the camera based on its distance from the object
    x = distance * math.sin(math.radians(frame*speed*direction))
    y = distance * math.cos(math.radians(frame*speed*direction))
    camera.location = (x,y,0)
    # Set the output path for the rendered image
    bpy.context.scene.render.filepath = "C:\\tmp\\myimage_" + str(frame).zfill(3) + ".png"
    # Render the frame and save it to the output file
    bpy.ops.render.render(write_still=True)

Sunday, July 14, 2024

The Zen of Python ...

... see the The Zen of Python, with this source code import this:
python
Python 3.12.4 (tags/v3.12.4:8e8a4ba, Jun  6 2024, 19:30:16) [MSC v.1940 64 bit (AMD64)] on win32
Type "help", "copyright", "credits" or "license" for more information.
>>> import this
The Zen of Python, by Tim Peters

Beautiful is better than ugly.
Explicit is better than implicit.
Simple is better than complex.
Complex is better than complicated.
Flat is better than nested.
Sparse is better than dense.
Readability counts.
Special cases aren't special enough to break the rules.
Although practicality beats purity.
Errors should never pass silently.
Unless explicitly silenced.
In the face of ambiguity, refuse the temptation to guess.
There should be one-- and preferably only one --obvious way to do it.
Although that way may not be obvious at first unless you're Dutch.
Now is better than never.
Although never is often better than *right* now.
If the implementation is hard to explain, it's a bad idea.
If the implementation is easy to explain, it may be a good idea.
Namespaces are one honking great idea -- let's do more of those!

Sunday, July 7, 2024

Python 3.12.1 : testing with ollama - part 001.

You need to download the ollama from the official website.
This allow you to use commands on the console: ollama --help into new command shell.
Use the pip tool to install ollma python package:
pip install ollama
Collecting ollama
  Downloading ollama-0.2.1-py3-none-any.whl.metadata (4.2 kB)
...
Installing collected packages: httpx, ollama
  Attempting uninstall: httpx
    Found existing installation: httpx 0.26.0
    Uninstalling httpx-0.26.0:
      Successfully uninstalled httpx-0.26.0
Successfully installed httpx-0.27.0 ollama-0.2.1
This command will install llama3
ollama run llama3
Let's see a basic python script with mistral model:
import ollama
from rich.console import Console
console = Console()
print(ollama.pull("mistral"))
#with console.pager(styles=True):
#	console.print(ollama.show("mistral"))
with console.pager(styles=True):
	console.print(ollama.list())
Another python script with llama3 model:
import ollama

stream = ollama.chat(
    model='llama3',
    messages=[{'role': 'user', 'content': 'Tell me the sizes of Earth?'}],
    stream=True,
)

for chunk in stream:
  print(chunk['message']['content'], end='', flush=True)
The result is this:
What a great question!

The size of Earth can be measured in various ways, depending on what aspect you're interested in. Here are some common sizes and dimensions of our planet ...

Python 3.12.1 : Check proxies on network.

Simple example about how to check proxies in network ...
import socket

# Get IP 
hostname = socket.gethostname()
workstation_ip = socket.gethostbyname(hostname)
#print("workstation_ip : ", workstation_ip )

# Put your IP's proxies from network
proxy_ips = ["192.168.1.1", "192.168.1.2", "192.168.1.3"]

# check IP proxy
if workstation_ip in proxy_ips:
    print("Is a proxy on network")
else:
    print("Not network proxy")
pip install sockschain
Collecting sockschain
  Downloading sockschain-1.0.0-py3-none-any.whl.metadata (10 kB)
...
Installing collected packages: sockschain
Successfully installed sockschain-1.0.0
Example with sockschain python module:
import socket
import sockschain as socks

# Enable debugging
def DEBUG(msg):
  print (msg)

socks.DEBUG = DEBUG
# This would have set proxies using the standard environment variables:
socks.usesystemdefaults()

# Configure a default chain
chain = [
  'tor://localhost:9050/', # First hop is Tor,
  'tor://localhost:8080/', # 8080 port,
  'ssl://proxy.example.com:8443/', # SSL to proxy.example.com
  'http://user:pass@proxy.example.com/' # ... try auth to an HTTP proxy
]
socks.setdefaultproxy() # Clear the default chain
for hop in chain:
   socks.adddefaultproxy(*socks.parseproxy(hop))

# Configure alternate routes (no proxy for localhost)
socks.setproxy('localhost', socks.PROXY_TYPE_NONE)
socks.setproxy('127.0.0.1', socks.PROXY_TYPE_NONE)
... the result is:
python socket_web.py Routes are: {'localhost': [(0, None, None, True, None, None, None)]} Routes are: {'localhost': [(0, None, None, True, None, None, None)], 'localhost.localdomain': [(0, None, None, True, None, None, None)]} Routes are: {'localhost': [(0, None, None, True, None, None, None)], 'localhost.localdomain': [(0, None, None, True, None, None, None)], '127.0.0.1': [(0, None, None, True, None, None, None)]} Routes are: {'localhost': [(0, None, None, True, None, None, None)], 'localhost.localdomain': [(0, None, None, True, None, None, None)], '127.0.0.1': [(0, None, None, True, None, None, None)], '': [(0, None, None, True, None, None, None)]} Routes are: {'localhost': [(0, None, None, True, None, None, None)], 'localhost.localdomain': [(0, None, None, True, None, None, None)], '127.0.0.1': [(0, None, None, True, None, None, None)], '': [(0, None, None, True, None, None, None)], '*': [(7, 'localhost', 9050, True, None, None, None)]} Routes are: {'localhost': [(0, None, None, True, None, None, None)], 'localhost.localdomain': [(0, None, None, True, None, None, None)], '127.0.0.1': [(0, None, None, True, None, None, None)], '': [(0, None, None, True, None, None, None)], '*': [(7, 'localhost', 9050, True, None, None, None), (7, 'localhost', 8080, True, None, None, None)]} Routes are: {'localhost': [(0, None, None, True, None, None, None)], 'localhost.localdomain': [(0, None, None, True, None, None, None)], '127.0.0.1': [(0, None, None, True, None, None, None)], '': [(0, None, None, True, None, None, None)], '*': [(7, 'localhost', 9050, True, None, None, None), (7, 'localhost', 8080, True, None, None, None), (4, 'proxy.example.com', 8443, True, None, None, ['proxy.example.com'])]} Routes are: {'localhost': [(0, None, None, True, None, None, None)], 'localhost.localdomain': [(0, None, None, True, None, None, None)], '127.0.0.1': [(0, None, None, True, None, None, None)], '': [(0, None, None, True, None, None, None)], '*': [(7, 'localhost', 9050, True, None, None, None), (7, 'localhost', 8080, True, None, None, None), (4, 'proxy.example.com', 8443, True, None, None, ['proxy.example.com']), (3, 'proxy.example.com', 8080, False, 'user', 'pass', None)]} Routes are: {'localhost': [(0, None, None, True, None, None, None)], 'localhost.localdomain': [(0, None, None, True, None, None, None)], '127.0.0.1': [(0, None, None, True, None, None, None)], '': [(0, None, None, True, None, None, None)], '*': [(7, 'localhost', 9050, True, None, None, None), (7, 'localhost', 8080, True, None, None, None), (4, 'proxy.example.com', 8443, True, None, None, ['proxy.example.com']), (3, 'proxy.example.com', 8080, False, 'user', 'pass', None)]} Routes are: {'localhost': [(0, None, None, True, None, None, None)], 'localhost.localdomain': [(0, None, None, True, None, None, None)], '127.0.0.1': [(0, None, None, True, None, None, None)], '': [(0, None, None, True, None, None, None)], '*': [(7, 'localhost', 9050, True, None, None, None), (7, 'localhost', 8080, True, None, None, None), (4, 'proxy.example.com', 8443, True, None, None, ['proxy.example.com']), (3, 'proxy.example.com', 8080, False, 'user', 'pass', None)]}
Tuesday, July 2, 2024

Python 3.12.1 : Ursina python game engine - part 002 .

This is the second tutorial with ursina, because now I use Python version 3.12.1 and Ursina comes with version 7.0.0 .
The install is easy with the pip tool.
pip install ursina
Collecting ursina
...
Installing collected packages: panda3d, screeninfo, panda3d-simplepbr, panda3d-gltf, ursina
Successfully installed panda3d-1.10.14 panda3d-gltf-1.2.0 panda3d-simplepbr-0.12.0 screeninfo-0.8.1 ursina-7.0.0
About Ursina you can read more on the official website.
Platforms:
  • Windows
  • Linux
  • Mac (not officially supported, but will most likely work)
I tested with samples from the GitHub project and works well.
from ursina import *

app = Ursina(size=(1280,720))

physics_entities = []
class PhysicsEntity(Entity):
    def __init__(self, model='cube', collider='box', **kwargs):
        super().__init__(model=model, collider=collider, **kwargs)
        physics_entities.append(self)

    def update(self):
        if self.intersects():
            self.stop()
            return

        self.velocity = lerp(self.velocity, Vec3(0), time.dt)
        self.velocity += Vec3(0,-1,0) * time.dt * 5
        self.position += (self.velocity + Vec3(0,-4,0)) * time.dt


    def stop(self):
        self.velocity = Vec3(0,0,0)
        if self in physics_entities:
            physics_entities.remove(self)

    def on_destroy(self):
        self.stop()


    def throw(self, direction, force):
        pass

from ursina.shaders import lit_with_shadows_shader
Entity.default_shader = lit_with_shadows_shader
DirectionalLight().look_at(Vec3(1,-1,-1))

ground = Entity(model='plane', scale=32, texture='white_cube', texture_scale=Vec2(32), collider='box')

from ursina.prefabs.first_person_controller import FirstPersonController
player = FirstPersonController()

def input(key):
    if key == 'left mouse down':
        e = PhysicsEntity(model='cube', color=color.azure, velocity=Vec3(0), position=player.position+Vec3(0,1.5,0)+player.forward, collider='sphere')
        e.velocity = (camera.forward + Vec3(0,.5,0)) * 10
        # physics_entities.append(e)

Sky()
app.run()

Tuesday, June 25, 2024

Blender 3D and python scripting - part 028.

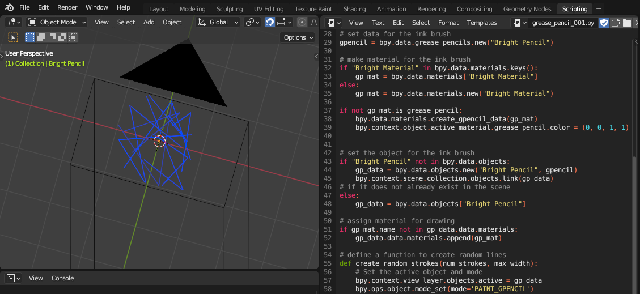
A simple script for Blender 4.0.0 version with Bright Pencil material, see the output image:
This is the source code:
import bpy
import random

# fix an active object before changing mode
if bpy.context.view_layer.objects.active is None:
    # If there is no active object, set the first object in the scene as active
    if len(bpy.context.scene.objects) > 0:
        bpy.context.view_layer.objects.active = bpy.context.scene.objects[0]
    else:
        print("There are no objects in the scene to set as active.")

# set the mode
bpy.ops.object.mode_set(mode='OBJECT')

# set camera from the scene
cam_ob = bpy.context.scene.camera

# if is a camera in the scene and set it as active object
if cam_ob is None:
    print("There is no camera in the scene.")
elif cam_ob.type == 'CAMERA':
    # Set the camera as active object
    bpy.context.view_layer.objects.active = cam_ob
    print("The camera has been set as active object.")
else:
    print(f"The object {cam_ob.type} is set as a camera, but it is not of type 'CAMERA'.")

# set data for the ink brush
gpencil = bpy.data.grease_pencils.new("Bright Pencil")

# make material for the ink brush
if "Bright Material" in bpy.data.materials.keys():
    gp_mat = bpy.data.materials["Bright Material"]
else:
    gp_mat = bpy.data.materials.new("Bright Material")

if not gp_mat.is_grease_pencil:
    bpy.data.materials.create_gpencil_data(gp_mat)
    bpy.context.object.active_material.grease_pencil.color = (0, 0, 1, 1)


# set the object for the ink brush 
if "Bright Pencil" not in bpy.data.objects:
    gp_data = bpy.data.objects.new("Bright Pencil", gpencil)
    bpy.context.scene.collection.objects.link(gp_data)
# if it does not already exist in the scene
else:
    gp_data = bpy.data.objects["Bright Pencil"]

# assign material for drawing 
if gp_mat.name not in gp_data.data.materials:
    gp_data.data.materials.append(gp_mat)

# define a function to create random lines
def create_random_strokes(num_strokes, max_width):
    # Set the active object and mode
    bpy.context.view_layer.objects.active = gp_data
    bpy.ops.object.mode_set(mode='PAINT_GPENCIL')

    # get or create layer and set it as active
    if gpencil.layers and gpencil.layers.active:
        layer = gpencil.layers.active
    else:
        layer = gpencil.layers.new('my_test_layer', set_active=True)
    # set layer as active
    gpencil.layers.active = layer

    # get or create frame and set it as active using change_frame() method
    if layer.frames and layer.active_frame:
        frame = layer.active_frame
    else:
        frame = layer.frames.new(1)

    for _ in range(num_strokes):
        stroke = frame.strokes.new()
        stroke.line_width = int(random.uniform(1.0, max_width))
        stroke.points.add(count=3)
        for point in stroke.points:
            point.co = (random.uniform(-1.0, 1.0), random.uniform(-1.0, 1.0), 0.0)

# this function with desired parameters
create_random_strokes(num_strokes=10, max_width=16.0)

# return to original mode
bpy.ops.object.mode_set(mode='OBJECT')

Wednesday, June 5, 2024

News : JAX in 100 Seconds by Fireship!

JAX is a Python library similar to NumPy for scientific computing and linear algebra, but designed to run on accelerators like Cuda-based GPUs and Google's TPUs.

Blender 3D and python scripting - part 027.

Is more easy to create your player character based on the armature.
The next step is to add more animation and export to your game engine ...
Based on this issue - blender.stackexchange website, I tested to today and works very well:
Let's see the source code:
import bpy
import mathutils 
from mathutils import Vector 
from math import *

class ArmatureMenu(bpy.types.Menu):
    bl_label = "Mesh 2 Armature Menu"
    bl_idname = "OBJECT_MT_Mesh_From_Armature"

    def draw(self, context):
        layout = self.layout
        layout.operator("wm.mesh_from_armature", text="Pyramid").mesh_type = 'Pyramid' # from here
        layout.operator("wm.mesh_from_armature", text="Tapered").mesh_type = 'Tapered' # from here
        layout.operator("wm.mesh_from_armature", text="Box").mesh_type = 'Box' # from here

def CreateMesh(self, meshType):

    obj = bpy.context.active_object

    if obj == None:
        self.report({"ERROR"}, "No selection" )
    elif obj.type != 'ARMATURE':
        self.report({"ERROR"}, "Armature expected" )
    else:
        processArmature( bpy.context, obj, meshType = meshType )

#Create the base object from the armature
def meshFromArmature( arm ):
    name = arm.name + "_mesh"
    meshData = bpy.data.meshes.new( name + "Data" )
    meshObj = bpy.data.objects.new( name, meshData )
    meshObj.matrix_world = arm.matrix_world.copy()
    return meshObj

#Create the bone geometry (vertices and faces)
def boneGeometry( l1, l2, x, z, baseSize, l1Size, l2Size, base, meshType ):
    
    if meshType == 'Tapered':
        print(meshType)
        x1 = x * baseSize * l1Size 
        z1 = z * baseSize * l1Size

        x2 = x * baseSize * l2Size 
        z2 = z * baseSize * l2Size
    elif meshType == 'Box':
        print(meshType)
        lSize = (l1Size + l2Size) / 2
        x1 = x * baseSize * lSize 
        z1 = z * baseSize * lSize

        x2 = x * baseSize * lSize 
        z2 = z * baseSize * lSize

    else: # default to Pyramid
        print(meshType)
        x1 = x * baseSize * l1Size 
        z1 = z * baseSize * l1Size

        x2 = Vector( (0, 0, 0) )
        z2 = Vector( (0, 0, 0) )

    verts = [
        l1 - x1 + z1,
        l1 + x1 + z1,
        l1 - x1 - z1,
        l1 + x1 - z1,
        l2 - x2 + z2,
        l2 + x2 + z2,
        l2 - x2 - z2,
        l2 + x2 - z2
        ] 

    faces = [
        (base+3, base+1, base+0, base+2),
        (base+6, base+4, base+5, base+7),
        (base+4, base+0, base+1, base+5),
        (base+7, base+3, base+2, base+6),
        (base+5, base+1, base+3, base+7),
        (base+6, base+2, base+0, base+4)
        ]

    return verts, faces

#Process the armature, goes through its bones and creates the mesh
def processArmature(context, arm, genVertexGroups = True, meshType = 'Pyramid'):
    print("processing armature {0} {1}".format(arm.name, meshType) )

    #Creates the mesh object
    meshObj = meshFromArmature( arm )
    context.collection.objects.link( meshObj )

    verts = []
    edges = []
    faces = []
    vertexGroups = {}

    bpy.ops.object.mode_set(mode='EDIT')

    try:
        #Goes through each bone
        for editBone in [b for b in arm.data.edit_bones if b.use_deform]:
            boneName = editBone.name
            # print( boneName )
            poseBone = arm.pose.bones[boneName]

            #Gets edit bone informations
            editBoneHead = editBone.head
            editBoneTail = editBone.tail
            editBoneVector = editBoneTail - editBoneHead
            editBoneSize = editBoneVector.dot( editBoneVector )
            editBoneRoll = editBone.roll
            editBoneX = editBone.x_axis
            editBoneZ = editBone.z_axis
            editBoneHeadRadius = editBone.head_radius
            editBoneTailRadius = editBone.tail_radius

            #Creates the mesh data for the bone
            baseIndex = len(verts)
            baseSize = sqrt( editBoneSize )
            newVerts, newFaces = boneGeometry( editBoneHead, editBoneTail, editBoneX, editBoneZ, baseSize, editBoneHeadRadius, editBoneTailRadius, baseIndex, meshType )

            verts.extend( newVerts )
            faces.extend( newFaces )

            #Creates the weights for the vertex groups
            vertexGroups[boneName] = [(x, 1.0) for x in range(baseIndex, len(verts))]

        #Assigns the geometry to the mesh
        meshObj.data.from_pydata(verts, edges, faces)

    except:
        bpy.ops.object.mode_set(mode='OBJECT')
    else:
        bpy.ops.object.mode_set(mode='OBJECT')

    #Assigns the vertex groups
    if genVertexGroups:
        for name, vertexGroup in vertexGroups.items():
            groupObject = meshObj.vertex_groups.new(name=name)
            for (index, weight) in vertexGroup:
                groupObject.add([index], weight, 'REPLACE')

    #Creates the armature modifier
    modifier = meshObj.modifiers.new('ArmatureMod', 'ARMATURE')
    modifier.object = arm
    modifier.use_bone_envelopes = False
    modifier.use_vertex_groups = True

    meshObj.data.update()

    return meshObj

class MeshFromArmatureOperator(bpy.types.Operator):
    bl_idname = "wm.mesh_from_armature"
    bl_label  = "MeshFromArmatureOperator"

    mesh_type : bpy.props.StringProperty(name="mesh_type")

    def execute(self, context):
        print('The mesh type is', self.mesh_type)
        CreateMesh(self, self.mesh_type)
        return {'FINISHED'}

def register():
    bpy.utils.register_class( ArmatureMenu )
    bpy.utils.register_class( MeshFromArmatureOperator )


def unregister():
    bpy.utils.unregister_class( ArmatureMenu )
    bpy.utils.unregister_class( MeshFromArmatureOperator )


if __name__ == "__main__":
    register()

    # The menu can also be called from scripts
    bpy.ops.wm.call_menu(name='OBJECT_MT_Mesh_From_Armature')
The result of this running script using a mixamo animation is this:

Monday, May 27, 2024

Python 3.10.7 : Krita and python - part 001.

Here is a Python script for Krita that will help you read the Python functions of a document.
Open a new document, create a python script, and add the source code. Use the main menu Tools - Scripts - Ten Scripts to choose the place where the script exists and the combination of keys for execution.
This is the source code:
from PyQt5.QtWidgets import QWidget, QVBoxLayout, QTreeWidget, QTreeWidgetItem, QTextEdit
from krita import *

class LayerContentDialog(QWidget):
    def __init__(self, content):
        super().__init__()
        self.setWindowTitle("Conținutul preluat cu dir():")
        self.setGeometry(100, 100, 800, 600)

        main_layout = QVBoxLayout()

        tree_widget = QTreeWidget()
        tree_widget.setHeaderLabels(["Nume", "Tip"])
        self.add_items_recursive(tree_widget, content)
        main_layout.addWidget(tree_widget)

        close_button = QPushButton("Închide")
        close_button.clicked.connect(self.close)
        main_layout.addWidget(close_button)

        self.setLayout(main_layout)

    def add_items_recursive(self, tree_widget, items, parent_item=None):
        for item in items:
            if isinstance(item, str):
                if parent_item:
                    item_widget = QTreeWidgetItem(parent_item, [item, type(getattr(doc, item)).__name__])
                    help_text = "\n".join(dir(getattr(doc, item)))
                    item_widget.addChild(QTreeWidgetItem([help_text]))
                else:
                    item_widget = QTreeWidgetItem(tree_widget, [item, type(getattr(doc, item)).__name__])
                    help_text = "\n".join(dir(getattr(doc, item)))
                    item_widget.addChild(QTreeWidgetItem([help_text]))
            elif isinstance(item, type):
                parent = QTreeWidgetItem(tree_widget, [item.__name__, "Modul"])
                self.add_items_recursive(tree_widget, dir(item), parent)

doc = Krita.instance().activeDocument()
layerContents = dir(doc)

dialog = LayerContentDialog(layerContents)
dialog.show()
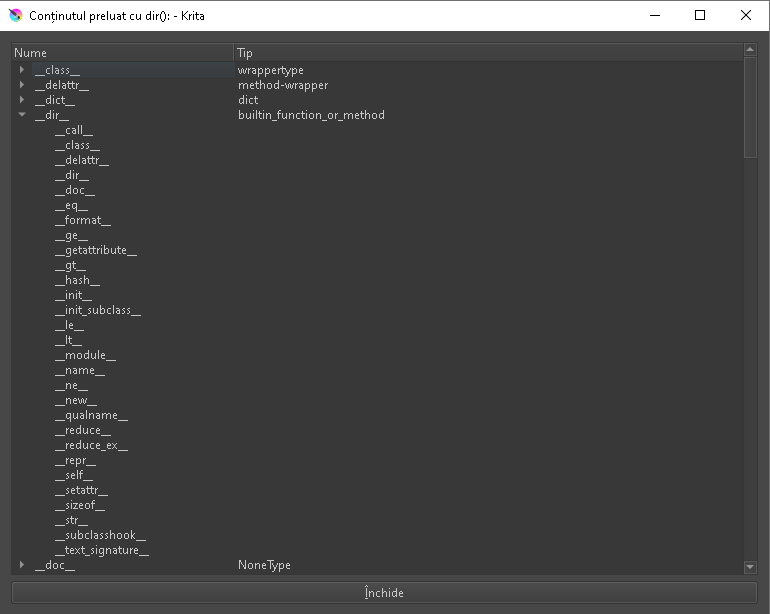
The result for this script is this:
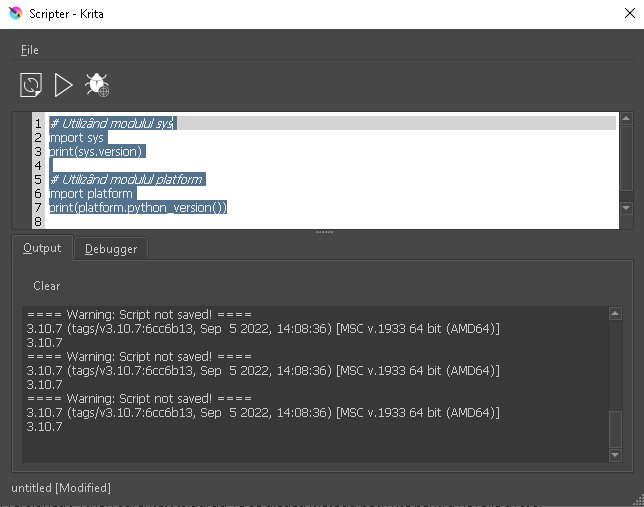
You can use the main menu Tools - Scripts - Scripter to write, test, save, and run the source code.

Sunday, April 28, 2024

News : New Django Builder online tool.

Django builder is free to use, and a personal project worked on in my spare time.
Any donations are very much appreciated.
If you want to, feel free to donate using the BitCoin address or PayPal link below.
Here is a new online tool that allows you to create projects with the Django framework and manage them more easily. It comes with different versions of Django, you can include channels and HTMX.
I don't see a command line to manage the project...

Saturday, April 20, 2024

Python 3.12.1 : Using the subprocess python module - part 001.

The subprocess module allows you to spawn new processes, connect to their input/output/error pipes, and obtain their return codes. This module intends to replace several older modules and functions:
See the official webpage for Python verison 3.12.3 same like version 3.12.1 I used.
Let's see two examples with this python module:
First script will get output of net users command and will parse all into a list:
import subprocess

def find_users():
    try:
        result = subprocess.run(["net", "users"], capture_output=True, text=True)
        users = result.stdout.splitlines()      
        # define list content         
        user_list = []
        for line in users[4:-2]:  # inser only some rows 
            #print(line) #only users        
            user = line.split()
            user_list += user
        # print the right result
        print(user_list)
    except Exception as e:
        print(f"Error : {str(e)}")

# run find_users
find_users()
The result is this:
python test_001.py
['Administrator', 'catafest', 'DefaultAccount', 'Guest', 'WDAGUtilityAccount']
This source code will show data from tasklist and will print result of this ... :
import subprocess

def find_processes():
    try:
        result = subprocess.run(['tasklist', '/v'], capture_output=True, text=True)
        output_lines = result.stdout.splitlines()

        for line in output_lines[3:]:
            columns = line.split()
            #print(columns)
            #if len(columns) >= 8 and columns[9] == 'N/A':
            if len(columns) >= 8 and columns[0] == 'tasklist.exe':
                print(line)
    except Exception as e:
        print(f"A apărut o eroare la găsirea proceselor suspendate: {str(e)}")

find_processes()
The result will be like this:
python test_pid_003.py
tasklist.exe 8348 Console 1 10,304 K Unknown DESKTOP-mycomputer 0:00:00 N/A

Friday, April 19, 2024

Python 3.10.12 : Colab quantum circuits with qiskit - part 046.

I've added another introductory example to my GitHub repository with Google Colab notebooks on how to use quantum circuits with the Python package called qiskit and the IBM Quantum Platform.
I used the IBM Quantum Platform and it provides an A.P.I symbol so that it can be used with the source code.
You can find this notebook at this catafest_061.ipynb repo file.

Thursday, April 18, 2024

Python 3.12.3 : python and Federated Message Bus in Fedora Linux Distro.

A few days ago I tested this functionality named Federated Message Bus of the Linux distribution called Fedora.
Federated Message Bus is a library built on ZeroMQ using the PyZMQ Python bindings. fedmsg aims to make it easy to connect services together using ZeroMQ publishers and subscribers.
You can use this python package named fedmsg to use this functionality ...
This is the source code :
import fedmsg
from fedmsg import *

import os
# Set the routing_nitpicky flag to True
os.environ['FEDMSG_ROUTING_NITPICKY'] = 'True'


config = fedmsg.config.load_config([],None)
config['mute'] = True
config['timeout'] = 0

for name, endpoint, topic, msg in fedmsg.tail_messages(**config):
    print ("name ", name)
This is the result :
[mythcat@fedora FedoraMessaging]$ python fedmsg_001.py
No routing policy defined for "org.fedoraproject.prod.copr.build.start" but routing_nitpicky is False so the message is being treated as authorized.
name  fedora-infrastructure
No routing policy defined for "org.fedoraproject.prod.copr.chroot.start" but routing_nitpicky is False so the message is being treated as authorized.
name  fedora-infrastructure
No routing policy defined for "org.fedoraproject.prod.github.check_run" but routing_nitpicky is False so the message is being treated as authorized.
name  fedora-infrastructure
No routing policy defined for "org.fedoraproject.prod.github.pull_request_review" but routing_nitpicky is False so the message is being treated as authorized.
name  fedora-infrastructure
No routing policy defined for "org.fedoraproject.prod.github.pull_request_review_comment" but routing_nitpicky is False so the message is being treated as authorized.
name  fedora-infrastructure ... 

Tuesday, April 16, 2024

Python 3.12.1 : aiohttp python package - part 001.

This python package named aiohttp provides asynchronous HTTP client and server functionality.
You can find more about this pytho package on the GitHub repo and the official page.
The last time I wrote about this python package was on Thursday, July 9, 2020 in this source code tutorial titled Python 3.8.3 : About aiohttp python package.
A few days ago I tested two python scripts that use this python packet.
One script makes a benchmark and the other uses cookie technology as a test.
Here is the script that makes the benchmark...
import timeit
from http import cookies

from yarl import URL

from aiohttp import CookieJar

def filter_large_cookie_jar():
    """Filter out large cookies from the cookie jar."""
    jar = CookieJar()
    c = cookies.SimpleCookie()
    domain_url = URL("http://maxagetest.com/")
    other_url = URL("http://otherurl.com/")

    for i in range(5000):
        cookie_name = f"max-age-cookie{i}"
        c[cookie_name] = "any"
        c[cookie_name]["max-age"] = 60
        c[cookie_name]["domain"] = "maxagetest.com"
    jar.update_cookies(c, domain_url)
    assert len(jar) == 5000
    assert len(jar.filter_cookies(domain_url)) == 5000
    assert len(jar.filter_cookies(other_url)) == 0

    filter_domain = timeit.timeit(lambda: jar.filter_cookies(domain_url), number=1000)
    filter_other_domain = timeit.timeit(
        lambda: jar.filter_cookies(other_url), number=1000
    )
    print(f"filter_domain: {filter_domain}")
    print(f"filter_other_domain: {filter_other_domain}")

filter_large_cookie_jar()
Here is the result obtained...
python test_bench_001.py
filter_domain: 59.85247729999901
filter_other_domain: 0.042927300000883406
Is more easier to understand code on how to use a cookie with this Python package using the httpbin website.
httpbin.org is a simple HTTP request and response service. It provides an easy way to test and inspect various aspects of HTTP communication.
Let's see the source code:
import asyncio
import aiohttp

async def main():
    urls = [
        'http://httpbin.org/cookies/set?test=ok',
    ]

    async with aiohttp.ClientSession(cookie_jar=aiohttp.CookieJar()) as s:
        for url in urls:
            async with s.get(url) as r:
                print('JSON:', await r.json())

        cookies = s.cookie_jar.filter_cookies('http://httpbin.org')
        for key, cookie in cookies.items():
            print(f'Key: "{cookie.key}", Value: "{cookie.value}"')

if __name__ == '__main__':
    loop = asyncio.new_event_loop()
    asyncio.set_event_loop(loop)
    try:
        asyncio.run(main())
    except KeyboardInterrupt:
        pass
The result of this running is this ...
python test_cookie_001.py
JSON: {'cookies': {'test': 'ok'}}
Key: "test", Value: "ok"

Friday, April 12, 2024

Python 3.12.1 : NiceGUI - UI framework over internet.

NiceGUI is an easy-to-use, Python-based UI framework, which shows up in your web browser. You can create buttons, dialogs, Markdown, 3D scenes, plots and much more.
The project can be found on this GitHub repo.
pip install nicegui
Collecting nicegui
  Downloading nicegui-1.4.21-py3-none-any.whl.metadata (9.4 kB)
...
Successfully installed aiofiles-23.2.1 aiohttp-3.9.4 aiosignal-1.3.1 bidict-0.23.1 docutils-0.19 fastapi-0.109.2 
frozenlist-1.4.1 httptools-0.6.1 ifaddr-0.2.0 markdown2-2.4.13 multidict-6.0.5 nicegui-1.4.21 orjson-3.10.0 
pscript-0.7.7 python-engineio-4.9.0 python-multipart-0.0.9 python-socketio-5.11.2 simple-websocket-1.0.0 
starlette-0.36.3 uvicorn-0.29.0 vbuild-0.8.2 watchfiles-0.21.0 websockets-12.0 yarl-1.9.4
The default demo example from the official webpage works fine.
This is the source code I used.
from nicegui import ui
from nicegui.events import ValueChangeEventArguments

def show(event: ValueChangeEventArguments):
    name = type(event.sender).__name__
    ui.notify(f'{name}: {event.value}')

ui.button('Button', on_click=lambda: ui.notify('Click'))
with ui.row():
    ui.checkbox('Checkbox', on_change=show)
    ui.switch('Switch', on_change=show)
ui.radio(['A', 'B', 'C'], value='A', on_change=show).props('inline')
with ui.row():
    ui.input('Text input', on_change=show)
    ui.select(['One', 'Two'], value='One', on_change=show)
ui.link('And many more...', '/documentation').classes('mt-8')

ui.run()
I run with the python and you can see is visible in many places:
python test_001.py
NiceGUI ready to go on http://localhost:8080, http://x.x.x.x:8080, and http://x.x.x.x:8080
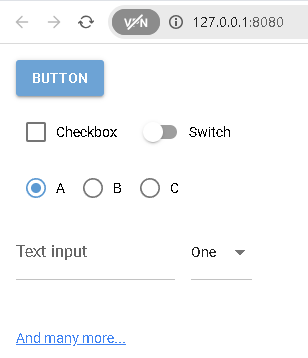
The result is this:
You can find a lot of examples on the official GitHub repo.

Thursday, April 4, 2024

News : SciPy 1.13.0 new release.

SciPy 1.13.0 is the culmination of 3 months of hard work. This out-of-band release aims to support NumPy 2.0.0, and is backwards compatible to NumPy 1.22.4. The version of OpenBLAS used to build the PyPI wheels has been increased to 0.3.26.dev.
This release requires Python 3.9+ and NumPy 1.22.4 or greater.
For running on PyPy, PyPy3 6.0+ is required.
This release can be found on the official GitHub repo.
python -m pip install --upgrade pip
Requirement already satisfied: pip in c:\python312\lib\site-packages (24.0)
...
python -m pip install --upgrade matplotlib
Collecting matplotlib
  Downloading matplotlib-3.8.4-cp312-cp312-win_amd64.whl.metadata (5.9 kB)
...
Successfully installed contourpy-1.2.1 cycler-0.12.1 fonttools-4.50.0 kiwisolver-1.4.5 matplotlib-3.8.4
...
python -m pip install --upgrade scipy
Collecting scipy
  Downloading scipy-1.13.0-cp312-cp312-win_amd64.whl.metadata (60 kB)
...
Successfully installed scipy-1.13.0
I tested the interpolate.Akima1DInterpolator changes with the default python script and works well:
import numpy as np
from scipy.interpolate import Akima1DInterpolator

import matplotlib.pyplot as plt
fig, ax = plt.subplots()

x = np.linspace(1, 7, 7)
y = np.array([-1, -1, -1, 0, 1, 1, 1])
xs = np.linspace(min(x), max(x), num=100)
y_akima = Akima1DInterpolator(x, y, method="akima")(xs)
y_makima = Akima1DInterpolator(x, y, method="makima")(xs)


ax.plot(x, y, "o", label="data")
ax.plot(xs, y_akima, label="akima")
ax.plot(xs, y_makima, label="makima")

ax.set_title('Fruit supply by kind and color')
ax.legend(title='Fruit color')

plt.show()
about Akima piecewise cubic Hermite interpolation.
Akima interpolator Fit piecewise cubic polynomials, given vectors x and y. The interpolation method by Akima uses a continuously differentiable sub-spline built from piecewise cubic polynomials. The resultant curve passes through the given data points and will appear smooth and natural.
The result of this source code is this:

Python 3.12.2 : Python and the Fedora Messaging Infrastructure - part 001.

I tried using the Fedora Messaging online tool with the python package of the same name on Python version 3.12.2.
You can find the documentation on the official page./div>
I created a working folder called FedoraMessaging:
[mythcat@fedora PythonProjects]$ mkdir FedoraMessaging
[mythcat@fedora PythonProjects]$ cd FedoraMessaging
You need to install the fedora-messaging and rabbitmq-server packages.
[root@fedora FedoraMessaging]# dnf5 install fedora-messaging
Updating and loading repositories:
Repositories loaded.
Package                             Arch    Version                       Repository         Size
Installing:                                                                                      
 fedora-messaging                   noarch  3.5.0-1.fc41                  rawhide        38.6 KiB
...
[root@fedora FedoraMessaging]# dnf install rabbitmq-server
At some point it will ask for a reboot.
You need to install the python package named fedora-messaging.
[root@fedora FedoraMessaging]# pip install --user fedora-messaging
Collecting fedora-messaging
...
Installing collected packages: pytz, incremental, wrapt, tomli, rpds-py, pyasn1, pika, hyperlink, constantly, attrs, 
referencing, pyasn1-modules, automat, twisted, jsonschema-specifications, service-identity, jsonschema, crochet, 
fedora-messaging
Successfully installed attrs-23.2.0 automat-22.10.0 constantly-23.10.4 crochet-2.1.1 fedora-messaging-3.5.0 
hyperlink-21.0.0 incremental-22.10.0 jsonschema-4.21.1 jsonschema-specifications-2023.12.1 pika-1.3.2 pyasn1-0.6.0 
pyasn1-modules-0.4.0 pytz-2024.1 referencing-0.34.0 rpds-py-0.18.0 service-identity-24.1.0 tomli-2.0.1 twisted-24.3.0 
wrapt-1.16.0
You need to start the broker:
[mythcat@fedora FedoraMessaging]$ sudo systemctl start rabbitmq-server
I used the source code from the documentation to test its functionality with a python script named hello_test.py.
from fedora_messaging import api, config

config.conf.setup_logging()
api.consume(lambda message: print(message))

from fedora_messaging import api, config

config.conf.setup_logging()
api.publish(api.Message(topic="hello by mythcat", body={"Hello": "world!"}))
I ran it and got this response:
[mythcat@fedora FedoraMessaging]$ python hello_test.py
[fedora_messaging.message INFO] Registering the 'base.message' key as the '<class 'fedora_messaging.message.Message'>' 
class in the Message class registry
[fedora_messaging.twisted.protocol INFO] Waiting for 0 consumer(s) to finish processing before halting
[fedora_messaging.twisted.protocol INFO] Finished canceling 0 consumers
[fedora_messaging.twisted.protocol INFO] Disconnect requested, but AMQP connection already gone
I created another python script named my_consumer.py, to check if this works:
from fedora_messaging import api, config
# Setup logging
config.conf.setup_logging()
# Define the callback function to process messages
def process_message(message):
    # Check if the message topic matches "hello by mythcat"
    if message.topic == "hello by mythcat":
        print(f"Received message: {message.body}")
    else:
        print(f"Ignoring message with topic: {message.topic}")
# Consume messages
api.consume(process_message)
I ran it and got this response:
[mythcat@fedora FedoraMessaging]$ python my_consumer.py
[fedora_messaging.twisted.protocol INFO] Successfully registered AMQP consumer Consumer(queue=amq.gen-9lKk7sGeYY5I40bdc5VrzQ,
callback=<function process_message at 0x7fdb0f5da160>)
[fedora_messaging.message INFO] Registering the 'base.message' key as the '<class 'fedora_messaging.message.Message'>'
class in the Message class registry
[fedora_messaging.twisted.consumer INFO] Consuming message from topic hello by mythcat 
(message id 800a1540-1e91-4b4a-a125-15e33eebb699)
Received message: {'Hello': 'world!'}
[fedora_messaging.twisted.consumer INFO] Successfully consumed message from topic hello by mythcat 
(message id 800a1540-1e91-4b4a-a125-15e33eebb699)
It can be seen that the answer is received and displayed correctly.

Sunday, March 31, 2024

Python 3.12.1 : About multiprocessing performance.

Today I test a simple python script for Pool and ThreadPool python classes from multiprocessing python module.
The main goal was to test Python’s multiprocessing performance with my computer.
NumPy releases the GIL for many of its operations, which means you can use multiple CPU cores even with threads.
Processing large amounts of data with Pandas can be difficult, and with Polars dataframe library is a potential solution.
Sciagraph gives you both performance profiling and peak memory profiling information.
Let's teste only these class:
The multiprocessing.pool.Pool class provides a process pool in Python.
The multiprocessing.pool.ThreadPool class in Python provides a pool of reusable threads for executing spontaneous tasks.
This is the python script:
from time import time
import multiprocessing as mp
from multiprocessing.pool import ThreadPool
import numpy as np
import pickle

def main():
    arr = np.ones((1024, 1024, 1024), dtype=np.uint8)
    expected_sum = np.sum(arr)

    with ThreadPool(1) as threadpool:
        start = time()
        assert (
            threadpool.apply(np.sum, (arr,)) == expected_sum
        )
        print("Thread pool:", time() - start)

    with mp.get_context("spawn").Pool(1) as process_pool:
        start = time()
        assert (
            process_pool.apply(np.sum, (arr,))
            == expected_sum
        )
        print("Process pool:", time() - start)

if __name__ == "__main__":
    main()
This is the result:
python thread_process_pool_001.py
Thread pool: 1.6689703464508057
Process pool: 11.644825458526611

Wednesday, March 27, 2024

Python 2.7.12 : Django running on glitch website.

Django was design and developed by Lawrence journal world in 2003 and publicly released under BSD license in July 2005. Currently, DSF (Django Software Foundation) maintains its development and release cycle.
Django was released on 21, July 2005. Its current stable version is 2.2.5 which was released April 1, 2019.
It is maintained by the Django Software Foundation
Some time ago, the website bug allowed the use of Python language.
Today I looked at the core project in Django, fixed it and added a test user called test with the password password_test
You can test in the admin area.
I did not add new functionalities and pages because I wanted it to be a default start project.
Here's how I set permissions for this test user.

Tuesday, March 26, 2024

Python 3.12.1 : Read EXIF data with PIL.

This is a simple source code I created to read EXIF date from a photo.
import sys
import PIL
import PIL.Image as PILimage
from PIL import ImageDraw, ImageFont, ImageEnhance
from PIL.ExifTags import TAGS, GPSTAGS

class EXIF(object):
    def __init__(self, img):
        self.img = img
        self.exif_data = self.get_exif_data()
        self.lat = self.get_lat()
        self.lon = self.get_lon()
        self.date =self.get_date_time()
        super(Worker, self).__init__()

    @staticmethod
    def get_if_exist(data, key):
        if key in data:
            return data[key]
        return None

    def get_exif_data(self):
        """Returns a dictionary from the exif data of an PIL Image item. Also
        converts the GPS Tags"""
        exif_data = {}
        info = self.img._getexif()
        if info:
            for tag, value in info.items():
                decoded = TAGS.get(tag, tag)
                if decoded == "GPSInfo":
                    gps_data = {}
                    for t in value:
                        sub_decoded = GPSTAGS.get(t, t)
                        gps_data[sub_decoded] = value[t]

                    exif_data[decoded] = gps_data
                else:
                    exif_data[decoded] = value
        print('exif_data ===')
        print(exif_data)
        print('exif_data ===')
        return exif_data

if __name__ == '__main__':
    try:
        img = PILimage.open(sys.argv[1])
        image = EXIF(img)

    except Exception as e:
        print(e)
The result of running source code is this:
python detect_exif_data_001.py paint.jpg
exif_data ===
{'ResolutionUnit': 2, 'ExifOffset': 196, 'Make': 'Canon', 'Model': '', 'Orientation': 1, 
'DateTime': '2012:08:19 13:20:09', 'YCbCrPositioning': 1, 'XResolution': 180.0, 'YResolution': 180.0, 
'ExifVersion': b'0220', 'ComponentsConfiguration': b'\x01\x02\x03\x00', 'CompressedBitsPerPixel': 5.0, 
'DateTimeOriginal': '2012:08:19 13:20:09', 'DateTimeDigitized': '2012:08:19 13:20:09', 'ShutterSpeedValue': 4.3125,
'ApertureValue': 2.75, 'ExposureBiasValue': 0.0, 'MaxApertureValue': 2.75, 'MeteringMode': 5, 'Flash': 16, 
'FocalLength': 5.8, 'UserComment':
...
 'ColorSpace': 1, 'ExifImageWidth': 3072, 'FocalPlaneXResolution': 13653.333333333334, 'ExifImageHeight': 1728,
 'FocalPlaneYResolution': 10224.852071005917, 'FocalPlaneResolutionUnit': 2, 'SensingMethod': 2, 'FileSource': b'\x03',
 'ExposureTime': 0.05, 'ExifInteroperabilityOffset': 3334, 'FNumber': 2.6, 'CustomRendered': 0, 'ISOSpeedRatings': 80,
 'ExposureMode': 0, 'FlashPixVersion': b'0100', 'WhiteBalance': 0, 'DigitalZoomRatio': 1.0, 'SceneCaptureType': 1,
 'MakerNote' ...

Sunday, March 24, 2024

Python 3.12.1 : PrettyTable

A simple Python library for easily displaying tabular data in a visually appealing ASCII table format, see this webpage.
Let's install with pip tool:
pip install prettytable
Collecting prettytable
...
Successfully installed prettytable-3.10.0 wcwidth-0.2.13
Let's test with the default example:
from prettytable import PrettyTable
table = PrettyTable()
table.field_names = ["City name", "Area", "Population", "Annual Rainfall"]
table.add_row(["Adelaide", 1295, 1158259, 600.5])
table.add_row(["Brisbane", 5905, 1857594, 1146.4])
table.add_row(["Darwin", 112, 120900, 1714.7])
table.add_row(["Hobart", 1357, 205556, 619.5])
table.add_row(["Sydney", 2058, 4336374, 1214.8])
table.add_row(["Melbourne", 1566, 3806092, 646.9])
table.add_row(["Perth", 5386, 1554769, 869.4])
print(table)
The result is this:
python test_001.py
+-----------+------+------------+-----------------+
| City name | Area | Population | Annual Rainfall |
+-----------+------+------------+-----------------+
|  Adelaide | 1295 |  1158259   |      600.5      |
|  Brisbane | 5905 |  1857594   |      1146.4     |
|   Darwin  | 112  |   120900   |      1714.7     |
|   Hobart  | 1357 |   205556   |      619.5      |
|   Sydney  | 2058 |  4336374   |      1214.8     |
| Melbourne | 1566 |  3806092   |      646.9      |
|   Perth   | 5386 |  1554769   |      869.4      |
+-----------+------+------------+-----------------+
Let's test with sqlite3 feature:
import sqlite3
from prettytable import from_db_cursor

try:
    # Connect to the database
    connection = sqlite3.connect("file_paths.db")
    cursor = connection.cursor()

    # Get the list of table names
    cursor.execute("SELECT name FROM sqlite_master WHERE type='table'")
    table_names = cursor.fetchall()
    # Print the table names
    for table in table_names:
        print(table[0])
        query = str('SELECT * FROM ' + table[0])
        cursor.execute(query)
        table_names = cursor.fetchall()
        print(table_names)
except sqlite3.Error as e:
    print(f"Error: {e}")

finally:
    # Close the connection
    connection.close()
The result for my sqlite3 file named file_paths.db and database named files is this:
files
[(1, 'C:/BACKUP/3D\\001.blend'), (2, 'C:/BACKUP/3D\\002.blend'), (3, 'C:/BACKUP/3D\\003.blend'), 
(4, 'C:/BACKUP/3D\\default_camera.blend')]
The result is according with the data from sqlite3 table.

Sunday, March 10, 2024

Python 3.12.1 : From script to executable with pyinstaller.

Using scripts in or out of the environment is useful and accessible. Another version is to create an executable, but it will no longer allow the same access to the source code resource and the executable will not be very buildable.
It is debatable, especially for those who do not trust the compiled language.
Today, I use a Python packet called aaa that allows, through other options, the creation of an executable.
I installed this Python packet with the pip utility.
pip install PyInstaller
The source code I used is a simple example that displays some text.
import time 
print("Welcome catafest !")
time.sleep(100)
To convert the Python program file into a single standalone executable, I used this command:
pyinstaller --onefile --console exec_001.py
9538 INFO: PyInstaller: 6.5.0, contrib hooks: 2024.3
9539 INFO: Python: 3.12.1
9636 INFO: Platform: Windows-10-10.0.19045-SP0
9638 INFO: wrote C:\PythonProjects\executable_001\exec_001.spec
9711 INFO: Extending PYTHONPATH with paths
['C:\\PythonProjects\\executable_001']
18951 INFO: checking Analysis
18999 INFO: Building because C:\PythonProjects\executable_001\exec_001.py changed
18999 INFO: Initializing module dependency graph...
19031 INFO: Caching module graph hooks...
19392 INFO: Analyzing base_library.zip ...
26750 INFO: Loading module hook 'hook-encodings.py' from 'C:\\Python312\\Lib\\site-packages\\PyInstaller\\hooks'...
35164 INFO: Loading module hook 'hook-pickle.py' from 'C:\\Python312\\Lib\\site-packages\\PyInstaller\\hooks'...
40857 INFO: Loading module hook 'hook-heapq.py' from 'C:\\Python312\\Lib\\site-packages\\PyInstaller\\hooks'...
44873 INFO: Caching module dependency graph...
45194 INFO: Running Analysis Analysis-00.toc
45194 INFO: Looking for Python shared library...
45217 INFO: Using Python shared library: C:\Python312\python312.dll
45217 INFO: Analyzing C:\PythonProjects\executable_001\exec_001.py
45223 INFO: Processing module hooks...
45240 INFO: Performing binary vs. data reclassification (2 entries)
45243 INFO: Looking for ctypes DLLs
45259 INFO: Analyzing run-time hooks ...
45264 INFO: Including run-time hook 'C:\\Python312\\Lib\\site-packages\\PyInstaller\\hooks\\rthooks\\pyi_rth_inspect.py'
45326 INFO: Looking for dynamic libraries
45708 INFO: Extra DLL search directories (AddDllDirectory): []
45709 INFO: Extra DLL search directories (PATH): []
46487 INFO: Warnings written to C:\PythonProjects\executable_001\build\exec_001\warn-exec_001.txt
46534 INFO: Graph cross-reference written to C:\PythonProjects\executable_001\build\exec_001\xref-exec_001.html
46696 INFO: checking PYZ
46797 INFO: checking PKG
46962 INFO: Building because C:\PythonProjects\executable_001\exec_001.py changed
46962 INFO: Building PKG (CArchive) exec_001.pkg
52220 INFO: Building PKG (CArchive) exec_001.pkg completed successfully.
52222 INFO: Bootloader C:\Python312\Lib\site-packages\PyInstaller\bootloader\Windows-64bit-intel\run.exe
52222 INFO: checking EXE
52225 INFO: Building EXE because EXE-00.toc is non existent
52225 INFO: Building EXE from EXE-00.toc
52251 INFO: Copying bootloader EXE to C:\PythonProjects\executable_001\dist\exec_001.exe
52334 INFO: Copying icon to EXE
52383 INFO: Copying 0 resources to EXE
52383 INFO: Embedding manifest in EXE
52416 INFO: Appending PKG archive to EXE
52457 INFO: Fixing EXE headers
52738 INFO: Building EXE from EXE-00.toc completed successfully.

Saturday, March 9, 2024

News : All Books Bundle from Michael Driscoll

  • Get a copy of all my self-published Python eBooks :
  • Python 101 - 2nd Edition
  • Python 201: Intermediate Python
  • ReportLab: PDF Processing with Python
  • Jupyter Notebook 101
  • Creating GUI Applications with Python
  • Pillow: Image Processing with Python
  • Automating Excel with Python
  • The Python Quiz Book

News : Website for Python users.

Here is a site called clcoding.com for those who use the python language with many simple examples and even a test fairy: python coding challenge day.

Thursday, March 7, 2024

Python 3.12.1 : flaskcode - an web based code editor.

This is an web based code editor on python flask framework.
Let's install with pip tool:
pip install flaskcode
Collecting flaskcode
  Downloading flaskcode-0.0.8.tar.gz (14.5 MB)
...
Installing collected packages: flaskcode
Successfully installed flaskcode-0.0.8
The flaskcode can be integrated in to your own Flask app by configuring and registering flaskcode.blueprint with your app:
from flask import Flask
import flaskcode

app = Flask(__name__)
app.config.from_object(flaskcode.default_config)
app.config['FLASKCODE_RESOURCE_BASEPATH'] = '/path/to/resource/folder'
app.register_blueprint(flaskcode.blueprint, url_prefix='/flaskcode')

@app.route('/')
def hello():
    return "Hello World!"

if __name__ == '__main__':
    app.run()
You can run easy this online tool on web browser with this command:
flaskcode
FlaskCode CLI: C:\PythonProjects

 * Serving Flask app 'flaskcode.cli'
 * Debug mode: off
WARNING: This is a development server. Do not use it in a production deployment. Use a production WSGI server instead.
 * Running on http://127.0.0.1:5001
Press CTRL+C to quit

Wednesday, March 6, 2024

Python Qt6 : Test application with unittest and QtTest.

In this simple example, I add a test class with unittest to sleep the application and QtTest to wait for the window to open after pressing the button.
To run the unittest you need to uncomment this row of source code:
#unittest.main()
Let's see the source code:
import sys

from PyQt6.QtWidgets import QApplication, QDialog, QMainWindow, QPushButton
from PyQt6 import QtCore, QtGui, QtWidgets
from PyQt6 import QtTest 

# Unitest area
import unittest
from time import sleep
def sleep_sec(sec):
    sleep(10*sec)
#
#define class for unittest
class Test(unittest.TestCase):
    def test_square(self):
        sleep_sec(5)

class Ui_Dialog(object):
    def setupUi(self, Dialog):
        Dialog.setObjectName("Dialog")
        Dialog.resize(640, 480)
        self.verticalLayout = QtWidgets.QVBoxLayout(Dialog)

    def retranslateUi(self, Dialog):
        _translate = QtCore.QCoreApplication.translate

class Window(QMainWindow):
    """Main window."""
    def __init__(self, parent=None):
        """Initializer."""
        super().__init__(parent)
        # Use a QPushButton for the central widget
        self.centralWidget = QPushButton("Test_Button")

        # Connect the .clicked() signal with the .onTest_BtnClicked() slot
        self.centralWidget.clicked.connect(self.onTest_BtnClicked)
        self.setCentralWidget(self.centralWidget)

    # Create a slot for launching the Test_ dialog
    def onTest_BtnClicked(self):
        """Launch the Test_ dialog."""
        dlg = Test_Dlg(self)
        # This will test with QtTest just for click 
        QtTest.QTest.qWait(2500)

        dlg.exec()

class Test_Dlg(QDialog):
    """Test dialog."""
    def __init__(self, parent=None):
        super().__init__(parent)
        # Create an instance of the GUI
        self.ui = Ui_Dialog()
        # Run the .setupUi() method to show the GUI
        self.ui.setupUi(self)

if __name__ == "__main__":
    # this test all run of application and show :
    # Ran 1 test in 50.001s
    # uncoment this
    #unittest.main()
    
    # Create the application
    app = QApplication(sys.argv)
    # Create and show the application's main window
    win = Window()
    win.show()
    # Run the application's main loop
    sys.exit(app.exec())

Tuesday, March 5, 2024

Python 3.12.1 : Bandit tool for security issues in Python code.

Bandit is a tool designed to find common security issues in Python code. To do this Bandit processes each file, builds an AST from it, and runs appropriate plugins against the AST nodes. Once Bandit has finished scanning all the files it generates a report.
Bandit was originally developed within the OpenStack Security Project and later rehomed to PyCQA
Installation is simple with the pip tool:.
pip install bandit
Collecting bandit
  Downloading bandit-1.7.7-py3-none-any.whl.metadata (5.9 kB)
...
Installing collected packages: PyYAML, pygments, pbr, mdurl, stevedore, markdown-it-py, rich, bandit
Successfully installed PyYAML-6.0.1 bandit-1.7.7 markdown-it-py-3.0.0 mdurl-0.1.2 pbr-6.0.0 pygments-2.17.2 
rich-13.7.1 stevedore-5.2.0
You can see all features with this command:
bandit -h
I test on the script from the last tutorial with pypdf python module and the result is great:
bandit test_001.py
[main]  INFO    profile include tests: None
[main]  INFO    profile exclude tests: None
[main]  INFO    cli include tests: None
[main]  INFO    cli exclude tests: None
[main]  INFO    running on Python 3.12.1
Run started:2024-03-05 19:53:56.858212

Test results:
        No issues identified.

Code scanned:
        Total lines of code: 24
        Total lines skipped (#nosec): 0

Run metrics:
        Total issues (by severity):
                Undefined: 0
                Low: 0
                Medium: 0
                High: 0
        Total issues (by confidence):
                Undefined: 0
                Low: 0
                Medium: 0
                High: 0
Files skipped (0):

Monday, March 4, 2024

Python 3.12.1 : Testing pypdf - version 4.1.0 .

I tried to find a solution for processing PDF files.
The newer Python package called "unstructured" I tested was a disaster and a waste of time and resources.
Today I will show you tests with the Python package called pypdf with version: 4.1.0.
You can find it on the official page.
Installation is simple with the pip tool and you can also add options offered by crypto.
pip install pypdf[crypto]
Collecting pypdf[crypto]
  Downloading pypdf-4.1.0-py3-none-any.whl.metadata (7.4 kB)
...
Installing collected packages: pypdf
Successfully installed pypdf-4.1.0
Here is some information displayed with the show option.
python -m pip show pypdf
Name: pypdf
Version: 4.1.0
Summary: A pure-python PDF library capable of splitting, merging, cropping, and transforming PDF files
Home-page:
Author:
Author-email: Mathieu Fenniak <biziqe@mathieu.fenniak.net>
License:
Location: C:\Python312\Lib\site-packages
Requires:
Required-by:
I create a little script for testing:
import os
from pypdf import PdfReader  
from pypdf import PdfWriter
#PdfMerger is deprecated and will be removed in pypdf 5.0.0. Use PdfWriter instead.
#from pypdf import PdfMerger

pdf_file = PdfReader("invoice-001.pdf")
print("Size in pages : ",len(pdf_file.pages))
print("========")
page = pdf_file .pages[0]
print("Page : ", page)
print("========")
text = page.extract_text()
print("Page text : ", text)
print("========")
print("PDF Metadata : ", pdf_file.metadata)
print("PDF Metadata - Title: ", pdf_file.metadata.title)
print("========")
pdf_writer = PdfWriter("invoice-002.pdf")
page = pdf_writer.add_blank_page(width=8.27 * 72, height=11.7 * 72)
pdf_writer.write("invoice-002.pdf")

from pypdf import PdfWriter

merger = PdfWriter()

for pdf in ["invoice-001.pdf", "invoice-002.pdf"]:
    merger.append(pdf)

merger.write("invoice-003.pdf")
merger.close()
The result is this:
python test_001.py
Size in pages :  1
========
Page :  {'/Type': '/Page', '/Resources': {'/ProcSet': ['/PDF', '/Text', '/ImageB', '/ImageC', '/ImageI'], '/ExtGState': 
{'/G3': IndirectObject(3, 0, 2484091272080)}, '/XObject': {'/X4': IndirectObject(4, 0, 2484091272080)}, '/Font': {'/F7': 
IndirectObject(7, 0, 2484091272080), '/F8': IndirectObject(8, 0, 2484091272080)}}, '/MediaBox': [0, 0, 612, 792], 
'/Contents': IndirectObject(9, 0, 2484091272080), '/StructParents': 0, '/Parent': IndirectObject(10, 0, 2484091272080)}
========
Page text :  Dino Store
227 Cobblestone Road
30000 Bedrock, Cobblestone County
+555 7 789-1234
https://dinostore.bed | hello@dinostore.bedPayment details:
ACC:123006705
IBAN:US100000060345
SWIFT:BOA447
Bill to:
Slate Rock and Gravel Company
222 Rocky Way
30000 Bedrock, Cobblestone County
+555 7 123-5555
fred@slaterockgravel.bedInvoice No. 1
Invoice Date: 03.03.2024
Issue Date: 03.03.2024
Due Date: 02.04.2024
INVOICE
Item Quantity Price Discount Tax Linetotal
1 Test 001 1 50,00 € 1% 19% 49,50 €
2 Test 002 2 40,00 € 2% 19% 78,40 €
3 Frozen Brontosaurus Ribs 1 100,00 € 0% 19% 100,00 €
Subtotal: 227,90 €
Tax 19%: 43,30 €
Total: 271,20 €
Terms & Notes
Fred, thank you very much. We really appreciate your business.
Please send payments before the due date.
========
PDF Metadata :  {'/Creator': 'Mozilla/5.0 (Windows NT 10.0; Win64; x64) AppleWebKit/537.36 (KHTML, like Gecko) 
Chrome/122.0.0.0 Safari/537.36 Edg/122.0.0.0', '/Producer': 'Skia/PDF m122', '/CreationDate': 
"D:20240304221509+00'00'", '/ModDate': "D:20240304221509+00'00'"}
PDF Metadata - Title:  None
========
The run of the script will create a second blend PDF named invoice-002 then will merge with the first one will result a PDF named : invoice-003.pdf .

Saturday, February 24, 2024

Python 3.12.1 : pipx tool .

The pip is a general-purpose package installer for both libraries and apps with no environment isolation. pipx is made specifically for application installation, as it adds isolation yet still makes the apps available in your shell: pipx creates an isolated environment for each application and its associated packages.
Install the pipx tool :
python -m pip install --user pipx
Collecting pipx
  Downloading pipx-1.4.3-py3-none-any.whl.metadata (17 kB)
  ...
Upgrade the pipx tool:
python -m pip install --user --upgrade pipx
Using pipx to install an application by running :
python -m pipx install pyos
⡿ installing pyos  installed package pyos 0.8.0, installed using Python 3.12.1
  These apps are now globally available
    - psh.exe
    - pyos.exe
done! ✨ 🌟 ✨
Show the Python packages on the environment:
python -m pipx list
venvs are in C:\Users\catafest\AppData\Local\pipx\pipx\venvs
apps are exposed on your $PATH at C:\Users\catafest\.local\bin
manual pages are exposed at C:\Users\catafest\.local\share\man
   package pyos 0.8.0, installed using Python 3.12.1
    - psh.exe
    - pyos.exe
If an application installed by pipx requires additional packages, you can add them with pipx inject, and this can be seen with the list argument.
python -m pipx inject pyos matplotlib
  injected package matplotlib into venv pyos
done! ✨ 🌟 ✨
...
python -m pipx list
venvs are in C:\Users\catafest\AppData\Local\pipx\pipx\venvs
apps are exposed on your $PATH at C:\Users\catafest\.local\bin
manual pages are exposed at C:\Users\catafest\.local\share\man
   package pyos 0.8.0, installed using Python 3.12.1
    - psh.exe
    - pyos.exe
...    
python -m pipx list --include-injected
venvs are in C:\Users\catafest\AppData\Local\pipx\pipx\venvs
apps are exposed on your $PATH at C:\Users\catafest\.local\bin
manual pages are exposed at C:\Users\catafest\.local\share\man
   package pyos 0.8.0, installed using Python 3.12.1
    - psh.exe
    - pyos.exe
    Injected Packages:
      - matplotlib 3.8.3
      - test-py 0.3
This adds the matplotlib package to pyosenvironment.
If I try to inject into another environment name, then I will get an error:
python -m pipx inject catafest matplotlib
Can't inject 'matplotlib' into nonexistent Virtual Environment 'catafest'. Be sure to install the package first
with 'pipx install catafest' before injecting into it.
Create a Python file named test.py with this source code:
# test.py

# Requirements:
# requests
#
# The list of requirements is terminated by a blank line or an empty comment line.

import sys
import requests
project = sys.argv[1]
pipx_data = requests.get(f"https://pypi.org/pypi/{project}/json").json()
print(pipx_data["info"]["version"])
You can run it with:
python -m pipx run test.py pipx
1.4.3
I don't know how advanced the environment is built and I tested some simple scenarios but I found some inconsistencies in the scripts created by the user that can be run other than with a simple run and on several environments in the same folder. Theoretically, there should be such functionality.

Python 3.12.1 : The kaitai python module and IDE online tool.

Kaitai Struct is a declarative language used to describe various binary data structures, laid out in files or in memory: i.e. binary file formats, network stream packet formats, etc.
The main idea is that a particular format is described in Kaitai Struct language (.ksy file) and then can be compiled with ksc into source files in one of the supported programming languages. These modules will include a generated code for a parser that can read the described data structure from a file or stream and give access to it in a nice, easy-to-comprehend API.
Let's install the Python module:
python3 -m pip install --upgrade kaitaistruct
Python was not found; run without arguments to install from the Microsoft Store, or disable this shortcut from Settings > Manage App Execution Aliases.

C:\PythonProjects\kaitai_001>python -m pip install --upgrade kaitaistruct
Collecting kaitaistruct
  Downloading kaitaistruct-0.10-py2.py3-none-any.whl.metadata (2.5 kB)
Downloading kaitaistruct-0.10-py2.py3-none-any.whl (7.0 kB)
Installing collected packages: kaitaistruct
Successfully installed kaitaistruct-0.10
The Kaitai compiler can be downloaded from the official website.
After installation, you can use the compiler ...
kaitai-struct-compiler.bat --version
kaitai-struct-compiler 0.10
...
kaitai-struct-compiler.bat --help
kaitai-struct-compiler 0.10
Usage: kaitai-struct-compiler [options] ...

  ...                source files (.ksy)
  -t, --target   target languages (graphviz, csharp, rust, all, perl, java, go, cpp_stl, php, lua, python, nim, html, ruby, construct, javascript)
  -d, --outdir 
                           output directory (filenames will be auto-generated); on Unix-like shells, the short form `-d` requires arguments to be preceded by `--`
  -I, --import-path ;;...
                           .ksy library search path(s) for imports (see also KSPATH env variable)
  --cpp-namespace 
                           C++ namespace (C++ only, default: none)
  --cpp-standard 
                           C++ standard to target (C++ only, supported: 98, 11, default: 98)
  --go-package    Go package (Go only, default: none)
  --java-package 
                           Java package (Java only, default: root package)
  --java-from-file-class 
                           Java class to be invoked in fromFile() helper (default: io.kaitai.struct.ByteBufferKaitaiStream)
  --dotnet-namespace 
                           .NET Namespace (.NET only, default: Kaitai)
  --php-namespace 
                           PHP Namespace (PHP only, default: root package)
  --python-package 
                           Python package (Python only, default: root package)
  --nim-module     Path of Nim runtime module (Nim only, default: kaitai_struct_nim_runtime)
  --nim-opaque     Directory of opaque Nim modules (Nim only, default: directory of generated module)
  --opaque-types    opaque types allowed, default: false
  --ksc-exceptions         ksc throws exceptions instead of human-readable error messages
  --ksc-json-output        output compilation results as JSON to stdout
  --verbose         verbose output
  --no-auto-read           disable auto-running `_read` in constructor
  --read-pos               `_read` remembers attribute positions in stream
  --debug                  same as --no-auto-read --read-pos (useful for visualization tools)
  --help                   display this help and exit
  --version                output version information and exit
Steps to use this tool with Python. You need to use a defined kaitai file format for your file type - for example, gif file format, compile this kaitai then you can use it in this manner:
from kaitaistruct import __version__ as ks_version, KaitaiStruct, KaitaiStream, BytesIO
import mmap
print('kaitai version : ', ks_version)
f = open("python_giphy.gif", "rb")
with mmap.mmap(f.fileno(), 0, access=mmap.ACCESS_READ) as buf:
    stream = KaitaiStream(BytesIO(buf))
    obj1 = print(stream)
    obj2 = print(stream)
    obj3 = print(stream)
stream.close()
I only test a little but is a great tool.
Kaitai Struct is free and open-source software, licensed under the following terms: Compiler and visualizer — GPLv3+ and these Runtime libraries:
  • C++/STL — MIT
  • C# — MIT
  • Go — MIT
  • Java — MIT
  • JavaScript — Apache v2
  • Lua — MIT
  • Nim — MIT
  • Perl — MIT
  • PHP — MIT
  • Python — MIT
  • Ruby — MIT
  • Rust — MIT
  • Swift — MIT
    Is easier to understand if you use the IDE on the web. On the left side you can see a cloud icon for upload, first, select the kaitai GIF type from formats/image/gif.ksy from web IDE, then select a GIF file from your computer and upload.
    The default IDE looks like this:

    Friday, February 23, 2024