Saturday, April 5, 2025
Thursday, April 3, 2025
Python 3.13.0rc1 : Draw L-System with turtle package.
You can find the turtle python package documentation on the official webpage.
The random python package is default on any python.
import turtle
import random

# Funcții L-System
def generate_lsystem(axiom, rules, iterations):
    """Generarea L-System bazată pe reguli de producție."""
    for _ in range(iterations):
        new_axiom = ""
        for char in axiom:
            new_axiom += rules.get(char, char)
        axiom = new_axiom
    return axiom

def draw_lsystem(axiom, length):
    """Desenarea L-System utilizând turtle."""
    for char in axiom:
        if char == "|":  # Desenează linia
            turtle.forward(length)
        elif char == "+":  # Rotire la dreapta
            angle = random.choice([0,60,120])  # Alegere aleatorie a unghiului
            turtle.right(angle)
            print(f"Rotire dreapta cu {angle} grade.")
        elif char == "-":  # Rotire la stânga
            angle = random.choice([-120,-60])  # Alegere aleatorie a unghiului
            turtle.left(angle)
            print(f"Rotire stânga cu {angle} grade.")
    return angle

# Setări pentru L-System
#axiom = "|---|--+|-+-|+--|+--|+-+|-+-"  # Axioma de bază
axiom = "|---|---|---|---|---+|---+|---"
rules = {
    "|": "|+|--|-",  # Reguli pentru extensia liniei cu rotații aleatorii
    "+": "+",
    "-": "-"
}

# Generare axiomă nouă după reguli
iterations = 3  # Număr de iterații pentru dezvoltarea L-System
length = 10 # Lungimea fiecărei linii
final_axiom = generate_lsystem(axiom, rules, iterations)


# Inițializare Turtle
turtle.speed(0)
turtle.penup()
turtle.goto(0, 0)  # Poziționare inițială
turtle.pendown()

# Desenare L-System
draw_lsystem(final_axiom, length)

# Finalizare
turtle.hideturtle()
turtle.done()Wednesday, March 26, 2025
Python 3.11.11 : Colab simple test with CogVideoX-5B model and default example - part 050.
I tested this GitHub project from THUDM user on my colab google account and works well with CogVideoX-5B model.
You can find the default implementation on my colab GitHub repo.
The default example comes with thjs prompt:
prompt = (
"A panda, dressed in a small, red jacket and a tiny hat, sits on a wooden stool in a serene bamboo forest. "
"The panda's fluffy paws strum a miniature acoustic guitar, producing soft, melodic tunes. Nearby, a few other "
"pandas gather, watching curiously and some clapping in rhythm. Sunlight filters through the tall bamboo, "
"casting a gentle glow on the scene. The panda's face is expressive, showing concentration and joy as it plays. "
"The background includes a small, flowing stream and vibrant green foliage, enhancing the peaceful and magical "
"atmosphere of this unique musical performance."
)
The speed of rendering starts from :
38% ... 19/50 [30:54<50:57, 98.61s/it] using T4 GPU
... then run at :
100% ... 50/50 [1:26:09<00:00, 109.87s/it]
when the video render was 100% somehow google give this error, but the source code run well:
OutOfMemoryError: CUDA out of memory. Tried to allocate 1.32 GiB. GPU 0 has a total capacity of 14.74 GiB of which 654.12 MiB is free. Process 26970 has 14.10 GiB memory in use. Of the allocated memory 12.97 GiB is allocated by PyTorch, and 1.00 GiB is reserved by PyTorch but unallocated. If reserved but unallocated memory is large try setting PYTORCH_CUDA_ALLOC_CONF=expandable_segments:True to avoid fragmentation. See documentation for Memory Management (https://pytorch.org/docs/stable/notes/cuda.html#environment-variables)
I think is need to set some extra memory on CUDA but this require to parse some documentation and is not a task for me now.
Saturday, March 22, 2025
Python 3.11.11 : Colab simple test with VGG16 - part 049.
VGG16 is a deep convolutional neural network (CNN) trained on a massive image dataset called ImageNet. This architecture is known for its remarkable performance in image classification tasks and is widely used in various computer vision applications.
You can find one simple example on my GitHub project.

Saturday, March 15, 2025
Python 3.13.0rc1 : strange crash of Python running ...
... my windows 10 crash the python running ... this is the output of crash:

Python Qt6 : Dependency checker for python packages with pipdeptree and PyQt6.
Today I created this python script to test and check python package dependency.
You need to install the pipdeptree with the pip tool.
I used the Python 3.13.0rc1 version and the result is this:

This is the source code I used:
import sys
import subprocess
from PyQt6.QtWidgets import (
    QApplication, QMainWindow, QVBoxLayout, QTreeWidget, QTreeWidgetItem, QWidget
)
from PyQt6.QtWidgets import QHeaderView
from PyQt6.QtGui import QIcon
from PyQt6.QtWidgets import QStyle


class DependencyViewer(QMainWindow):
    def __init__(self):
        super().__init__()

        self.setWindowTitle("Dependency Checker")

        # Maximizarea ferestrei la lansare
        self.showMaximized()

        # Creează un QTreeWidget pentru afișarea dependențelor
        self.tree_widget = QTreeWidget()
        self.tree_widget.setHeaderLabels(["Dependency", "Status"])

        # Ajustează aliniamentul central pentru fiecare coloană
        for i in range(2):  # Pentru cele două coloane
            self.tree_widget.headerItem().setTextAlignment(i, Qt.AlignmentFlag.AlignCenter)

        # Configurarea automată a lățimii coloanelor
        self.tree_widget.header().setSectionResizeMode(QHeaderView.ResizeMode.ResizeToContents)

        # Layout
        layout = QVBoxLayout()
        layout.addWidget(self.tree_widget)

        container = QWidget()
        container.setLayout(layout)
        self.setCentralWidget(container)

        # Obține și afișează dependențele
        self.display_dependencies()

    def display_dependencies(self):
        try:
            # Rulează pipdeptree pentru a obține ierarhia dependențelor
            result = subprocess.run(['pipdeptree', '--warn', 'silence'], capture_output=True, text=True)
            dependencies = result.stdout.splitlines()

            for line in dependencies:
                # Determină nivelul de indentare pentru ierarhia dependențelor
                indent_level = len(line) - len(line.lstrip())
                dependency_name = line.strip()

                # Creează un item pentru fiecare dependență
                item = QTreeWidgetItem([dependency_name])

                # Atribuie iconițe pe baza compatibilității (exemplu simplificat)
                if "(*)" in dependency_name:  # Exemplu de incompatibilitate (poți schimba după caz)
                    item.setIcon(0, self.style().standardIcon(QStyle.StandardPixmap.SP_DialogCancelButton))
                    item.setText(1, "Incompatible")
                else:
                    item.setIcon(0, self.style().standardIcon(QStyle.StandardPixmap.SP_DialogApplyButton))
                    item.setText(1, "Compatible")

                # Adaugă item-ul în arbore
                if indent_level == 0:
                    self.tree_widget.addTopLevelItem(item)
                else:
                    # Alege ultimul item părinte și adaugă dependența ca sub-item
                    parent_item = self.tree_widget.topLevelItem(self.tree_widget.topLevelItemCount() - 1)
                    parent_item.addChild(item)

            # Extinde toate elementele din arbore
            self.tree_widget.expandAll()

        except Exception as e:
            error_item = QTreeWidgetItem(["Error", str(e)])
            error_item.setIcon(0, self.style().standardIcon(QStyle.StandardPixmap.SP_MessageBoxCritical))
            self.tree_widget.addTopLevelItem(error_item)


if __name__ == "__main__":
    from PyQt6.QtCore import Qt

    app = QApplication(sys.argv)
    viewer = DependencyViewer()
    viewer.show()
    sys.exit(app.exec())
Wednesday, March 12, 2025
Python 3.13.0rc1 : testing the new Kivy-2.3.1 with default examples.
Today I tested the Kivy-2.3.1 with Python 3.13.0rc1.
Read more on the official webpage.
The install step is easy with the pip tool:
python -m pip install kivy
Collecting kivy
...
Installing collected packages: kivy-deps.sdl2, kivy-deps.glew, kivy-deps.angle, filetype, pypiwin32, pygments, docutils, Kivy-Garden, kivy
Successfully installed Kivy-Garden-0.1.5 docutils-0.21.2 filetype-1.2.0 kivy-2.3.1 kivy-deps.angle-0.4.0 kivy-deps.glew-0.3.1 kivy-deps.sdl2-0.8.0 pygments-2.19.1 pypiwin32-223
Let's install the kivy examples source code:
python -m pip install --pre "kivy[base]" kivy_examples
Collecting kivy_examples
...
Installing collected packages: kivy_examples
Successfully installed kivy_examples-2.3.1
You can test these examples with this command into the python folder:
C:\Python313\share\kivy-examples>python demo\showcase\main.py
[WARNING] [Config      ] Older configuration version detected (0 instead of 27)
[WARNING] [Config      ] Upgrading configuration in progress.
[DEBUG  ] [Config      ] Upgrading from 0 to 1
This is the result:

Monday, March 10, 2025
News : Ollama-Adaptive-Image-Code-Gen project test - need more memory.
Python code that leverages a language model (such as LLaMA) to generate images featuring basic shapes in 2D or 3D. The script randomly selects shapes, colors, and areas to create diverse visuals. It continuously generates images based on AI-generated code, validates them, and provides feedback for iterative improvements.
This source code can be found on this GitHub project named Ollama-Adaptive-Image-Code-Gen.
You can download this and use these commands to run and test this feature of create and generate images with ollama.
NOTE: Compose up process might upto 20 - 25 Mins. first time. Because it will download all the respective ModelFiles
Let's start:
git clone https://github.com/jaypatel15406/Ollama-Adaptive-Image-Code-Gen.git
Cloning into 'Ollama-Adaptive-Image-Code-Gen'...
Resolving deltas: 100% (30/30), done.

cd Ollama-Adaptive-Image-Code-Gen

Ollama-Adaptive-Image-Code-Gen>pip3 install -r requirements.txt
Collecting ollama (from -r requirements.txt (line 1))
...
Installing collected packages: propcache, multidict, frozenlist, aiohappyeyeballs, yarl, aiosignal, ollama,
aiohttp
Successfully installed aiohappyeyeballs-2.4.8 aiohttp-3.11.13 aiosignal-1.3.2 frozenlist-1.5.0 multidict-6.1.0
ollama-0.4.7 propcache-0.3.0 yarl-1.18.3

Ollama-Adaptive-Image-Code-Gen>python main.py
 utility : pull_model_instance : Instansiating 'llama3.1' ...
 utility : pull_model_instance : 'llama3.1' Model Fetching Status : pulling manifest
 utility : pull_model_instance : 'llama3.1' Model Fetching Status : pulling 667b0c1932bc
Seams to work but I need more memory:
Ollama-Adaptive-Image-Code-Gen>python main.py
 utility : pull_model_instance : Instansiating 'llama3.1' ...
 utility : pull_model_instance : 'llama3.1' Model Fetching Status : pulling manifest
 utility : pull_model_instance : 'llama3.1' Model Fetching Status : pulling 667b0c1932bc
 utility : pull_model_instance : 'llama3.1' Model Fetching Status : pulling 948af2743fc7
 utility : pull_model_instance : 'llama3.1' Model Fetching Status : pulling 0ba8f0e314b4
 utility : pull_model_instance : 'llama3.1' Model Fetching Status : pulling 56bb8bd477a5
 utility : pull_model_instance : 'llama3.1' Model Fetching Status : pulling 455f34728c9b
 utility : pull_model_instance : 'llama3.1' Model Fetching Status : verifying sha256 digest
 utility : pull_model_instance : 'llama3.1' Model Fetching Status : writing manifest
 utility : pull_model_instance : 'llama3.1' Model Fetching Status : success

=========================================================================================

 utility : get_prompt_response : Prompt : Choose the dimension of the shape: '2D' or '3D'. NOTE: Return only the chosen dimension.
ERROR:root: utility : get_prompt_response : Error : model requires more system memory (5.5 GiB) than is available (5.1 GiB) (status code: 500) ... Python 3.13.0rc1 : Python script as window 10 service.
The main reason I tested this python issues comes from this:
I have a strange usage of msedgewebview2.exe on my window 10.
The right way was to install but I cannot do that because is not my laptop.
I created a python script to make logs and kill this process:
import win32serviceutil
import servicemanager
import win32event
import win32service
import time
import logging
import psutil

class MyService(win32serviceutil.ServiceFramework):
    _svc_name_ = 'catafestService'
    _svc_display_name_ = 'My catafest Service tool'

    def __init__(self, args):
        win32serviceutil.ServiceFramework.__init__(self, args)
        self.hWaitStop = win32event.CreateEvent(None, 0, 0, None)
        self.stop_requested = False
        logging.basicConfig(filename='D:\\PythonProjects\\catafest_services\\logfile.log', level=logging.DEBUG,
                            format='%(asctime)s - %(name)s - %(levelname)s - %(message)s')

    def SvcStop(self):
        self.ReportServiceStatus(win32service.SERVICE_STOP_PENDING)
        win32event.SetEvent(self.hWaitStop)
        self.stop_requested = True
        logging.info('Service stop requested')

    def SvcDoRun(self):
        servicemanager.LogMsg(servicemanager.EVENTLOG_INFORMATION_TYPE,
                              servicemanager.PYS_SERVICE_STARTED,
                              (self._svc_name_, ''))
        logging.info('Service started')
        self.main()

    def main(self):
        while not self.stop_requested:
            try:
                # Check and terminate 'msedgewebview2.exe' process
                for proc in psutil.process_iter(['pid', 'name']):
                    if proc.info['name'] == 'msedgewebview2.exe':
                        proc.kill()
                        logging.info(f'Terminated process: {proc.info["name"]} (PID: {proc.info["pid"]})')
                logging.info('Service running...')
                time.sleep(10)  # Runs every 10 seconds
            except Exception as e:
                logging.error(f'Error occurred: {e}', exc_info=True)
                servicemanager.LogMsg(servicemanager.EVENTLOG_ERROR_TYPE,
                                      servicemanager.PYS_SERVICE_STOPPED,
                                      (self._svc_name_, f'Error occurred: {e}'))
                break
        logging.info('Service stopped')

if __name__ == '__main__':
    win32serviceutil.HandleCommandLine(MyService)
You need to install pyinstaller to make a exe file:
pip install pyinstaller
...
Successfully installed altgraph-0.17.4 pefile-2023.2.7 pyinstaller-6.12.0 pyinstaller-hooks-contrib-2025.1
pywin32-ctypes-0.2.3
The next step install the pywin32 python package:
pip install pywin32... try to make executable:
pyinstaller --onefile catafest_services.py... use the start:
catafest_services.exe start
Traceback (most recent call last):
  ...
  File "win32serviceutil.py", line 706, in HandleCommandLine
  File "win32serviceutil.py", line 624, in GetServiceClassString
ModuleNotFoundError: No module named 'win32timezone'
[PYI-6880:ERROR] Failed to execute script 'catafest_services' due to unhandled exception!
... this error comes from interaction on running with windows services:
try to fix with this:
pyinstaller --name=catafest_services --onefile catafest_services.pyOpen the generated spec file catafest_services.spec and add the win32timezone module to the hidden imports. See:
# -*- mode: python ; coding: utf-8 -*-
block_cipher = None

a = Analysis(['catafest_services.py'],
             pathex=['D:\\PythonProjects\\catafest_services'],
             binaries=[],
             datas=[],
             hiddenimports=['win32timezone'],
             hookspath=[],
             runtime_hooks=[],
             excludes=[],
             win_no_prefer_redirects=False,
             win_private_assemblies=False,
             cipher=block_cipher,
             noarchive=False)

# The rest of the file remains unchanged
Rebuild the executable using the modified spec file:
pyinstaller catafest_services.spec
709 INFO: PyInstaller: 6.12.0, contrib hooks: 2025.1
711 INFO: Python: 3.13.0rc1
791 INFO: Platform: Windows-10-10.0.19045-SP0
791 INFO: Python environment: C:\Python313
...
Try again with start:
catafest_services.exe startI got this output:
catafest_services.exe start
Starting service catafestService
Error starting service: Access is denied.
Open the command prompt as administrator and try again:
catafest_services.exe start
Starting service catafestService
Error starting service: The service did not respond to the start or control request in a timely fashion.
Same interaction because try to kill a process and more ...
This not work, but is another good way to use it by using the debug:
catafest_services.exe debug
Debugging service catafestService - press Ctrl+C to stop.
I n f o   0 x 4 0 0 0 1 0 0 2   -   T h e   c a t a f e s t S e r v i c e   s   r v i c e   h a s   s t a r t e d .
 Stopping debug service.
Under debug all works well, some msedgewebview2 processes are gone.
I stop this run and I try to work on development ...
Next step: If all works then you can use install:
catafest_services.exe install
Installing service catafestService
Service installed
You can do more. Make sure the account running the service has the necessary permissions. You can specify a user account during service installation:
catafest_services.exe install --username your_domain\your_username --password your_passwordYou can use this command to see these info:
set userLast step: You can open the Services Manager by typing services.msc in the Windows Run dialog. Use press Win + R keys to open the Run dialog.
Manage the service as any services. You can use even on command prompt:
catafest_services.exe
Usage: 'catafest_services.exe [options] install|update|remove|start [...]|stop|restart [...]|debug [...]'t_services>cd dist
Options for 'install' and 'update' commands only:
 --username domain\username : The Username the service is to run under
 --password password : The password for the username
 --startup [manual|auto|disabled|delayed] : How the service starts, default = manual
 --interactive : Allow the service to interact with the desktop.
 --perfmonini file: .ini file to use for registering performance monitor data
 --perfmondll file: .dll file to use when querying the service for
   performance data, default = perfmondata.dll
Options for 'start' and 'stop' commands only:
 --wait seconds: Wait for the service to actually start or stop.
                 If you specify --wait with the 'stop' option, the service
                 and all dependent services will be stopped, each waiting
the specified period.Saturday, March 1, 2025
Python 3.13.0rc1 : testing the elevenlabs with artificial intelligence.
Today I teste the elevenlabs python package to use it with artifical inteligence to create sound.
I install this python package with pip tool, I created a python script file and the basic script run well with the api key from the official website.
pip install elevenlabs
Collecting elevenlabs
...
Installing collected packages: websockets, sniffio, pydantic-core, h11, annotated-types, pydantic, httpcore, anyio, httpx,
elevenlabs
Successfully installed annotated-types-0.7.0 anyio-4.8.0 elevenlabs-1.52.0 h11-0.14.0 httpcore-1.0.7 httpx-0.28.1
pydantic-2.10.6the official website pydantic-core-2.27.2 sniffio-1.3.1 websockets-15.0
...
pip install playsound
Collecting playsound
...
Installing collected packages: playsound
Successfully installed playsound-1.3.0
...
python elevenlabs_test_001.py
Fișierul audio a fost salvat la generated_audio.mp3
This is the source code:
import io  # Importarea bibliotecii io
from elevenlabs import ElevenLabs
from playsound import playsound
import tempfile
import os

# API Key pentru ElevenLabs
api_key = "API_KEY"
voice_id = "JBFqnCBsd6RMkjVDRZzb"


# Configurarea clientului ElevenLabs
client = ElevenLabs(api_key=api_key )

# Textul pe care vrei să-l convertești în audio
text = 'Hello! This is a test without mpv.'

# Generarea audio
audio_generator = client.generate(text=text, voice=voice_id)

# Colectarea datelor din generator într-un obiect BytesIO
audio_data = io.BytesIO()
for chunk in audio_generator:
    audio_data.write(chunk)
audio_data.seek(0)  # Resetarea pointerului la începutul streamului

# Specificarea căii de salvare pentru fișierul audio
save_path = 'generated_audio.mp3'

# Salvarea audio într-un fișier temporar
with tempfile.NamedTemporaryFile(delete=False, suffix='.mp3') as temp_audio:
    temp_audio.write(audio_data.read())
    temp_audio_path = temp_audio.name

# Redarea fișierului audio utilizând playsound
playsound(temp_audio_path)

# Salvarea fișierului audio generat într-o locație specificată
with open(save_path, 'wb') as f:
    audio_data.seek(0)  # Resetarea pointerului la începutul streamului pentru a citi din nou datele
    f.write(audio_data.read())

print(f'Fișierul audio a fost salvat la {save_path}')Saturday, February 22, 2025
News : Python and Grok 3 Beta — The Age of Reasoning Agents
On the official website of x.ai you can find this:
We are thrilled to unveil an early preview of Grok 3, our most advanced model yet, blending superior reasoning with extensive pretraining knowledge.
You can find a simle and good example with python and pygame how this can be used.
The Grok 3 artificial inteligence is used for :
Research
Brainstorm
Analyze Data
Create images
Code
For me, the artificial intelligence help me to be more fast into coding versus issues and bugs, game design, parse and change data.
I don't test this Grok 3, but I can tell you some artificial inteligence into develop area are bad even they say is dedicated to this issue.
Saturday, February 8, 2025
Python 3.13.0rc1 : Testing python with Ollama local install.
I was very busy with development and testing for about two weeks and my laptop was stuck and I was working hard... Today I managed to test local background clipping on my laptop with a local Ollama installation separated by a Python module but with processing from the Python script. I also used Microsoft's Copilot artificial intelligence for python and it works well even though it is not theoretically specialized in development. The source code is quite large but the result is very good and fast:
import subprocess
import os
import json
from PIL import Image, ImageOps

class OllamaProcessor:
    def __init__(self, config_file):
        self.config_file = config_file
        self.model_methods = self.load_config()

    def load_config(self):
        try:
            with open(self.config_file, 'r') as file:
                config = json.load(file)
            print("Configuration loaded successfully.")
            return config
        except FileNotFoundError:
            print(f"Configuration file {self.config_file} not found.")
            raise
        except json.JSONDecodeError:
            print(f"Error decoding JSON from the configuration file {self.config_file}.")
            raise

    def check_ollama(self):
        try:
            result = subprocess.run(["ollama", "--version"], capture_output=True, text=True, check=True)
            print("Ollama is installed. Version:", result.stdout)
        except subprocess.CalledProcessError as e:
            print("Ollama is not installed or not found in PATH. Ensure it's installed and accessible.")
            raise
...
Here is the result obtained after finishing running in the command line:
python ollama_test_001.py
Configuration file ollama_config.json created successfully.
Configuration loaded successfully.
Ollama is installed. Version: ollama version is 0.5.7

Available models: ['NAME']
pulling manifest
pulling 170370233dd5... 100% ▕██████████████▏ 4.1 GB
pulling 72d6f08a42f6... 100% ▕██████████████▏ 624 MB
pulling 43070e2d4e53... 100% ▕██████████████▏  11 KB
pulling c43332387573... 100% ▕██████████████▏   67 B
pulling ed11eda7790d... 100% ▕██████████████▏   30 B
pulling 7c658f9561e5... 100% ▕██████████████▏  564 B
verifying sha256 digest
writing manifest
success
Model llava pulled successfully for method process_images_in_folder.
Some "Command failed ..." but the result is cutting well and it has transparency !
Tuesday, February 4, 2025
Python 3.11.11 : Colab simple test with mistralai - part 048.
Two notebook on my colab repo project
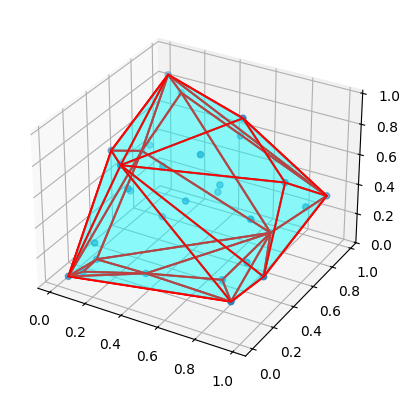
One with xterm colab festure and another with hull-convex known as lattrice with OllamaFunctions.
Subscribe to:
Comments (Atom)