analitics

Pages

Monday, September 9, 2024

Python Qt6 : Use regular expression with PyQt6.

Today I tested a python source code with PyQt6.
This source code let you to clean the text by HTML tags and regular expression in realtime.
If you want to parse in realtime then check the Realtime and add the regular expresion in editbox.
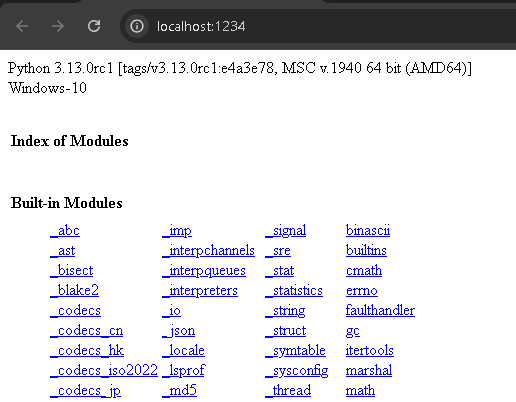
This is the result:
This is the source code I used to parse realtime regular expresion on editbox
from PyQt6.QtWidgets import QApplication, QMainWindow, QTextEdit, QVBoxLayout, QHBoxLayout, QWidget, QPushButton, QCheckBox, QLineEdit, QLabel
from PyQt6.QtGui import QTextDocument
from PyQt6.QtCore import Qt
import re

class MainWindow(QMainWindow):
    def __init__(self):
        super().__init__()

        self.setWindowTitle("HTML Cleaner")

        self.text_edit = QTextEdit()
        self.clean_button = QPushButton("Clean HTML")
        self.transform_div_checkbox = QCheckBox("Transform 
tags") self.realtime_checkbox = QCheckBox("Realtime") self.regex_edit = QLineEdit() self.regex_edit.setPlaceholderText("Enter regex pattern") self.regex_edit.setEnabled(False) # Dezactivăm inițial top_layout = QHBoxLayout() top_layout.addWidget(self.clean_button) top_layout.addWidget(self.transform_div_checkbox) top_layout.addWidget(QLabel("Regex:")) top_layout.addWidget(self.regex_edit) top_layout.addWidget(self.realtime_checkbox) main_layout = QVBoxLayout() main_layout.addLayout(top_layout) main_layout.addWidget(self.text_edit) container = QWidget() container.setLayout(main_layout) self.setCentralWidget(container) self.clean_button.clicked.connect(self.clean_html) self.realtime_checkbox.stateChanged.connect(self.toggle_realtime) self.regex_edit.textChanged.connect(self.realtime_update) def clean_html(self): html_text = self.text_edit.toPlainText() clean_text = self.remove_html_tags(html_text) self.text_edit.setPlainText(clean_text) def remove_html_tags(self, text): # Remove CSS text = re.sub(r'.*?', '', text, flags=re.DOTALL) # Remove JavaScript text = re.sub(r'.*?', '', text, flags=re.DOTALL) # Remove HTML comments text = re.sub(r'', '', text, flags=re.DOTALL) # Transform
tags if checkbox is checked if self.transform_div_checkbox.isChecked(): text = re.sub(r']*>', '
', text) # Remove HTML tags but keep content clean = re.compile('<.*?>') text = re.sub(clean, '', text) # Remove empty lines text = re.sub(r'\n\s*\n', '\n', text) return text def toggle_realtime(self): if self.realtime_checkbox.isChecked(): self.regex_edit.setEnabled(True) # Activăm editbox-ul self.text_edit.textChanged.connect(self.realtime_update) else: self.regex_edit.setEnabled(False) # Dezactivăm editbox-ul self.text_edit.textChanged.disconnect(self.realtime_update) def realtime_update(self): if self.realtime_checkbox.isChecked(): html_text = self.text_edit.toPlainText() regex_pattern = self.regex_edit.text() if regex_pattern: try: html_text = re.sub(regex_pattern, '', html_text) except re.error: pass # Ignore regex errors self.text_edit.blockSignals(True) self.text_edit.setPlainText(html_text) self.text_edit.blockSignals(False) app = QApplication([]) window = MainWindow() window.show() app.exec()

Saturday, September 7, 2024

News : Python and the Intel's NPU Acceleration Library.

You can find the Intel's NPU Acceleration Library on this GitHub repo with Python code samples.

News : Python in Visual Studio Code – September 2024 Release

We’re excited to announce the September 2024 release of the Python and Jupyter extensions for Visual Studio Code!
This release includes the following announcements:
Django unit test support
Go to definition from inlay hints with Pylance
If you’re interested, you can check the full list of improvements in our changelogs for the Python, Jupyter and Pylance extensions.
Read more on the offcial website.

Friday, September 6, 2024

Python 3.12.4 : DuckDB operate in in-memory mode.

DuckDB aims to automatically achieve high performance by using well-chosen default configurations and having a forgiving architecture. Of course, there are still opportunities for tuning the system for specific workloads. The Performance Guide's page contain guidelines and tips for achieving good performance when loading and processing data with DuckDB.
DuckDB can operate in in-memory mode. In most clients, this can be activated by passing the special value :memory: as the database file or omitting the database file argument.
You can use with python or another programming language.
I used Python 3.13.0rc1 version and pip tool ...
pip install duckdb --upgrade
Collecting duckdb
...
Installing collected packages: duckdb
Successfully installed duckdb-1.0.0
I created a python script :
python test_memory_duckdb_sqlite_db.py
[]
[('table', 'users', 'users', 0, 'CREATE TABLE users(id BIGINT PRIMARY KEY, first_name VARCHAR, last_name VARCHAR, occupation VARCHAR, hobby VARCHAR, year_of_birth BIGINT, age BIGINT);')]
This is the source code I used:
import duckdb

# Conectare la baza de date în memorie
con = duckdb.connect(database=':memory:')

# Instalează extensia sqlite
con.execute("INSTALL sqlite")

# Încarcă extensia sqlite
con.execute("LOAD sqlite")

# Verifică dacă extensia este încărcată
result = con.execute("SELECT * FROM sqlite_master").fetchall()
print(result)

# Conectare la baza de date pe disc
con_disk = duckdb.connect(database='sqlite_database.db', read_only=False)

# Instalează extensia sqlite pentru baza de date pe disc
con_disk.execute("INSTALL sqlite")

# Încarcă extensia sqlite pentru baza de date pe disc
con_disk.execute("LOAD sqlite")

# Verifică dacă extensia este încărcată pentru baza de date pe disc
result_disk = con_disk.execute("SELECT * FROM sqlite_master").fetchall()
print(result_disk)

Wednesday, September 4, 2024

Python 3.13.0rc1 : Use faker with build pandas and PyQt6.

In this tutorial I will show you how I build pandas and use faker and PyQt6.
The faker python module is a powerful library designed to generate fake data, which is particularly useful for testing, filling databases, and creating realistic-looking sample data.
I used python version 3.13.0rc1 and I install with pip tool faker and the pandas and PyQt6 is build with pip tool.
pip install faker
Collecting faker
...
Installing collected packages: six, python-dateutil, faker
Successfully installed faker-28.1.0 python-dateutil-2.9.0.post0 six-1.16.0
The pandas installation fail first time then today works, maybe comes with fixes ...
pip install pandas
...
Successfully built pandas
Installing collected packages: pytz, tzdata, pandas
Successfully installed pandas-2.2.2 pytz-2024.1 tzdata-2024.1
Let's try one example to see how this works, I used copilot from microsoft to generate this first source code:
import sys
from PyQt6.QtWidgets import QApplication, QMainWindow, QTableView
from PyQt6.QtCore import Qt, QAbstractTableModel
import pandas as pd
from faker import Faker

# Generăm date false folosind Faker
fake = Faker()
data = {
    'Name': [fake.name() for _ in range(100)],
    'Address': [fake.address() for _ in range(100)],
    'Email': [fake.email() for _ in range(100)],
    'IP Address': [fake.ipv4() for _ in range(100)]  # Adăugăm adresa IP
}

# Creăm un DataFrame Pandas
df = pd.DataFrame(data)

# Definim un model pentru QTableView
class PandasModel(QAbstractTableModel):
    def __init__(self, df):
        super().__init__()
        self._df = df

    def rowCount(self, parent=None):
        return len(self._df)

    def columnCount(self, parent=None):
        return self._df.shape[1]

    def data(self, index, role=Qt.ItemDataRole.DisplayRole):
        if index.isValid():
            if role == Qt.ItemDataRole.DisplayRole:
                return str(self._df.iloc[index.row(), index.column()])
        return None

    def headerData(self, section, orientation, role=Qt.ItemDataRole.DisplayRole):
        if role == Qt.ItemDataRole.DisplayRole:
            if orientation == Qt.Orientation.Horizontal:
                return self._df.columns[section]
            else:
                return str(section)
        return None

# Aplicatia PyQt6
app = QApplication(sys.argv)
window = QMainWindow()
view = QTableView()

# Setăm modelul pentru QTableView
model = PandasModel(df)
view.setModel(model)

# Configurăm fereastra principală
window.setCentralWidget(view)
window.resize(800, 600)
window.show()

# Rulăm aplicația
sys.exit(app.exec())

Monday, September 2, 2024

Python Qt6 : Two sliders

I used the Python 3.13.0rc1 version and PyQt6 6.7.1 version.
This is the source code:
import sys
from PyQt6.QtWidgets import QApplication, QWidget, QVBoxLayout, QSlider
from PyQt6.QtCore import Qt

class SliderWindow(QWidget):
    def __init__(self):
        super().__init__()

        self.setWindowTitle("Two Slideres")
        self.setGeometry(100, 100, 640, 200)

        layout = QVBoxLayout()

        self.slider_max = QSlider(Qt.Orientation.Horizontal)
        self.slider_max.setMinimum(0)
        self.slider_max.setMaximum(100)
        self.slider_max.setValue(100)
        self.slider_max.valueChanged.connect(self.update_min_slider)

        self.slider_min = QSlider(Qt.Orientation.Horizontal)
        self.slider_min.setMinimum(0)
        self.slider_min.setMaximum(100)
        self.slider_min.setValue(0)
        self.slider_min.valueChanged.connect(self.update_max_slider)

        layout.addWidget(self.slider_max)
        layout.addWidget(self.slider_min)

        self.setLayout(layout)

    def update_min_slider(self, value):
        self.slider_min.blockSignals(True)
        self.slider_min.setValue(100 - value)
        self.slider_min.blockSignals(False)

    def update_max_slider(self, value):
        self.slider_max.blockSignals(True)
        self.slider_max.setValue(100 - value)
        self.slider_max.blockSignals(False)

if __name__ == "__main__":
    app = QApplication(sys.argv)
    window = SliderWindow()
    window.show()
    sys.exit(app.exec())

Sunday, September 1, 2024

Python 3.13.0rc1 : Test MSBuild with PyQt6.

The goal of this tutorial is to test the build process of the Python package.
Installing the PyQt6 python module may come with the build error.
In this case, MS Build is installed from the official website, and then other necessary Python modules can be installed depending on the files needed to build the PyQt6 package.
pip install --upgrade setuptools
pip install msvc-runtime
ERROR: Could not find a version that satisfies the requirement msvc-runtime (from versions: none)
ERROR: No matching distribution found for msvc-runtime
pip install pyqt6
Collecting pyqt6
  Using cached PyQt6-6.7.1-cp38-abi3-win_amd64.whl.metadata (2.1 kB)
...
Successfully built PyQt6-sip
Installing collected packages: PyQt6-Qt6, PyQt6-sip, pyqt6
Successfully installed PyQt6-Qt6-6.7.2 PyQt6-sip-13.8.0 pyqt6-6.7.1
This process uses a lot of files and MSBuild needs some Gb free on the hard disk.

Saturday, August 31, 2024

Python 3.13.0rc1 : Using pydoc python module.

This is default python module.
You can find pydoc - documentation.
Simple use of this python module for example: sys python module to see the documentation.
PythonProjects\test_pydoc>python -m pydoc sys
Using the w argument willcreate a HTML file with the documentation.
In this example will be sys.html, because is sys python module.
PythonProjects\test_pydoc>python -m pydoc -w sys
wrote sys.html
Best feature is search by word and show the result as python modules, in this case will show a list ...
PythonProjects\test_pydoc>python -m pydoc -k url
nturl2path - Convert a NT pathname to a file URL and vice versa.
test_sqlite3: testing with SQLite version 3.45.3
test.test_urllib - Regression tests for what was in Python 2's "urllib" module
test.test_urllib2
test.test_urllib2_localnet
test.test_urllib2net
Share the documentation with an server, in this case is set to localhost:
\PythonProjects\test_pydoc>python -m pydoc -p 1234
Server ready at http://localhost:1234/
Server commands: [b]rowser, [q]uit
You can create your python module script named test.py formated and then use pydoc.
"""
my python module
====
This is documentation
"""
def test():
"""
Function test
"""
    print("test")
Use this to show the text from your python source script module:
python -m pydoc test
PythonProjects\test_pydoc>python -m pydoc test
Help on module test:

NAME
    test

FILE
...

Thursday, August 29, 2024

News : ... august 2024

... news for Python users and developers.
Python 3.12.5 released, see the official webpage.
... new Python 3.13.0 release candidate 1 released, you can read on this webpage.
the last one: Announcing Python Software Foundation Fellow Members for Q1 2024! from this webpage.
About the releases, I can say that all kinds of improvements are coming, I liked that they made the shell more interactive.

Monday, August 19, 2024

Python 3.12.1 : Web server with SQLite database using flask - update.

Update with new URL with params, see the first tutorial:
from flask import Flask, request, jsonify, render_template_string
import sqlite3
from datetime import datetime

app = Flask(__name__)

# Clasa pentru serverul SQL
class SQLiteServer:
    def __init__(self, db_name):
        self.db_name = db_name
        self.init_db()

    def init_db(self):
        conn = sqlite3.connect(self.db_name)
        c = conn.cursor()
        c.execute('''
            CREATE TABLE IF NOT EXISTS users (
                id INTEGER PRIMARY KEY,
                first_name TEXT,
                last_name TEXT,
                occupation TEXT,
                hobby TEXT,
                year_of_birth INTEGER,
                age INTEGER
            )
        ''')
        conn.commit()
        conn.close()

    def calculate_age(self, year_of_birth):
        # Adjust year_of_birth if only two digits are provided
        if len(str(year_of_birth)) == 2:
            if year_of_birth > int(str(datetime.now().year)[-2:]):
                year_of_birth += 1900
            else:
                year_of_birth += 2000
        current_year = datetime.now().year
        return current_year - year_of_birth

    def add_user(self, first_name, last_name, occupation, hobby, year_of_birth):
        age = self.calculate_age(year_of_birth)
        conn = sqlite3.connect(self.db_name)
        c = conn.cursor()
        c.execute('''
            INSERT INTO users (first_name, last_name, occupation, hobby, year_of_birth, age)
            VALUES (?, ?, ?, ?, ?, ?)
        ''', (first_name, last_name, occupation, hobby, year_of_birth, age))
        conn.commit()
        conn.close()

    def get_users(self):
        conn = sqlite3.connect(self.db_name)
        c = conn.cursor()
        c.execute("SELECT * FROM users")
        users = c.fetchall()
        conn.close()
        return users
    def get_users_jsonify():
        conn = sqlite3.connect('sqlite_database.db')
        c = conn.cursor()
        c.execute("SELECT * FROM users")
        users = c.fetchall()
        conn.close()
        return jsonify(users)

# Clasa pentru serverul web
class WebServer:
    def __init__(self, sqlite_server):
        self.sqlite_server = sqlite_server

    def run(self):
        app.run(debug=True)
    #   adauga user si buton de redirect la pagina users
    @app.route('/')
    def index():
        users = sqlite_server.get_users()
        return render_template_string('''
            <!DOCTYPE html>
            <html lang="en">
            <head>
                <meta charset="UTF-8">
                <meta name="viewport" content="width=device-width, initial-scale=1.0">
                <title>Flask website for testing cypress with sqlite</title>
            </head>
            <body>
                <h2>Add User</h2>
                <form action="/add_user" method="post">
                    First Name: <input type="text" name="first_name"><br>
                    Last Name: <input type="text" name="last_name"><br>
                    Occupation: <input type="text" name="occupation"><br>
                    Hobby: <input type="text" name="hobby"><br>
                    Year of Birth: <input type="text" name="year_of_birth"><br>
                    <input type="submit" value="Add User">
                </form>
                <a href="http://127.0.0.1:5000/users"><button type="button">Show Users</button></a>
            </body>
            </html>
        ''', users=users)
    @app.route('/add_user', methods=['POST'])
    def add_user():
        first_name = request.form['first_name']
        last_name = request.form['last_name']
        occupation = request.form['occupation']
        hobby = request.form['hobby']
        year_of_birth = int(request.form['year_of_birth'])
        sqlite_server.add_user(first_name, last_name, occupation, hobby, year_of_birth)
        return 'User added successfully! <a href="/">Go back</a>'
    @app.route('/users', methods=['GET'])
    def get_users():
        query_type = request.args.get('query_type', 'simple')
        
        conn = sqlite3.connect('sqlite_database.db')
        c = conn.cursor()
        
        try:
            c.execute('SELECT name FROM sqlite_master WHERE type="table" AND name="users"')
            if not c.fetchone():
                return jsonify({"error": "Table 'users' does not exist"})

            if query_type == 'advanced':
                # Advanced query logic
                first_name = request.args.get('first_name')
                last_name = request.args.get('last_name')
                occupation = request.args.get('occupation')
                hobby = request.args.get('hobby')
                year_of_birth = request.args.get('year_of_birth')

                query = 'SELECT * FROM users WHERE 1=1'
                params = []
                # Exemple query simple 
                # Basic query: /users
                # Simple query: /users?query_type=simple for simple selection
                # Addvanced query: /users?query_type=advanced&first_name=John&occupation=Engineer for advanced querying
                # Advanced query with name search: /users?query_type=advanced&first_name=John&last_name=Doe
                # Query by occupation: /users?query_type=advanced&occupation=Engineer
                # Query by hobby: /users?query_type=advanced&hobby=Reading
                # Query by year of birth: /users?query_type=advanced&year_of_birth=1990

                if first_name:
                    query += ' AND first_name LIKE ?'
                    params.append(f'%{first_name}%')
                if last_name:
                    query += ' AND last_name LIKE ?'
                    params.append(f'%{last_name}%')
                if occupation:
                    query += ' AND occupation LIKE ?'
                    params.append(f'%{occupation}%')
                if hobby:
                    query += ' AND hobby LIKE ?'
                    params.append(f'%{hobby}%')
                if year_of_birth:
                    query += ' AND year_of_birth = ?'
                    params.append(year_of_birth)

                # Query by minimum age: /users?query_type=advanced&min_age=30
                # Query by maximum age: /users?query_type=advanced&max_age=50
                # Query with ordering: /users?query_type=advanced&order_by=last_name
                # Query with limit: /users?query_type=advanced&limit=10
                # Combined query: /users?query_type=advanced&first_name=John&occupation=Engineer&min_age=25&order_by=year_of_birth&limit=5          
                # Additional advanced query options
                for param, value in request.args.items():
                    match param:
                        case 'min_age':
                            query += ' AND (? - year_of_birth) >= ?'
                            params.extend([datetime.now().year, int(value)])
                        case 'max_age':
                            query += ' AND (? - year_of_birth) <= ?'
                            params.extend([datetime.now().year, int(value)])
                        case 'order_by':
                            query += f' ORDER BY {value}'
                        case 'limit':
                            query += ' LIMIT ?'
                            params.append(int(value))
                c.execute(query, params)
            else:
                # Simple query logic
                c.execute('SELECT * FROM users')

            users = c.fetchall()
        except sqlite3.OperationalError as e:
            return jsonify({"error": str(e)})
        finally:
            conn.close()
        
        return jsonify(users)

# Instanțierea serverului SQL și a serverului web
sqlite_server = SQLiteServer('sqlite_database.db')
web_server = WebServer(sqlite_server)

if __name__ == '__main__':
    web_server.run()

Wednesday, August 14, 2024

Python 3.12.1 : Web server with SQLite database using flask.

This python surce script can be used to start a web server with an SQLite server.
For example, you can use this to test with javascript on sql server, see next image:
This is the source code:
from flask import Flask, request, jsonify, render_template_string
import sqlite3
from datetime import datetime

app = Flask(__name__)

# Clasa pentru serverul SQL
class SQLServer:
    def __init__(self, db_name):
        self.db_name = db_name
        self.init_db()

    def init_db(self):
        conn = sqlite3.connect(self.db_name)
        c = conn.cursor()
        c.execute('''
            CREATE TABLE IF NOT EXISTS users (
                id INTEGER PRIMARY KEY,
                first_name TEXT,
                last_name TEXT,
                occupation TEXT,
                hobby TEXT,
                year_of_birth INTEGER,
                age INTEGER
            )
        ''')
        conn.commit()
        conn.close()

    def calculate_age(self, year_of_birth):
        # Adjust year_of_birth if only two digits are provided
        if len(str(year_of_birth)) == 2:
            if year_of_birth > int(str(datetime.now().year)[-2:]):
                year_of_birth += 1900
            else:
                year_of_birth += 2000
        current_year = datetime.now().year
        return current_year - year_of_birth

    def add_user(self, first_name, last_name, occupation, hobby, year_of_birth):
        age = self.calculate_age(year_of_birth)
        conn = sqlite3.connect(self.db_name)
        c = conn.cursor()
        c.execute('''
            INSERT INTO users (first_name, last_name, occupation, hobby, year_of_birth, age)
            VALUES (?, ?, ?, ?, ?, ?)
        ''', (first_name, last_name, occupation, hobby, year_of_birth, age))
        conn.commit()
        conn.close()

    def get_users(self):
        conn = sqlite3.connect(self.db_name)
        c = conn.cursor()
        c.execute("SELECT * FROM users")
        users = c.fetchall()
        conn.close()
        return users

# Clasa pentru serverul web
class WebServer:
    def __init__(self, sql_server):
        self.sql_server = sql_server

    def run(self):
        app.run(debug=True)

    @app.route('/')
    def index():
        users = sql_server.get_users()
        return render_template_string('''
            <h1>Users</h1>
            <ul>
                {% for user in users %}
                    <li>{{ user[1] }} {{ user[2] }} - {{ user[3] }} - {{ user[4] }} - {{ user[5] }} ({{ user[6] }} years old)</li>
                {% endfor %}
            </ul>
            <h2>Add User</h2>
            <form action="/add_user" method="post">
                First Name: <input type="text" name="first_name"><br>
                Last Name: <input type="text" name="last_name"><br>
                Occupation: <input type="text" name="occupation"><br>
                Hobby: <input type="text" name="hobby"><br>
                Year of Birth: <input type="text" name="year_of_birth"><br>
                <input type="submit" value="Add User">
            </form>
        ''', users=users)

    @app.route('/add_user', methods=['POST'])
    def add_user():
        first_name = request.form['first_name']
        last_name = request.form['last_name']
        occupation = request.form['occupation']
        hobby = request.form['hobby']
        year_of_birth = int(request.form['year_of_birth'])
        sql_server.add_user(first_name, last_name, occupation, hobby, year_of_birth)
        return 'User added successfully! <a href="/">Go back</a>'

# Instanțierea serverului SQL și a serverului web
sql_server = SQLServer('example.db')
web_server = WebServer(sql_server)

if __name__ == '__main__':
    web_server.run()

Saturday, August 3, 2024

Blender 3D and python scripting - part 029.

This is a simple Blender 3D script that render images from myimage_000 to myimage_035 around object named Cube.
The script can be changed with any object and any steps for 0 to 360 degree.
import bpy
import math
# Set the object that the camera will orbit around
#target_object = bpy.data.objects["MyObject"]

# Create a new empty object
empty = bpy.data.objects.new("Empty", None)

# Set the empty object's location to the origin point
empty.location = (0, 0, 0)

# Set the starting position for the camera
camera = bpy.data.objects["Camera"]

# Set the number of degrees to rotate the camera around the object
degrees = 360

# Set the distance that the camera should be from the object
distance = 7.6

# Set the speed at which the camera should orbit
speed = 10

# Set the direction in which the camera should orbit (1 for clockwise, -1 for counter-clockwise)
direction = 1

# Set the camera to track the object
bpy.ops.object.select_all(action="DESELECT")
camera.select_set(True)

# Set the distance to origin point
camera.location = (-distance, 0, 0)
bpy.context.view_layer.objects.active = camera

# Remove all constraints from the object "Cube"
bpy.data.objects['Cube'].select_get()
bpy.context.view_layer.objects.active = bpy.data.objects['Cube']
bpy.ops.object.constraints_clear()

# Add a track to constraint to the object and set it
bpy.ops.object.constraint_add(type="TRACK_TO")
bpy.ops.object.track_set(type="TRACKTO")

# Set the target object as the tracking target
bpy.data.objects['Cube'].select_get()
bpy.context.view_layer.objects.active = bpy.data.objects['Cube']

# Select the file image format
bpy.context.scene.render.image_settings.file_format = 'PNG'

# Animate the camera orbiting around the object
for frame in range(0, 36):
    # Set the current frame
    bpy.context.scene.frame_set(frame)

    # Calculate the new position for the camera based on its distance from the object
    x = distance * math.sin(math.radians(frame*speed*direction))
    y = distance * math.cos(math.radians(frame*speed*direction))
    camera.location = (x,y,0)
    # Set the output path for the rendered image
    bpy.context.scene.render.filepath = "C:\\tmp\\myimage_" + str(frame).zfill(3) + ".png"
    # Render the frame and save it to the output file
    bpy.ops.render.render(write_still=True)

Sunday, July 14, 2024

The Zen of Python ...

... see the The Zen of Python, with this source code import this:
python
Python 3.12.4 (tags/v3.12.4:8e8a4ba, Jun  6 2024, 19:30:16) [MSC v.1940 64 bit (AMD64)] on win32
Type "help", "copyright", "credits" or "license" for more information.
>>> import this
The Zen of Python, by Tim Peters

Beautiful is better than ugly.
Explicit is better than implicit.
Simple is better than complex.
Complex is better than complicated.
Flat is better than nested.
Sparse is better than dense.
Readability counts.
Special cases aren't special enough to break the rules.
Although practicality beats purity.
Errors should never pass silently.
Unless explicitly silenced.
In the face of ambiguity, refuse the temptation to guess.
There should be one-- and preferably only one --obvious way to do it.
Although that way may not be obvious at first unless you're Dutch.
Now is better than never.
Although never is often better than *right* now.
If the implementation is hard to explain, it's a bad idea.
If the implementation is easy to explain, it may be a good idea.
Namespaces are one honking great idea -- let's do more of those!