analitics

Pages

Monday, October 3, 2016

The python CacheControl module - part 002.

Today was a hard day and this is the reason I make this short tutorial.
Teory of HTTP:
HTTP specifies four response cache headers that you can set to enable caching:
  • Cache-Control
  • Expires
  • ETag
  • Last-Modified
These four headers are used to help cache your responses into two different models:
  • Expiration Caching - used to cache your entire response for a specific amount of time (e.g. 24 hours), simple, but cache invalidation is more difficult;
  • Validation Caching - this is more complex and used to cache your response, but allows you to dynamically invalidate it as soon as your content changes.
First you need to know about this code is a raw example about how we can access cache of the page.
Come with a simple class named DictCache. You can named with any name and is a BaseCache class.
The next step I make is to show you how can access it.
One simpe way is to see the page - first session.
The complex come when you need to access for example data and info like:
 'adapters', 'auth', 'cert', 'close', 'cookies', 'delete', 'get', 'get_adapter', 'head', 'headers', 'hooks', 'max_redirects', 'merge_environment_settings', 'mount', 'options', 'params', 'patch', 'post', 'prepare_request', 'proxies', 'put', 'rebuild_auth', 'rebuild_method', 'rebuild_proxies', 'redirect_cache', 'request', 'resolve_redirects', 'send', 'stream', 'trust_env', 'verify'
And this is come with teh second session from this source code:

import requests
from cachecontrol import CacheControl
from cachecontrol.cache import BaseCache

class DictCache(BaseCache):

    def __init__(self, init_dict=None):
        self.data = init_dict or {}

    def get(self, key):
        return self.data.get(key, None)

    def set(self, key, value):
        self.data.update({key: value})

    def delete(self, key):
        self.data.pop(key)

print "first session requests"
sess = requests.session()
cached_sess = CacheControl(sess)
response = cached_sess.get('http://google.com')
print '=================='
print 'see page by add this: print response.text'
print '=================='
print "second session BaseCache"
sess2 = requests.session()
base=DictCache(sess2)
print '=================='
print "dir(base)"
print dir(base)
print '=================='
print"dir(base.data)"
print dir(base.data)
print '=================='
print"base.data.max_redirects"
print base.data.max_redirects
print '=================='

Sunday, October 2, 2016

The python CacheControl module - part 001.

This tutorials series want to be a better approach to understand the several mechanisms that HTTP provides for web cache validation. Let's start with the first part.
You can install it with pip
C:\>cd Python27
C:\Python27>cd Scripts
C:\Python27\Scripts>pip install cachecontrol
Collecting cachecontrol
  Downloading CacheControl-0.11.7.tar.gz
Requirement already satisfied (use --upgrade to upgrade): 
requests in c:\python27\lib\site-packages (from cachecontrol)
Building wheels for collected packages: cachecontrol
  Running setup.py bdist_wheel for cachecontrol ... done
  Stored in directory: C:\Users\GeorgeCatalin\AppData\Local\pip\\
Cache\wheels\9b\94\d2\1793b004461b5bc238a89e260cd2b9f770437c42424fdd0943
Successfully built cachecontrol
Installing collected packages: cachecontrol
Successfully installed cachecontrol-0.11.7
First test come with the default example and show all with the text.
import requests
from cachecontrol import CacheControl
sess = requests.session()
cached_sess = CacheControl(sess)
response = cached_sess.get('http://google.com')
print response

print response.text
...
The requests python module is an Apache2 Licensed HTTP library to allow you to send HTTP/1.1 requests.
This help you to add headers, form data, multipart files, and parameters with simple
Python dictionaries, and access the response data in the same way.

The theory part.
You can use CacheControl with the basic wrapper way or via a requests Transport Adapter.
The Transport Adapters provide a mechanism to define interaction methods for an HTTP service.
The code will come with this template (docs example):
sess = requests.Session()
sess.mount('http://', CacheControlAdapter())
This mean the CacheControl assumes you are using a requests.Session for your requests.
So the Transport Adapter will cover the HTTPCore and WSGICore.
Now, both (the wrapper and adapter classes) allow providing a custom cache store object.
This is used for storing your cached data.
The next step will be
from cachecontrol.caches import FileCache
sess = CacheControl(requests.Session(),
                    cache=FileCache('.webcache'))
The result will create a directory called .webcache and store a file for each cached request.
Also the CacheControl python module comes with a few storage backends for storing your cache objects.
First is DictCache is the default cache, next is FileCache is similar to the caching mechanism provided by httplib2 and the last is RedisCache uses a Redis database to store values.
One note about requesting the filecache extra can use dependency with: pip install cachecontrol[filecache].
The CacheControl’s support of ETags by returns a response with the appropriate If-None-Match header.
Seem the ETag support only takes effect when the time has expired.
The ETag or entity tag, is part of HTTP, the protocol for the World Wide Web and provides for web cache validation. You can also take a look at Hypertext Transfer Protocol (HTTP/1.1): Caching.
The documentation of cachecontrol python module tells us:
Caching is hard! It is considered one of the great challenges of computer science.
Yes! you can agree with that, because some parts need to be understand well.
This issues: Timezones, Cached Responses and Query String Params are the most important parts.

Any info about this issue will be grea, just put your comments.


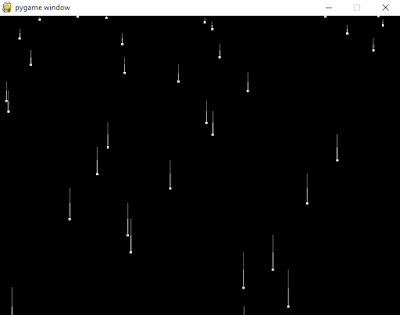
Another simple effect with pygame.

The pygame module come with many features for users.
I used the pygame version to make one simple tutorial about pallete functions :
>>> print pygame.version.ver
1.9.2b1

The result of my tutorial is this:


Thursday, September 22, 2016

Another learning python post with pygame.

This is a simple python script with pygame python module.
I make it for for educational purposes for the children.
I used words into romanian language for variables, functions and two python class.
See this tutorial here
pygame python

Thursday, September 8, 2016

OpenGL and OpenCV with python 2.7 - part 003.

If you have seen the last tutorial about OpenCV, then this tutorial comes to complete with one source code.
This source code will cut the background of webcam.
The webcam output is take by VideoCapture function.
This part of source code: np.zeros((1,65),np.float64) will return a new array of given shape and type, filled with zeros.
The result of this parts is used with function grabCut from cv2 python module.
This is the source code:

import numpy as np
import cv2
cap = cv2.VideoCapture(0)
while(True):
    ret, img = cap.read()
    #img = cv2.imread('test002.jpg')
    mask = np.zeros(img.shape[:2],np.uint8)

    bgdModel = np.zeros((1,65),np.float64)
    fgdModel = np.zeros((1,65),np.float64)

    rect = (50,50,450,290)
    cv2.grabCut(img,mask,rect,bgdModel,fgdModel,5,cv2.GC_INIT_WITH_RECT)

    mask2 = np.where((mask==2)|(mask==0),0,1).astype('uint8')
    img = img*mask2[:,:,np.newaxis]
    cv2.imshow('frame',img)
    if 0xFF & cv2.waitKey(5) == 27:
        break
cap.release()
cv2.destroyAllWindows()
The end result will be something like:

Saturday, August 27, 2016

The python dizzy with clean instalation, is true !?

This will refer the python 2.7 working - but it can be extrapolated to other versions.
Many users have trouble installing python modules. The problem comes from old modules outdated or those who did not support.
I will present a few examples. I hope to come and support as necessary to remedy in time or exclusion through better solutions.
This is the main question for today: The python dizzy with clean instalation, is true !?
I don't think is a unwanted hacking of my python instalation using internet.
But I search and I saw many questions and erros over pip and Scripts folders.
I will deal just for this issue:
After I make one clean python 2.7 and all my python modules works well I used my windows to deal with some ssh software.
The next step I make it with python was to try to update with pip.
The strange think is with this files from Scripts folders:
12-Aug-16 06:41 PM 98,150 pyrsa-decrypt-bigfile.exe
12-Aug-16 06:41 PM 98,134 pyrsa-decrypt.exe
12-Aug-16 06:41 PM 98,150 pyrsa-encrypt-bigfile.exe
12-Aug-16 06:41 PM 98,134 pyrsa-encrypt.exe
12-Aug-16 06:41 PM 98,132 pyrsa-keygen.exe
12-Aug-16 06:41 PM 98,155 pyrsa-priv2pub.exe
12-Aug-16 06:41 PM 98,128 pyrsa-sign.exe
12-Aug-16 06:41 PM 98,132 pyrsa-verify.exe
and this file from same Script folder:
21-Jun-16 09:09 PM 0 python.exe
When I need to use pip I got errors.Then I try to fix with this:
pip install --upgrade ndg-httpsclient
and seem to be working now.
But I need to find from where come this file and why is this python file with:
C:\Python27\Scripts>python
Access is denied.
Maybe will be fix with a clean python instalation.
But the next step is and one of my concern is how to preserve this python instalation.
For example today the
pip update issue
come with many errors and this will be fixed.
Let's see how I fixed some of this.

First download Microsoft Visual C++ Compiler for Python 2.7.
This will fix this error:
error: Microsoft Visual C++ 9.0 is required. Get it from http://aka.ms/vcpython27
.

If you got this error: RuntimeError: Freetype library not found
C:\Python27>Scripts\pip install freetype-py
Collecting freetype-py
Downloading freetype-py-1.0.2.tar.gz (394kB)
100% |################################| 399kB 758kB/s
Building wheels for collected packages: freetype-py
Running setup.py bdist_wheel for freetype-py ... done
You can see also this freetype-py will not working:
C:\Python27>python.exe
Python 2.7.8 (default, Jun 30 2014, 16:08:48) [MSC v.1500 64 bit (AMD64)] on win32
Type "help", "copyright", "credits" or "license" for more information.
>>> import freetype
Traceback (most recent call last):
File "", line 1, in
File "C:\Python27\lib\site-packages\freetype\__init__.py", line 21, in
from freetype.raw import *
File "C:\Python27\lib\site-packages\freetype\raw.py", line 37, in
raise RuntimeError('Freetype library not found')
RuntimeError: Freetype library not found
Also some python module has into cloud dizzy stuff.
For example the pycryptodome come with many features and working great.
Also some alternative is a bad solution.
It is hard to find a solution to the problem of leaving all these modules.
Any solutions?

The python module pycryptodome - part 001.

The tutorial for today come with this subject: python module pycryptodome.
According to the official website:
PyCryptodome is a self-contained Python package of low-level cryptographic primitives.
It supports Python 2.4 or newer, all Python 3 versions and PyPy.
official website.
Also this python module can be used with Windows and Linux (Ubuntu and Fedora distro linux).
I don't see anything about Mac OS - Apple OS Mac_OS - wikipedia.
First step of this tutorial:

C:\Python27\Scripts>pip install pycryptodome
Collecting pycryptodome
Downloading pycryptodome-3.4-cp27-cp27m-win_amd64.whl (7.5MB)
100% |################################| 7.5MB 88kB/s
Installing collected packages: pycryptodome
Successfully installed pycryptodome-3.4
You need to have command.com shell admin rights or you got errors:
C:\Python27\Scripts>python -m Crypto.SelfTest
Access is denied.
You can test it the instalation with:
C:\Python27>python -m Crypto.SelfTest
Skipping AESNI tests
...........................................................................................................................................................................................................................................................................................................................................................................

.......................
----------------------------------------------------------------------
Ran 22263 tests in 171.266s

OK
One simple test with this module:
C:\Python27>python.exe
Python 2.7.8 (default, Jun 30 2014, 16:08:48) [MSC v.1500 64 bit (AMD64)] on win32
Type "help", "copyright", "credits" or "license" for more information.
>>> from Crypto.Cipher import AES
>>> from Crypto.Random import get_random_bytes
>>>
Most of resurces and features can be found here also can have some example at Matthew Green.
I will come with another tutorial about this python module.
Have a great day.

Thursday, August 11, 2016

Hide your info with stepic python module.

I will show a funny way to put your info into one image and then show this info.
First you need one image. I used this image:


First need to use Python 2.7 with Image ( Pillow python module) and stepic python module.
... and follow the below steps:

C:\Python27>cd Scripts
C:\Python27\Scripts>pip install Image
C:\Python27\Scripts>pip install stepic
C:\Python27\Scripts>cd ..

C:\Python27>python
Python 2.7.8 (default, Jun 30 2014, 16:08:48) [MSC v.1500 64 bit (AMD64)] on win32
Type "help", "copyright", "credits" or "license" for more information.

To encode and then to show the text from one image I used this python script:


import PIL
from PIL import Image
import stepic
im=Image.open("MonaLisa.jpg")
im1 = stepic.encode(im,'The smallest feline is a masterpiece.')
im1.save('test_encode.jpg','JPEG')
im.show()
im1.show()
decoding=stepic.decode(im1)
data_encode=decoding.decode()
print data_encode

The Python and antivirus Kaspersky antivirus.

The Kaspersky antivirus is very reserved versus python.
Even if the pip will try to install one module also any instance of numpy module has one replay over Kaspersky antivirus.
I try to start python shell and then import numpy after that I close the shell and I run it again. 
Update I try also help() / modules command under shell and more and randmon pyd file are blocked. This is strange because the pyd files are random.
See the result is how Kaspersky and python shell works together:
What do you think about that?


Wednesday, July 6, 2016

OpenCV with cutting video background.

This source code is a try to solve the video cutting background.
import cv2
from cv2 import *
import numpy as np
cap = cv2.VideoCapture("avi_test_001.avi")
while(True):
    ret, img = cap.read()
    mask = np.zeros(img.shape[:2],np.uint8)

    bgdModel = np.zeros((1,65),np.float64)
    fgdModel = np.zeros((1,65),np.float64)

    rect = (50,50,450,290)
    cv2.grabCut(img,mask,rect,bgdModel,fgdModel,5,cv2.GC_INIT_WITH_RECT)

    mask2 = np.where((mask==2)|(mask==0),0,1).astype('uint8')
    img = img*mask2[:,:,np.newaxis]
    cv2.imshow('frame',img)
    if 0xFF & cv2.waitKey(5) == 27:
        break
cap.release()
cv2.destroyAllWindows()

Saturday, June 25, 2016

OpenGL and OpenCV with python 2.7 - part 002.

I deal today with opencv and I fix some of my errors.
One is this error I got with cv2.VideoCapture. When I  try to used with load video and createBackgroundSubtractorMOG2() i got this:

cv2.error:   C:\builds\master_PackSlaveAddon-win64-vc12-static\opencv\modules\highgui\src\window.cpp:281:  error: (-215) size.width<0 amp="" cv::imshow="" function="" i="" in="" size.height="">
You need also to have opencv_ffmpeg310.dll and opencv_ffmpeg310_64.dll into your Windows C:\Windows\System32, this will help me to play videos.
Now make sure you have the opencv version 3.1.0 because opencv come with some changes over python.
C:\Python27\python
Python 2.7.8 (default, Jun 30 2014, 16:08:48) [MSC v.1500 64 bit (AMD64)] on win32
Type "help", "copyright", "credits" or "license" for more information.
>>>import cv2
>>>print cv2.__version__
3.1.0

You can take some infos from about opencv python module - cv2 with:

>>>cv2.getBuildInformation()
...
>>>cv2.getCPUTickCount()
...
>>>print cv2.getNumberOfCPUs()
...
>>>print cv2.ocl.haveOpenCL()
True

You can also see some error by disable OpenCL:

>>>cv2.ocl.setUseOpenCL(False)
>>>print cv2.ocl.useOpenCL()
False

Now will show you how to use webcam gray and color , and play one video:
webcam color

import numpy as np
import cv2
cap = cv2.VideoCapture(0)
while(True):
    ret, frame = cap.read()
    cv2.imshow('frame',frame)
    if 0xFF & cv2.waitKey(5) == 27:
        break
cap.release()
cv2.destroyAllWindows()

webcam gray

import numpy as np
import cv2
cap = cv2.VideoCapture(0)
while(True):
    ret, frame = cap.read()
    gray = cv2.cvtColor(frame, cv2.COLOR_BGR2GRAY)
    cv2.imshow('frame',gray)
    if 0xFF & cv2.waitKey(5) == 27:
        break
cap.release()
cv2.destroyAllWindows()

play video

import cv2
from cv2 import *
capture = cv2.VideoCapture("avi_test_001.avi")
while True:
    ret, img = capture.read()
    cv2.imshow('some', img)
    if 0xFF & cv2.waitKey(5) == 27:
        break
cv2.destroyAllWindows()


Wednesday, June 22, 2016

OpenGL and OpenCV with python 2.7 - part 001.

First you need to know what version of python you use.
C:\Python27>python
Python 2.7.8 (default, Jun 30 2014, 16:08:48) [MSC v.1500 64 bit (AMD64)] on win32
Type "help", "copyright", "credits" or "license" for more information.
>>>

You need also to download the OpenCV version 3.0 from here.
Then run the executable into your folder and get cv2.pyd file from \opencv\build\python\2.7\x64 and paste to \Python27\Lib\site-packages.
If you use then use 32 bit python version then use this path: \opencv\build\python\2.7\x86.
Use pip to install next python modules:
C:\Python27\Scripts>pip install PyOpenGL
...
C:\Python27\Scripts>pip install numpy
...
C:\Python27\Scripts>pip install matplotlib
...

Let's see how is working OpenGL:
C:\Python27>python
Python 2.7.8 (default, Jun 30 2014, 16:08:48) [MSC v.1500 64 bit (AMD64)] on win32
Type "help", "copyright", "credits" or "license" for more information.
>>> import OpenGL
>>> import numpy
>>> import matplotlib
>>> import cv2
>>> from OpenGL import *
>>> from numpy import *
>>> from matplotlib import *
>>> from cv2 import *

You can also use dir(module) to see more. You can import all from GL, GLU and GLUT.
>>> dir(OpenGL)
['ALLOW_NUMPY_SCALARS', 'ARRAY_SIZE_CHECKING', 'CONTEXT_CHECKING', 'ERROR_CHECKING', 'ERROR_LOGGING', 'ERROR_ON_COPY', 'FORWARD_COMPATIBLE_ONLY', 'FULL_LOGGING', 'FormatHandler', 'MODULE_ANNOTATIONS', 'PlatformPlugin', 'SIZE_1_ARRAY_UNPACK', 'STORE_POINTERS', 'UNSIGNED_BYTE_IMAGES_AS_STRING', 'USE_ACCELERATE', 'WARN_ON_FORMAT_UNAVAILABLE', '__builtins__', '__doc__', '__file__', '__name__', '__package__', '__path__', '__version__', '_bi', 'environ_key', 'os', 'plugins', 'sys', 'version']
>>> from OpenGL.GL import *
>>> from OpenGL.GLU import *
>>> from OpenGL.GLUT import *
>>> from OpenGL.WGL import *

If you are very good with python OpenGL module then you can import just like this example:
>>> from OpenGL.arrays import ArrayDatatype
>>> from OpenGL.GL import (GL_ARRAY_BUFFER, GL_COLOR_BUFFER_BIT,
... GL_COMPILE_STATUS, GL_FALSE, GL_FLOAT, GL_FRAGMENT_SHADER,
... GL_LINK_STATUS, GL_RENDERER, GL_SHADING_LANGUAGE_VERSION,
... GL_STATIC_DRAW, GL_TRIANGLES, GL_TRUE, GL_VENDOR, GL_VERSION,
... GL_VERTEX_SHADER, glAttachShader, glBindBuffer, glBindVertexArray,
... glBufferData, glClear, glClearColor, glCompileShader,
... glCreateProgram, glCreateShader, glDeleteProgram,
... glDeleteShader, glDrawArrays, glEnableVertexAttribArray,
... glGenBuffers, glGenVertexArrays, glGetAttribLocation,
... glGetProgramInfoLog, glGetProgramiv, glGetShaderInfoLog,
... glGetShaderiv, glGetString, glGetUniformLocation, glLinkProgram,
... glShaderSource, glUseProgram, glVertexAttribPointer)

Most of this OpenGL need to have a valid OpenGL rendering context.
For example you can test it with WGL ( WGL or Wiggle is an API between OpenGL and the windowing system interface of Microsoft Windows):
>>> import OpenGL
>>> from OpenGL import *
>>> from OpenGL import WGL
>>> print WGL.wglGetCurrentDC()
None

Now , let's see the OpenCV python module with s=one simple webcam python script:
import numpy as np
import cv2
cap = cv2.VideoCapture(0)
while(True):
    ret, frame = cap.read()
    gray = cv2.cvtColor(frame, cv2.COLOR_BGR2GRAY)
    cv2.imshow('frame',gray)
    if cv2.waitKey(1) & 0xFF == ord('q'):
        break
cap.release()
cv2.destroyAllWindows()
This is result of my webcam:


Tuesday, June 21, 2016

Scrapy python module - part 001.

To install pip under python 2.7.8, securely download get-pip.py into Python27 folder.
Use this command:

C:\Python27\python.exe get-pip.py
...
C:\Python27\Scripts>pip2.7.exe install urllib3
C:\Python27\Scripts>pip2.7 install requests
C:\Python27\Scripts>pip install Scrapy

Some of python modules are installed:

Successfully built PyDispatcher pycparser
Installing collected packages: cssselect, queuelib, six, enum34, ipaddress, idna, pycparser, cffi, pyasn1, cryptography, pyOpenSSL, w3lib, lxml, parsel, PyDispatcher, zope.interface, Twisted, attrs, pyasn1-modules, service-identity, Scrapy
Successfully installed PyDispatcher-2.0.5 Scrapy-1.1.0 Twisted-16.2.0 attrs-16.0.0 cffi-1.7.0 cryptography-1.4 cssselect-0.9.2 enum34-1.1.6 idna-2.1 ipaddress-1.0.16 lxml-3.6.0 parsel-1.0.2 pyOpenSSL-16.0.0 pyasn1-0.1.9 pyasn1-modules-0.0.8 pycparser-2.14 queuelib-1.4.2 service-identity-16.0.0 six-1.10.0 w3lib-1.14.2 zope.interface-4.2.0


>>> print scrapy.version_info
(1, 1, 0)


>>> help(scrapy)
PACKAGE CONTENTS
_monkeypatches
cmdline
command
commands (package)
conf
contracts (package)
contrib (package)
contrib_exp (package)
core (package)
crawler
downloadermiddlewares (package)
dupefilter
dupefilters
exceptions
exporters
extension
extensions (package)
http (package)
interfaces
item
link
linkextractor
linkextractors (package)
loader (package)
log
logformatter
mail
middleware
pipelines (package)
project
resolver
responsetypes
selector (package)
settings (package)
shell
signalmanager
signals
spider
spiderloader
spidermanager
spidermiddlewares (package)
spiders (package)
squeue
squeues
stats
statscol
statscollectors
telnet
utils (package)
xlib (package)
...


C:\Python27\c:\Python27\Scripts\scrapy.exe startproject test_scrapy
New Scrapy project 'test_scrapy', using template directory 'c:\\python27\\lib\\site-packages\\scrapy\\templates\\project', created in:
C:\Python27\test_scrapy

You can start your first spider with:
cd test_scrapy
scrapy genspider example example.com

C:\Python27\cd test_scrapy

C:\Python27\test_scrapy>tree
Folder PATH listing
Volume serial number is 9A67-3A80
C:.
└───test_scrapy
└───spiders

Now you need to install win32api with this python module:
pip install pypiwin32
...
Downloading pypiwin32-219-cp27-none-win_amd64.whl (7.3MB)
100% |################################| 7.3MB 61kB/s
Installing collected packages: pypiwin32
Successfully installed pypiwin32-219

... and test scrapy bench:
C:\Python27\Scripts\scrapy.exe bench
2016-06-21 22:45:20 [scrapy] INFO: Scrapy 1.1.0 started (bot: scrapybot)
2016-06-21 22:45:20 [scrapy] INFO: Overridden settings: {'CLOSESPIDER_TIMEOUT': 10, 'LOG_LEVEL': 'INFO', 'LOGSTATS_INTERVAL': 1}
2016-06-21 22:45:39 [scrapy] INFO: Enabled extensions:
['scrapy.extensions.closespider.CloseSpider',
'scrapy.extensions.logstats.LogStats',
'scrapy.extensions.telnet.TelnetConsole',
'scrapy.extensions.corestats.CoreStats']
2016-06-21 22:45:46 [scrapy] INFO: Enabled downloader middlewares:
['scrapy.downloadermiddlewares.httpauth.HttpAuthMiddleware',
'scrapy.downloadermiddlewares.downloadtimeout.DownloadTimeoutMiddleware',
'scrapy.downloadermiddlewares.useragent.UserAgentMiddleware',
'scrapy.downloadermiddlewares.retry.RetryMiddleware',
'scrapy.downloadermiddlewares.defaultheaders.DefaultHeadersMiddleware',
'scrapy.downloadermiddlewares.redirect.MetaRefreshMiddleware',
'scrapy.downloadermiddlewares.httpcompression.HttpCompressionMiddleware',
'scrapy.downloadermiddlewares.redirect.RedirectMiddleware',
'scrapy.downloadermiddlewares.cookies.CookiesMiddleware',
'scrapy.downloadermiddlewares.chunked.ChunkedTransferMiddleware',
'scrapy.downloadermiddlewares.stats.DownloaderStats']
2016-06-21 22:45:46 [scrapy] INFO: Enabled spider middlewares:
['scrapy.spidermiddlewares.httperror.HttpErrorMiddleware',
'scrapy.spidermiddlewares.offsite.OffsiteMiddleware',
'scrapy.spidermiddlewares.referer.RefererMiddleware',
'scrapy.spidermiddlewares.urllength.UrlLengthMiddleware',
'scrapy.spidermiddlewares.depth.DepthMiddleware']
2016-06-21 22:45:46 [scrapy] INFO: Enabled item pipelines:
[]
2016-06-21 22:45:46 [scrapy] INFO: Spider opened
2016-06-21 22:45:46 [scrapy] INFO: Crawled 0 pages (at 0 pages/min), scraped 0 items (at 0 items/min)
2016-06-21 22:45:48 [scrapy] INFO: Crawled 27 pages (at 1620 pages/min), scraped 0 items (at 0 items/min)
2016-06-21 22:45:49 [scrapy] INFO: Crawled 59 pages (at 1920 pages/min), scraped 0 items (at 0 items/min)
2016-06-21 22:45:50 [scrapy] INFO: Crawled 85 pages (at 1560 pages/min), scraped 0 items (at 0 items/min)
2016-06-21 22:45:51 [scrapy] INFO: Crawled 123 pages (at 2280 pages/min), scraped 0 items (at 0 items/min)
2016-06-21 22:45:52 [scrapy] INFO: Crawled 149 pages (at 1560 pages/min), scraped 0 items (at 0 items/min)
2016-06-21 22:45:53 [scrapy] INFO: Crawled 181 pages (at 1920 pages/min), scraped 0 items (at 0 items/min)
2016-06-21 22:45:54 [scrapy] INFO: Crawled 211 pages (at 1800 pages/min), scraped 0 items (at 0 items/min)
2016-06-21 22:45:55 [scrapy] INFO: Crawled 237 pages (at 1560 pages/min), scraped 0 items (at 0 items/min)
2016-06-21 22:45:56 [scrapy] INFO: Crawled 269 pages (at 1920 pages/min), scraped 0 items (at 0 items/min)
2016-06-21 22:45:57 [scrapy] INFO: Closing spider (closespider_timeout)
2016-06-21 22:45:57 [scrapy] INFO: Crawled 307 pages (at 2280 pages/min), scraped 0 items (at 0 items/min)
2016-06-21 22:45:57 [scrapy] INFO: Dumping Scrapy stats:
{'downloader/request_bytes': 97844,
'downloader/request_count': 317,
'downloader/request_method_count/GET': 317,
'downloader/response_bytes': 469955,
'downloader/response_count': 317,
'downloader/response_status_count/200': 317,
'dupefilter/filtered': 204,
'finish_reason': 'closespider_timeout',
'finish_time': datetime.datetime(2016, 6, 21, 19, 45, 57, 835000),
'log_count/INFO': 17,
'request_depth_max': 14,
'response_received_count': 317,
'scheduler/dequeued': 317,
'scheduler/dequeued/memory': 317,
'scheduler/enqueued': 6136,
'scheduler/enqueued/memory': 6136,
'start_time': datetime.datetime(2016, 6, 21, 19, 45, 46, 986000)}
2016-06-21 22:45:57 [scrapy] INFO: Spider closed (closespider_timeout)

Into the next tutorial I will try to use scrapy.
If you have some ideas about how to do the next step just send me one comment.