analitics

Pages

Showing posts with label modules. Show all posts

Wednesday, October 18, 2023

Python 3.12.0 : PyAutoGUI example.

PyAutoGUI lets your Python scripts control the mouse and keyboard to automate interactions with other applications.
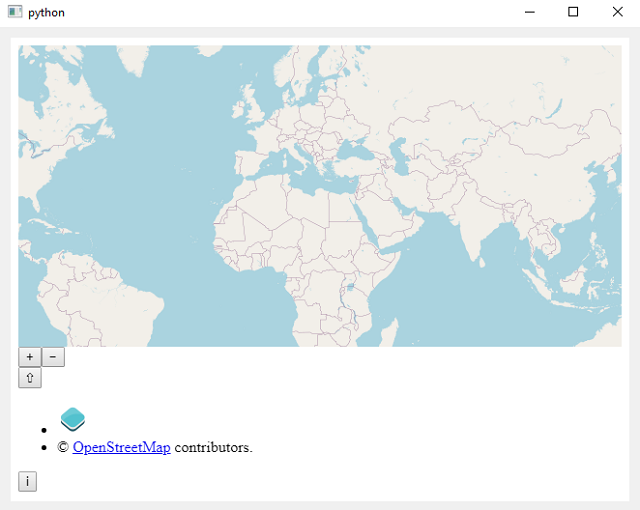
Make sure the modal dialog window is active and the desired text is visible before running the script.
This script waits for the user to activate the modal dialog window (for example, by clicking on the dialog window) and then moves the cursor to the coordinates of the label in the dialog window.
Copies the selected text to the clipboard using the classic Ctr and C keys.
Let's see the source code that does this.
import pyautogui
import time

# Display a short notification to prompt the user to activate the modal dialog window
print("Please activate the modal dialog window.")

# Wait for the user to activate the modal dialog window (you can click in the dialog window)
time.sleep(10) # Wait 10 seconds or enough time to activate the window

# Get the coordinates where you want to read the text on the label
x_label = 200 # Replace with the correct x coordinates
y_label = 300 # Replace with the correct y coordinates

# Move the mouse cursor to the coordinates of the label
pyautogui.moveTo(x_label, y_label)

# Select the text in the label using the mouse
pyautogui.dragTo(x_label + 200, y_label, duration=1) # Substitute the appropriate coordinates and duration

# Copies the selected text to the clipboard
pyautogui.hotkey("ctrl", "c")

# You can use the clipboard to access the read text
import clipboard
text_copied = clipboard.paste()

Friday, October 13, 2023

Blender 3D and python scripting - part 026.

Today I tested the bpy python module from Blender 3D software version 3.5 and I made this lite addon that showed me a modal dialog and checked and installed the Pillow python module.
The script don't install Pillow because is not fixed.
The main reason was to add my Python tools and features to Blender 3D and share with you.
bl_info = {
    "name": "Tools by catafest",
    "blender": (3, 0, 0),
    "category": "3D View",
}

import bpy
from bpy.types import Operator, Panel
from bpy.props import StringProperty

try:
    import importlib
    importlib.import_module("Pillow")
    PIL_installed = True
except ImportError:
    PIL_installed = False

def install_pillow():
    import subprocess
    try:
        subprocess.run([bpy.app.binary_path, '--python-exit-code', '1', '-m', 'ensurepip'])
        subprocess.check_call([bpy.app.binary_path, '-m', 'pip', 'install', 'Pillow'])
    except subprocess.CalledProcessError as e:
        print("Eroare la instalarea Pillow:", e)

# Operator pentru a afișa fereastra modală cu informații despre instalarea Pillow
class CATAFEST_IMAGES_OT_show_pillow_message(Operator):
    bl_idname = "catafest.show_pillow_message"
    bl_label = "Show Pillow Message"

    def execute(self, context):
        global PIL_installed
        message = "Pillow este instalat." if PIL_installed else "Pillow nu este instalat."

        # Dacă Pillow nu este instalat, încercați să-l instalați
        if not PIL_installed:
            install_pillow()
            try:
                import importlib
                importlib.import_module("Pillow")
                PIL_installed = True
                message = "Pillow a fost instalat cu succes!" if PIL_installed else "Eroare la instalarea Pillow."
            except ImportError:
                PIL_installed = False

        # Afișați fereastra modală în centrul ecranului
        bpy.ops.catafest.show_modal_message('INVOKE_DEFAULT', title="Starea Pillow", message=message)
        return {'FINISHED'}

    def invoke(self, context, event):
        return self.execute(context)

# Operator pentru a afișa fereastra modală personalizată
class CATAFEST_IMAGES_OT_show_modal_message(Operator):
    bl_idname = "catafest.show_modal_message"
    bl_label = "Show Modal Message"

    title: bpy.props.StringProperty(default="Message")
    message: bpy.props.StringProperty(default="")

    def execute(self, context):
        return {'FINISHED'}

    def invoke(self, context, event):
        wm = context.window_manager
        return wm.invoke_props_dialog(self, width=400)

    def draw(self, context):
        layout = self.layout
        layout.label(text=self.message)

# Panel pentru bara laterală din 3D View
class VIEW3D_PT_tools_image(Panel):
    bl_label = "Images"
    bl_idname = "VIEW3D_PT_tools_image"
    bl_space_type = 'VIEW_3D'
    bl_region_type = 'UI'
    bl_category = 'Tools by catafest'

    def draw(self, context):
        layout = self.layout
        layout.operator(CATAFEST_IMAGES_OT_show_modal_message.bl_idname)
        layout.operator(CATAFEST_IMAGES_OT_show_pillow_message.bl_idname)

def register():
    bpy.utils.register_class(CATAFEST_IMAGES_OT_show_modal_message)
    bpy.utils.register_class(CATAFEST_IMAGES_OT_show_pillow_message)
    bpy.utils.register_class(VIEW3D_PT_tools_image)

def unregister():
    bpy.utils.unregister_class(CATAFEST_IMAGES_OT_show_modal_message)
    bpy.utils.unregister_class(CATAFEST_IMAGES_OT_show_pillow_message)
    bpy.utils.unregister_class(VIEW3D_PT_tools_image)

if __name__ == "__main__":
    register()

Monday, September 18, 2023

News : Amazon free python audible audiobook.

Although Python programming language comes with many learning resources, you can find a lot of free audiobooks on Amazon.
You can try a free trial then you need to pay $14.95 a month after 30 days - cancel online anytime.

Wednesday, May 24, 2023

Python 3.11.0 : Exo - domain-specific programming language in python.

Exo is a domain-specific programming language that helps low-level performance engineers transform very simple programs that specify what they want to compute into very complex programs that do the same thing as the specification, only much, much faster.
You can find it on GitHub project and on the official webpage.
Let's install it with pip tool:
C:\PythonProjects>mkdir exo-lang_001

C:\PythonProjects>cd exo-lang_001

C:\PythonProjects\exo-lang_001>pip install exo-lang --user
Collecting exo-lang
  Downloading exo_lang-0.0.2-py3-none-any.whl (142 kB)
  ...
Successfully installed PySMT-0.9.5 asdl-0.1.5 asdl-adt-0.1.0 astor-0.8.1 exo-lang-0.0.2 tomli-2.0.1 
yapf-0.33.0 z3-solver-4.12.2.0
Let's test with this default example but using virtual environments
This allow me to install Python packages in an isolated location from the rest of your system instead of installing them system-wide.
C:\PythonProjects\exo-lang_001>pip install virtualenv --user
...
C:\PythonProjects\exo-lang_001>python -m venv venv
C:\PythonProjects\exo-lang_001>venv\Scripts\activate.bat

(venv) C:\PythonProjects\exo-lang_001>python -m pip install -U setuptools wheel
Successfully installed setuptools-67.8.0 wheel-0.40.0

[notice] A new release of pip available: 22.3 -> 23.1.2
[notice] To update, run: python.exe -m pip install --upgrade pip
(venv) C:\PythonProjects\exo-lang_001>python.exe -m pip install --upgrade pip
Requirement already satisfied: pip in c:\pythonprojects\exo-lang_001\venv\lib\site-packages (22.3)
Collecting pip
  Using cached pip-23.1.2-py3-none-any.whl (2.1 MB)
...
Successfully installed pip-23.1.2
(venv) C:\PythonProjects\exo-lang_001>python -m pip install exo-lang
...
Installing collected packages: z3-solver, PySMT, asdl, tomli, numpy, attrs, astor, yapf, asdl-adt, exo-lang
Successfully installed PySMT-0.9.5 asdl-0.1.5 asdl-adt-0.1.0 astor-0.8.1 attrs-23.1.0 exo-lang-0.0.2 numpy-1.24.3
tomli-2.0.1 yapf-0.33.0 z3-solver-4.12.2.0
Let's try a simple example from official webpage:
(venv) C:\PythonProjects\exo-lang_001>notepad example.py
# example.py
from __future__ import annotations
from exo import *

@proc
def example_sgemm(
    M: size,
    N: size,
    K: size,
    C: f32[M, N] @ DRAM,
    A: f32[M, K] @ DRAM,
    B: f32[K, N] @ DRAM,
):
    for i in seq(0, M):
        for j in seq(0, N):
            for k in seq(0, K):
                C[i, j] += A[i, k] * B[k, j]
Use this command and check the out folder:
(venv) C:\PythonProjects\exo-lang_001>cd out
(venv) C:\PythonProjects\exo-lang_001\out>dir 
...
 example.c   example.h
If you want to know more see this video from youtube:

Sunday, May 21, 2023

Python 3.11.3 : Using Jupyter Lab on Fedora linux distro.

JupyterLab is the latest web-based interactive development environment for notebooks, code, and data. Its flexible interface allows users to configure and arrange workflows in data science, scientific computing, computational journalism, and machine learning.
Follow these steps:
  1. Install the jupyterlab python package using pip. This will allow you to run Jupyter notebooks in the terminal.
    pip install jupyterlab
  2. Open a Jupyter Lab session in the terminal using the command:
    jupyter lab
  3. Create a new notebook file and save it with the .ipynb extension.
  4. In the notebook file, add the source code to work with the Python programming language and save the file notebook.
See the next screenshot how this works:

Saturday, April 29, 2023

Extension for inkscape with python.

Today, I created the first Python extension for Inkscape, and although in theory, it seems easy, it is not really so.
You have to study a little and search the web, but I created a tutorial on one of my website.
The idea is to use at least two files with different extensions.
I named one catafest_extension.inx and the other catafest_extension.py.
For the Python file, I used this source code:
#!/usr/bin/env python
# coding=utf-8
#
# Copyright (C) 2023 Catalin George Festila, catafest@yahoo.com
#

"""
Simple test extension for inkscape
"""

import inkex
# add by me 

from lxml import etree
def draw_SVG_square(w,h, x,y, parent):
    style = { 'stroke'        : 'none',
              'stroke-width'  : '1',
              'fill'          : '#0000FF'
            }

    attribs = {
        'style'     : str(inkex.Style(style)),
        'height'    : str(h),
        'width'     : str(w),
        'x'         : str(x),
        'y'         : str(y)
            }
    patrat = etree.SubElement(
        parent, inkex.addNS('rect','svg'), attribs )
    return patrat

class MyExtension(inkex.Effect):
    def __init__(self):
        super().__init__()

    def effect(self):
        self.msg("This is an empty extension created by catafest !")
        parent = self.svg.get_current_layer()
        draw_SVG_square(100,100, 0,0, parent)

if __name__ == '__main__':
    MyExtension().run()
The result is this

Tuesday, April 11, 2023

Python 3.11.0 : about consolemenu .

This simple console menu can help to create menus, you can find the project on GitHub project.
pip install console-menu --user
For testing, I used the default example, and works well.
# Import the necessary packages
from consolemenu import *
from consolemenu.items import *

# Create the menu
menu = ConsoleMenu("Title", "Subtitle")

# Create some items

# MenuItem is the base class for all items, it doesn't do anything when selected
menu_item = MenuItem("Menu Item")

# A FunctionItem runs a Python function when selected
function_item = FunctionItem("Call a Python function", input, ["Enter an input"])

# A CommandItem runs a console command
command_item = CommandItem("Run a console command",  "touch hello.txt")

# A SelectionMenu constructs a menu from a list of strings
selection_menu = SelectionMenu(["item1", "item2", "item3"])

# A SubmenuItem lets you add a menu (the selection_menu above, for example)
# as a submenu of another menu
submenu_item = SubmenuItem("Submenu item", selection_menu, menu)

# Once we're done creating them, we just add the items to the menu
menu.append_item(menu_item)
menu.append_item(function_item)
menu.append_item(command_item)
menu.append_item(submenu_item)

# Finally, we call show to show the menu and allow the user to interact
menu.show()

Saturday, April 8, 2023

Create an ovoid with python on Blender 3D.

Blender 3D use python version 3.10.9 and you can write your scripts with the Blender 3D features. This script can also be found on the website where I write tutorials. This Python script for Blender 3D creates an ovoid model using the math formula for ovoid:
import bpy
import math

# Define the parameters of the ovoid
a = 1.9
b = 1.5
c = 1.5

# Define the number of vertices in each direction
n_long = 32
n_lat = 16

# Create a new mesh
mesh = bpy.data.meshes.new(name="Ovoid")

# Create the vertices
verts = []
for j in range(n_lat):
    lat = (j / (n_lat - 1)) * math.pi
    for i in range(n_long):
        lon = (i / (n_long - 1)) * 2 * math.pi
        x = a * math.sin(lat) * math.cos(lon)
        y = b * math.sin(lat) * math.sin(lon)
        z = c * math.cos(lat)
        verts.append((x, y, z))

# Create the faces
faces = []
for j in range(n_lat - 1):
    for i in range(n_long - 1):
        v1 = j * n_long + i
        v2 = j * n_long + i + 1
        v3 = (j + 1) * n_long + i + 1
        v4 = (j + 1) * n_long + i
        faces.append((v1, v2, v3, v4))

# Create the mesh and object
mesh.from_pydata(verts, [], faces)
obj = bpy.data.objects.new(name="Ovoid", object_data=mesh)

# Add the object to the scene
scene = bpy.context.scene
scene.collection.objects.link(obj)

Saturday, April 1, 2023

Python 3.11.0 : about execnet python package - part 001.

The execnet Python package allows you to use lightweight interprocess communication using remote Python interpreters. It provides a simple way to execute code in a remote Python interpreter, allowing for easy distribution of work across multiple machines or processes.
With this package, you can create gateways to remote Python interpreters and then execute Python code in that interpreter.
This package provides a simple interface for creating these gateways and for executing code on them, making it easy to distribute work and run code in parallel.
It can be particularly useful for running tests on multiple versions of Python or for distributing computational tasks across multiple machines.
Let's see the first example:
import execnet

def multiplier(channel, factor):
    while not channel.isclosed():
        param = channel.receive()
        channel.send(param * factor)

gw = execnet.makegateway()
channel = gw.remote_exec(multiplier, factor=10)
print(channel)
for i in range(5):
    channel.send(i)
    result = channel.receive()
    print(result)
    assert result == i * 10
gw.exit()
This is the result
<Channel id=1 open>
0
10
20
30
40
Let's see the next example:
import execnet

gw = execnet.makegateway() 
channel = gw.remote_exec("""
    def multiply(x, y):
        return x * y
    
    result = 0
    for i in range(10):
        result += multiply(i, 1)
        print("This is result for ",i," ",result)    
    channel.send(result)

""")

result = channel.receive()
print("This is channel receive result : ", result)
assert result == 45
This is result:
This is channel receive result :  45

Wednesday, March 29, 2023

Python : Open3D cannot be used on Windows 10 and Fedora Linux Distro .

Open3D is an open-source library that supports rapid development of software that deals with 3D data. The Open3D frontend exposes a set of carefully selected data structures and algorithms in both C++ and Python. The backend is highly optimized and is set up for parallelization. Open3D was developed from a clean slate with a small and carefully considered set of dependencies. It can be set up on different platforms and compiled from source with minimal effort. The code is clean, consistently styled, and maintained via a clear code review mechanism. Open3D has been used in a number of published research projects and is actively deployed in the cloud. We welcome contributions from the open-source community.
Today I tested this python package with Windows 10 and Fedora Linux Distro with python versions 11 and 10 ...
This package does not work and you will see why ...
C:\PythonProjects\Open3D001>git clone https://github.com/isl-org/Open3D.git
Cloning into 'Open3D'...
remote: Enumerating objects: 67435, done.
remote: Counting objects: 100% (2280/2280), done.
remote: Compressing objects: 100% (1894/1894), done.
remote: Total 67435 (delta 886), reused 599 (delta 385), pack-reused 65155
Receiving objects: 100% (67435/67435), 237.23 MiB | 17.11 MiB/s, done.

Resolving deltas: 100% (50682/50682), done.
Updating files: 100% (2315/2315), done.

C:\PythonProjects\Open3D001>cd Open3D

C:\PythonProjects\Open3D001\Open3D>mkdir build

C:\PythonProjects\Open3D001\Open3D>cd build

C:\PythonProjects\Open3D001\Open3D\build>cmake -DBUILD_SHARED_LIBS=ON -DCMAKE_INSTALL_PREFIX=C:\open3d_install ..
-- Building for: Visual Studio 17 2022
-- Setting build type to Release as none was specified.
-- CMAKE_BUILD_TYPE is set to Release.
-- Downloading third-party dependencies to C:/PythonProjects/Open3D001/Open3D/3rdparty_downloads
CMake Deprecation Warning at CMakeLists.txt:189 (cmake_policy):
  The OLD behavior for policy CMP0072 will be removed from a future version
  of CMake.

  The cmake-policies(7) manual explains that the OLD behaviors of all
  policies are deprecated and that a policy should be set to OLD only under
  specific short-term circumstances.  Projects should be ported to the NEW
  behavior and not rely on setting a policy to OLD.

...
According to this issue number 4796 and my test on Windows 10 with a Python version greater than 10 and on Fedora Linux Distro you cannot use this python package.
You can try an older version of Python and try it, see this example:
C:\PythonProjects\Open3D001>C:\Python310\python.exe -m pip install --user open3d --no-warn-script-location
C:\PythonProjects\Open3D001>C:\Python310\python.exe -c "import open3d as o3d; print(o3d)"
Traceback (most recent call last):
 ...
    from open3d.cpu.pybind import (core, camera, data, geometry, io, pipelines,
ImportError: DLL load failed while importing pybind: A dynamic link library (DLL) initialization routine failed.
...
pip install pybind --user
Collecting pybind
  Using cached pybind-0.1.35.tar.gz (15.5 MB)
ERROR: Could not install packages due to an OSError: [WinError 206] The filename or extension is too 
long: 'C:\\Users\\catafest\\AppData\\Local\\Temp\\pip-install-7ccpzu3z\\pybind_
...
Basically, this python package cannot be used with an old python version in Windows 10.

Sunday, March 26, 2023

Python 3.11.0 : Image generation with OpenAI.

In this tutorial I will show you a python script with PyQt6 and OpenAI that generates an image based on OpenAI token keys and a text that describes the image.
The script is quite simple and requires the installation of python packets: PyQt6,openai.
In the script you can find a python class called MainWindow in which graphic user interface elements are included and openai elements for generating images.
You also need a token key from the official openai page to use for generation.
The script runs with the command python numa_script.py and in the two editboxes is inserted chaie from token API OpenAI and the text that will describe the image to be generated.
This is the python script with the source code:
#create_image.py

import os
import openai

from PyQt6.QtCore import Qt, QSize
from PyQt6.QtGui import QImage, QPixmap
from PyQt6.QtWidgets import QApplication, QWidget, QLabel, QLineEdit, QVBoxLayout, QHBoxLayout, QPushButton
import requests

class MainWindow(QWidget):
    def __init__(self):
        super().__init__()
        self.resize(500, 500)
        self.setWindowTitle("AI Data Input")
        
        # create widgets
        self.image_label = QLabel(self)
        self.image_label.setFixedSize(QSize(300, 300))
        self.url_edit = QLineEdit(self)
        self.api_key = QLineEdit(self)
        self.send_button = QPushButton("Send data to AI", self)
        self.send_button.clicked.connect(self.on_send_button_clicked)
        
        # create layout
        layout = QVBoxLayout()
        url_layout = QHBoxLayout()
        url_layout.addWidget(QLabel("Text request AI: "))
        url_layout.addWidget(self.url_edit)
        api_layout = QHBoxLayout()
        api_layout.addWidget(QLabel("OpenAI API Key: "))
        api_layout.addWidget(self.api_key)

        layout.addLayout(url_layout)
        layout.addLayout(api_layout)
        layout.addWidget(self.image_label, alignment=Qt.AlignmentFlag.AlignCenter)
        layout.addWidget(self.send_button, alignment=Qt.AlignmentFlag.AlignCenter)
        
        self.setLayout(layout)
    
    def on_send_button_clicked(self):
        #openai.api_key = "your api key generated by OpenAI API"
        openai.api_key = self.api_key.text()
        PROMPT = self.url_edit.text()
        url = openai.Image.create(
            prompt=PROMPT,
            n=1,
            size="256x256",
        )

        # extract the url value
        url_value = url['data'][0]['url']
        if url_value :
            response = requests.get(url_value)
            if response.status_code == 200:
                image = QImage.fromData(response.content)
                pixmap = QPixmap.fromImage(image)
                self.image_label.setPixmap(pixmap)
                self.image_label.setScaledContents(True)

if __name__ == "__main__":
    app = QApplication([])
    window = MainWindow()
    window.show()
    app.exec()
This is the result of the source script:

Wednesday, March 22, 2023

Python 3.11.0 : clean from frequent folder and the list of recent files.

This python script that clears all entries in the Windows File Explorer from frequent folder and the list of recent files:
import os
import shutil

# Quick Access folder path on Windows
quick_access_path = os.path.join(os.environ['USERPROFILE'], 'AppData', 'Roaming', 'Microsoft', 'Windows', 'Recent', 'AutomaticDestinations')

# List all files in the Quick Access folder
files = os.listdir(quick_access_path)
print(files)
# Loop through all files in the Quick Access folder
for file in files:
    # Check if the file name contains "tmp" or "temp"
    if 'tmp' in file.lower() or 'temp' in file.lower():
        # Construct the full file path
        file_path = os.path.join(quick_access_path, file)
        # Delete the file
        os.remove(file_path)
        # Print a message to the console
        print(f"{file_path} deleted successfully.")

# Clear Frequent folder
frequent_folder = os.path.join(os.environ['APPDATA'], 'Microsoft', 'Windows', 'Recent', 'AutomaticDestinations')
os.system('del /f /q "{}\*"'.format(frequent_folder))

# Clear Recent files list
recent_folder = os.path.join(os.environ['APPDATA'], 'Microsoft', 'Windows', 'Recent')
os.system('del /f /q "{}\*"'.format(recent_folder))

Monday, March 20, 2023

Python 3.11.0 : PySimpleGUI - part 001.

PySimpleGUI runs on Windows, Linux and Mac, just like tkinter, Qt, WxPython and Remi do.
pip install PySimpleGUI --user
Collecting PySimpleGUI
  Downloading PySimpleGUI-4.60.4-py3-none-any.whl (509 kB)
     ---------------------------------------- 510.0/510.0 kB 2.5 MB/s eta 0:00:00
Installing collected packages: PySimpleGUI
Successfully installed PySimpleGUI-4.60.4
I try the default source code and works well:
import PySimpleGUI as sg
sg.theme('DarkAmber')   # Add a little color to your windows
# All the stuff inside your window. This is the PSG magic code compactor...
layout = [  [sg.Text('Some text on Row 1')],
            [sg.Text('Enter something on Row 2'), sg.InputText()],
            [sg.OK(), sg.Cancel()]]

# Create the Window
window = sg.Window('Window Title', layout)
# Event Loop to process "events"
while True:             
    event, values = window.read()
    if event in (sg.WIN_CLOSED, 'Cancel'):
        break

window.close()

Thursday, March 9, 2023

Python 3.11.0 : The yattag python package.

Yattag is a Python library for generating HTML or XML in a pythonic way.
You can find more information on the official webpage.
Installation can be done easily with the pip utility:
pip install yattag --user
I test a simple example code from the official documentation and works well:
from yattag import Doc

doc, tag, text = Doc(
    defaults = {
        'title': 'Untitled',
        'contact_message': 'You just won the lottery!'
    },
    errors = {
        'contact_message': 'Your message looks like spam.'
    }
).tagtext()

with tag('h1'):
    text('Contact form')
with tag('form', action = ""):
    doc.input(name = 'title', type = 'text')
    with doc.textarea(name = 'contact_message'):
        pass
    doc.stag('input', type = 'submit', value = 'Send my message')

print(doc.getvalue())

Sunday, March 5, 2023

Python Qt5 : OpenStreetMap with PyQtWebEngine.

You need to install the PyQtWebEngine python package and to have the PyQt5 python package installed.
PyQt6 works in the same way as PyQt5 but with small differences ...
pip install PyQtWebEngine --user
Collecting PyQtWebEngine
  Downloading PyQtWebEngine-5.15.6-cp37-abi3-win_amd64.whl (182 kB)
     ---------------------------------------- 182.7/182.7 kB 580.6 kB/s eta 0:00:00
...
     ---------------------------------------- 60.0/60.0 MB 655.7 kB/s eta 0:00:00
...
Installing collected packages: PyQtWebEngine-Qt5, PyQtWebEngine
Successfully installed PyQtWebEngine-5.15.6 PyQtWebEngine-Qt5-5.15.2
import sys
from PyQt5.QtWebEngineWidgets import QWebEngineView
from PyQt5.QtWidgets import QApplication, QWidget, QVBoxLayout

class MapWidget(QWidget):
    def __init__(self, parent=None):
        super().__init__(parent)

        # Create a QWebEngineView object to display the map
        self.map = QWebEngineView()
        self.map.setHtml("""
            <!DOCTYPE html>
            <html>
                <head>
                    <meta name="viewport" content="width=device-width, initial-scale=1.0">
                    <style>
                        #map {
                            height: 100%;
                        }
                    </style>
                </head>
                <body>
                    <div id="map"></div>
                    <script src="https://openlayers.org/en/v4.6.5/build/ol.js"></script>
                    <script>
                        var map = new ol.Map({
                            target: 'map',
                            layers: [
                                new ol.layer.Tile({
                                    source: new ol.source.OSM()
                                })
                            ],
                            view: new ol.View({
                                center: ol.proj.fromLonLat([0, 0]),
                                zoom: 2
                            })
                        });
                    </script>
                </body>
            </html>
        """)

        # Create a QVBoxLayout to hold the map widget
        layout = QVBoxLayout()
        layout.addWidget(self.map)
        self.setLayout(layout)

if __name__ == '__main__':
    app = QApplication(sys.argv)
    widget = MapWidget()
    widget.show()
    sys.exit(app.exec_())
The run of this python script will show a window with the OpenStreetMap map.

Wednesday, March 1, 2023

Python 3.11.0 : The sunpy python package - part 002.

In the last article tutorial, I show some simple examples with the sunpy python package.
Today I installed it again with all of these python packages using the pip tool.
You don't need all of these if you just start, but in time you will need to install them:
pip install sunpy --user
Collecting sunpy
  Downloading sunpy-4.1.3.tar.gz (3.6 MB)
     ---------------------------------------- 3.6/3.6 MB 3.6 MB/s eta 0:00:00
     ...
     Successfully installed PyYAML-6.0 aioftp-0.21.4 astropy-5.2.1 pyerfa-2.0.0.1 sunpy-4.1.3
...
pip install zeep --user
Collecting zeep
  Using cached zeep-4.2.1-py3-none-any.whl (101 kB)  
  ...
  Successfully installed isodate-0.6.1 pytz-2022.7.1 requests-file-1.5.1 requests-toolbelt-0.10.1 zeep-4.2.1
  ...
pip install drms --user
Collecting drms
  Downloading drms-0.6.3-py3-none-any.whl (35 kB)
  ...
  Successfully installed drms-0.6.3 pandas-1.5.3
pip install hvpy --user
Collecting hvpy
  Downloading hvpy-1.0.1-py3-none-any.whl (44 kB)
     ---------------------------------------- 44.0/44.0 kB 359.5 kB/s eta 0:00:00
     ...
     Successfully installed hvpy-1.0.1
pip install scipy --user
Collecting scipy
  Downloading scipy-1.10.1-cp311-cp311-win_amd64.whl (42.2 MB)
     ---------------------------------------- 42.2/42.2 MB 7.4 MB/s eta 0:00:00
     ...
     Successfully installed scipy-1.10.1 
pip install glymur --user
Collecting glymur
  Downloading Glymur-0.12.2-py3-none-any.whl (2.7 MB)
     ---------------------------------------- 2.7/2.7 MB 4.2 MB/s eta 0:00:00
     ...
     Successfully installed glymur-0.12.2
     
Let's use the 1600 Angstrom from these all data of spectral range: 335 Angstrom, 131 Angstrom, 191-195 Angstrom, 211 Angstrom, 1600 Angstrom, 1700 Angstrom, 4500 Angstrom, 171-175 Angstrom, 304 Angstrom, 94 Angstrom
from datetime import datetime
from hvpy import createMovie, DataSource, create_events, create_layers
createMovie(
     startTime=datetime(2023, 2, 27),                    # start from 1st September 2022
     endTime=datetime(2023, 2, 28),                      # end at 5th September 2022
     layers=create_layers([(DataSource.AIA_1600, 100)]), # use AIA_193 Lens with 100% Opacity
     events=create_events(["CH"]),                      # show the Active regions
     eventsLabels=True,                                 # event labels should be included
     imageScale=1,                                      # Image scale in arcseconds per pixel
     hq=True,                                           # Download a higher-quality movie file
     timeout=10,                                        # Wait 10 minutes to get a response
     overwrite=True
)
The result is a video that looks like this :
There are easier ways to get information about the sun…
You can take one screenshot using the api.helioviewer.org feature in your browser.
https://api.helioviewer.org/v2/takeScreenshot/?imageScale=1&layers=[SDO,AIA,AIA,304,1,100]&events=&eventLabels=true&scale=true&scaleType=earth&scaleX=0&scaleY=0&date=2023-02-28T15:00:00.000Z&x1=-1100.0&x2=1100.0&y1=-1100.0&y2=1100.0&display=true&watermark=true&events=[CH,all,1]
You can find movies of the last two days of HMI magnetograms and intensitygrams on this webpage.

Monday, February 27, 2023

Python 3.11.0 : EbookLib python library - part 002.

The last version 3.3 of this file type was published by the EPUB 3 Working Group as a Candidate Recommendation Snapshot on 21 February 2023 ...
I haven't written about the ePub format and python since 2022 because I was busy with all kinds of tasks.
Then I presented a short introduction with some examples on how to create an ePUB file, see that tutorial article.
I like this file type, especially the last format that allows many features, including inserting SVG vector files.
Installing the package is easy on a windows 10 with the pip utility.
pip install ebooklib --user
In the folder with the svg image named cover.svg I created a python file with this content.
from ebooklib import epub

# Create a new EPUB book
book = epub.EpubBook()

# Set the book metadata
book.set_title('My EPUB Book')
book.set_language('en')

# Add a cover image
cover_svg = epub.EpubItem(uid="cover_svg", file_name="cover.svg", media_type="image/svg+xml", content=open("cover.svg").read())
book.add_item(cover_svg)

# Create a new chapter for the cover page
cover_page = epub.EpubHtml(title='Cover Page', file_name='cover.xhtml', lang='en')
cover_page.content = '<img alt="Cover Image" src="cover.svg" />'

# Add the cover page to the book
book.add_item(cover_page)

# Add a chapter to the book
chapter1 = epub.EpubHtml(title='Chapter 1', file_name='chap_1.xhtml', lang='en')
chapter1.content = '<h1>Chapter 1</h1><p>This is the first chapter of my book.</p>'

# Add the chapter to the book
book.add_item(chapter1)

# Create the spine
book.spine = [cover_page, chapter1]

# Generate the EPUB file
epub.write_epub('my_book.epub', book, {})
after running the script this was the result a epub file named my_book.epub.
The result is this simple epub with an SVG file from Wikipedia, see the screenshot take with the Sumatra PDF free software.

Thursday, February 9, 2023

Python 3.6.9 : Anvil platform for web with python - part 001.

Anvil is a platform for building and hosting full-stack web apps written entirely in Python. Drag and drop your UI, then write Python on the front-end and back-end to make it all work ...
Yesterday I tested Anvil with python and was amazed at how simple it can be used to develop a web application. Anvil use python version 3.6.9. The tutorial I tested is available on the official website and is a feedback form that sends an email with your name, email address and content to your Anvil account address.
You can see this web application I follow from web tutorials on this webpage.
You can find some tutorials on this webpage.
How it works: Create a free account that can also be paid for via a web interface that you build with drag and drop and populate interface properties, add defined python modules and services, and write source code. I noticed that it uses beginner level python decorators and not very complex source code. The good part is that it is a fast development and the bad part is that it is limited to the free tier. After only three emails received, they came back with messages saying: ... his email quota has been exceeded.
These are features for anvil, I used in my project just the email:

Saturday, February 4, 2023

Python 3.7.0 : CodeSkulptor online compiler and editor.

CodeSkulptor uses Skulpt to provide a browser-based coding environment and can be tested on the official website.
You can see an online default example with simplegui python package on that website with online editor.

Saturday, January 28, 2023

Python : Fix error with pip and pylupdate6.exe .

I try to upgrade the PyQt6 package and I got this error:

pip3 install --upgrade --force-reinstall PyQt6
...
ERROR: Could not install packages due to an OSError: [WinError 2] The system cannot find the file specified:
...pylupdate6.exe
...pylupdate6.exe.deleteme'
I think this solution will work for any python package
Open a command shell run as administrator and run it again:
pip3 install --upgrade --force-reinstall PyQt6
Collecting PyQt6
...
Successfully installed PyQt6-6.4.1 PyQt6-Qt6-6.4.2 PyQt6-sip-13.4.1
If you want to re-download the packages instead of using the files from your pip cache, then use:
pip install --force-reinstall --no-cache-dir