The last Application Programming Interface (A.P.I.) for Blender 3D can be found here.
You need to take a look at the link to see the base of this python module.
The example I will start today is a python script that helps me to deal with Blender 3D.
First I put the script named catafest.py into Blender 3D path: C:\Program Files\Blender Foundation\Blender\2.78\python\lib.
The reason is to be load by Blender 3D application.
Let's start with the script:
First, you need to import the Blender 3D python module named bpy.
This allows us to deal with Blender 3D using python and Application Programming Interface (A.P.I.).
The script is an example not a lib script for Blender 3D.
The goal of this script is to show how to deal with python scripting into Blender 3D.
If you want to make a lib for the Blender 3D then you need to read about Python’s standard library - here.
My script just creates materials. To do that I used functions to make materials - mat, set the material to the object - set_mat and the run function to see how is working.
Let's see the python script:
import bpy

def mat(name,df_col,df_sh,df_int,sp_col,sp_sh,sp_int,alp,amb):
    mat = bpy.data.materials.new(name)
    mat.diffuse_color = df_col
    mat.diffuse_shader = df_sh
    mat.diffuse_intensity = df_int
    mat.specular_color = sp_col
    mat.specular_shader = sp_sh
    mat.specular_intensity = sp_int
    mat.alpha = alp
    mat.ambient = amb
    return mat

def set_mat(ob, mat):
    me = ob.data
    me.materials.append(mat)

def run(origin):
    # create two materials
    red = mat('Red', (1,0,0),'LAMBERT',1.0,(1,1,1),'COOKTORR',0.5, 1,1)
    blue = mat('Green', (0,1,0),'LAMBERT',1.0,(0,0.5,0.5),'COOKTORR',0.5, 1, 0.5)

    # create red cube
    bpy.ops.mesh.primitive_cube_add(location=origin)
    set_mat(bpy.context.object, red)
    # create a green torus
    bpy.ops.mesh.primitive_torus_add(location=origin)
    bpy.ops.transform.translate(value=(1,0,0))
    set_mat(bpy.context.object, blue)

if __name__ == "__main__":
    run((0,0,0))
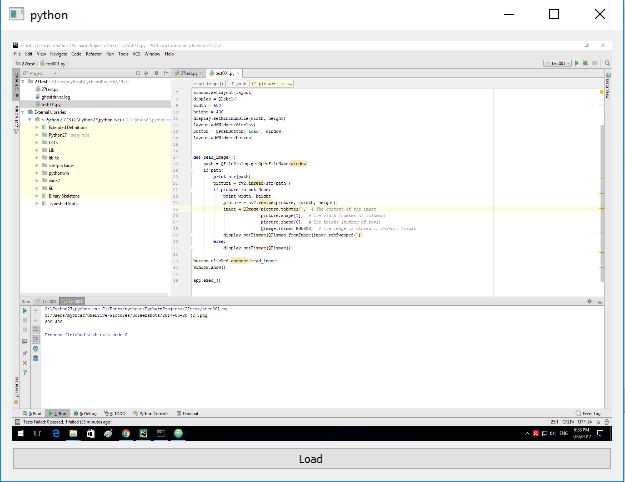
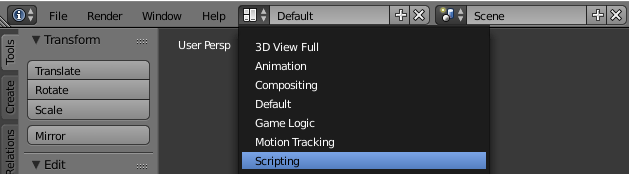
Open the Blender 3D and go to the scripting area:
Now about the source code of this script.
As you know the Blender 3D interface let you add and change objects and materials.
Each material comes with a name, colors with a diffuse and specular property, alpha color, ambient color, etc. see the documentation.
Some values come like strings and can get it from Blender 3D interface, see:
diffuse_shader
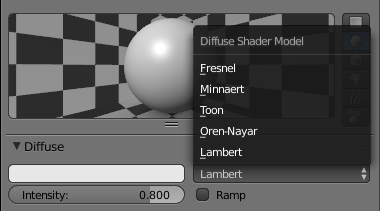
and the
specular_shader
 .
.The set_mat function just load one object using: me = ob.data
Then put the material to object using append function.
The run function is used to show the result with how to make materials, create objects with this materials.
I run into Blender 3D - Console area:
YTHON INTERACTIVE CONSOLE 3.5.2 (default, Dec  1 2016, 20:58:16) [MSC v.1800 64 bit (AMD64)]

Command History:     Up/Down Arrow
Cursor:              Left/Right Home/End
Remove:              Backspace/Delete
Execute:             Enter
Autocomplete:        Ctrl-Space
Zoom:                Ctrl +/-, Ctrl-Wheel
Builtin Modules:     bpy, bpy.data, bpy.ops, bpy.props, bpy.types, bpy.context, bpy.utils, bgl, blf, mathutils
Convenience Imports: from mathutils import *; from math import *
Convenience Variables: C = bpy.context, D = bpy.data

>>> import catafest
>>> dir(catafest)
['__builtins__', '__cached__', '__doc__', '__file__', '__loader__', '__name__', '__package__', '__spec__',
 'bpy', 'mat', 'run', 'set_mat']

>>> catafest.run((0,0,0))