In today's tutorial I will present the source code with some minor fixes and an early way to fix the skin for the added branch.
Minor fixes are related to some errors in creating and passing data - I added comments.
It is interesting to see how I created and modified the source code step by step because it cannot be moved from one area to another because it is restrictive to the way it works in Blender 3D.
If I had used classes, this would not have been understood.
There are also minor technical details related to the skin, the random function for the thickness of the branches ...
For a source code written on the fly and without a pseudocode defined at the beginning I could say that the transitions between the source code between the tutorials is quite legible.
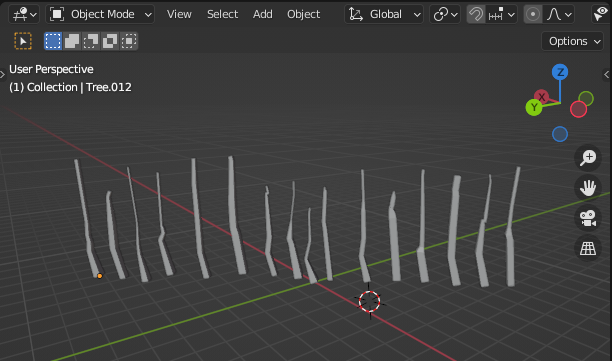
Here is a screenshot with some skin generated examples for the second branch for vertex position one.
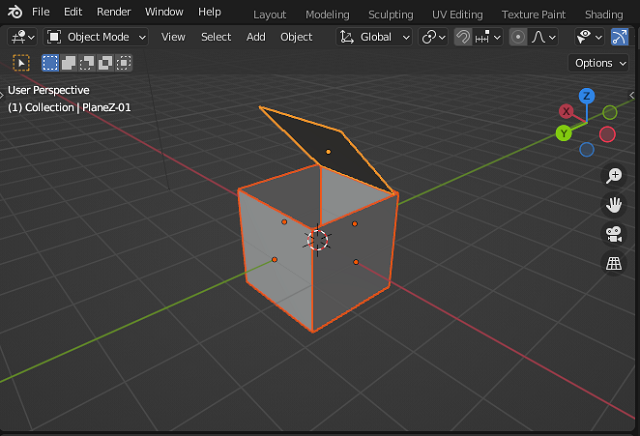
This is the source basket used to create the new branch.
import bpy
import random
# import bmesh
import bmesh
MinNubmer = -10
MaxNumber = 10
# Clean up the area , uncoment the next two row to keep
# branch after running the script
#bpy.ops.object.select_all(action="SELECT")
#bpy.ops.object.delete()
# Number of branches
branch = 4
# Create the verts array
verts = [(0,0,0)]
# Create the edges array
edges = [(0,0)]
# Create the faces array
faces = []
# define random number for X and Y axis
def RN():
return random.randint(MinNubmer, MaxNumber) / 20
# define random number for positive Z axis
def RNZ():
return random.randint(10, 50) / 10
# create a list of branch thicknesses
rand_list = []
name_branch = "TreeMesh"
# define createBranch
def createBranch(branch, name_branch):
# Create the mesh for branch
mesh = bpy.data.meshes.new(name_branch)
for i in range(1,branch):
rand_list.append(RNZ()/30)
# sort all reverse by thicknesses
rand_list.sort(reverse=True)
# generate vertices list for drawing the branch
for i in range(1,branch):
verts.append((rand_list[i-1] +0.1,rand_list[i-1]+0.1,RNZ()))
edges.append((i-1,i))
# sort the list of vertices by last number witch is Z axis
verts.sort(key=lambda x: x[2])
# create branch update and validate, see documentation
mesh.from_pydata(verts, edges, faces)
mesh.update()
mesh.validate()
# Create object to hold the mesh branch with the new name for object
obj = bpy.data.objects.new(name_branch+'_Obj', mesh)
return obj
# create a new branch
def createNewBranch(obj_branch, n):
bpy.ops.object.mode_set(mode="EDIT", toggle=False)
me = obj_branch.data
bm = bmesh.from_edit_mesh(me)
bm.select_mode = {'VERT'}
for i,v in enumerate(bm.verts):
# select only by the index of list
if i == n:
v.select = ( v.co.x > 0.0 )
v2 = v
else:
v.select = False
# flush and update view
v1 = bm.verts.new( (RN()+(v.co.x) + 1.0 , RN()+(v.co.y) + 1.0 , (v.co.z) - (v.co.z)/3) )
#v1 = bm.verts.new(1, 1, 3)
bm.edges.new((v1, v2))
rand_list.append(0.01)
rand_list.sort(reverse=True)
# update
bm.select_flush_mode()
me.update()
#mesh.validate()
#bmesh.update_edit_mesh(obj_branch.data)
# use the createBranch
obj_branch = createBranch(branch, name_branch)
# ... and add it to the scene
scene = bpy.context.scene
scene.collection.objects.link(obj_branch)
# this will fix the error ... mode_set_poll()
bpy.context.view_layer.objects.active = obj_branch
createNewBranch(obj_branch, 1)
# print tool for developing area
def print_python_console(data):
for window in bpy.context.window_manager.windows:
screen = window.screen
for area in screen.areas:
if area.type == 'CONSOLE':
override = {'window': window, 'screen': screen, 'area': area}
bpy.ops.console.scrollback_append(override, text=str(data), type="OUTPUT")
# used to see the size of radius skin for each vertices
print_python_console(rand_list)
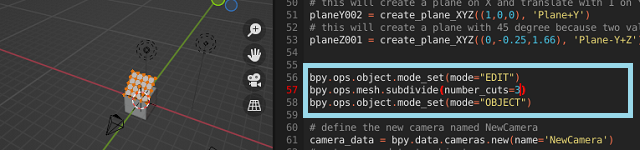
# fix error : skin modifier is locked when using edit mode.
bpy.ops.object.mode_set(mode="OBJECT", toggle=False)
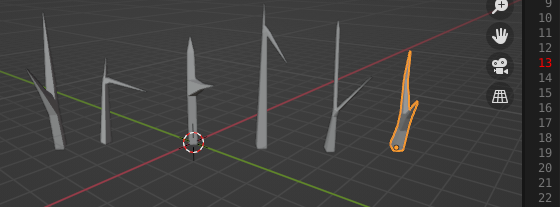
# add the skin modifier - NOT FIXED FOR THE LAST BRANC ADDED
obj_branch.modifiers.new(name="SK", type="SKIN")
bpy.context.view_layer.objects.active = obj_branch
# get the skin vertices layers
skin_vertices = obj_branch.data.skin_vertices
# get the layer
skin_layer = skin_vertices[0]
for i in range(1,branch+1):
# assigns radius for each vertice to sized the branch
skin_layer.data[i-1].radius = (rand_list[i-1], rand_list[i-1])
#Indices 0 and 1 are the vertex indices
skin_layer.data[i].radius = (rand_list[i-1],rand_list[i-1])
# set modes for user
bpy.ops.object.mode_set(mode="EDIT", toggle=False)
bpy.ops.object.skin_root_mark()
bpy.ops.object.mode_set(mode="OBJECT", toggle=False)