analitics

Pages

Wednesday, May 25, 2022

Blender 3D and python scripting - part 006.

In this tutorial I will show you how to use the camera and render an image.
I kept the source code from the old tutorial 005 and made the following changes:
I defined the global PI constant because I used it outside the definition.
import bpy

#define the pi global 
pi = 3.1415926
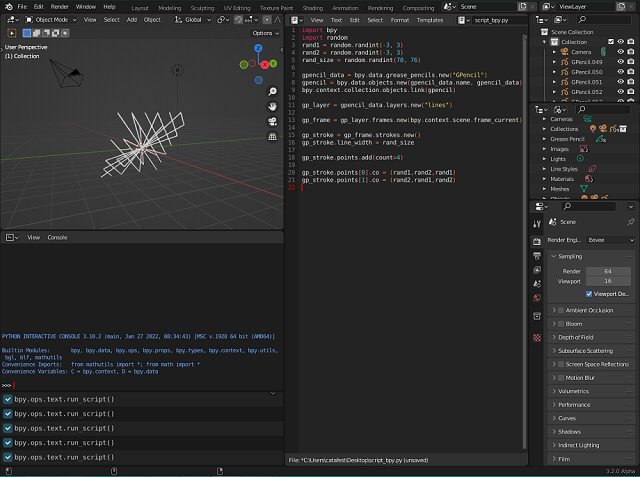
I added to the old source code the part of adding camera, translation, rotation, rendering settings and rendering an image called box_640_480.png in the 3D folder on the local disk.
You can see in the example below the added source code:
# define the new camera named NewCamera
camera_data = bpy.data.cameras.new(name='NewCamera')
# set camera_data to object 
camera_object = bpy.data.objects.new('ObjectCamera', camera_data)
# link camera object to scene
bpy.context.scene.collection.objects.link(camera_object)
# set active camera in the current scene by object
bpy.context.scene.camera = bpy.data.objects['ObjectCamera']
# set location 
camera_object.location = [0,-5,1]
# set rotation mode
camera_object.rotation_mode = 'XYZ'
# set the rotate the camerea using rotation_euler
bpy.data.objects[camera_object.name_full].rotation_euler = (90*(pi/180),0,0)

scene = bpy.context.scene

#these settings will set the render output
bpy.context.scene.cycles.samples = 1
scene.render.resolution_x = 640
scene.render.resolution_y = 480
scene.render.resolution_percentage = 100
scene.render.use_border = False
scene.render.image_settings.file_format='PNG'
scene.render.filepath='C:/3D/box_640_480.png'
bpy.ops.render.render(write_still=1)

Tuesday, May 24, 2022

Blender 3D and python scripting - part 005.

In this tutorial I will recreate the same box but with a more complex source code.
In the previous tutorial I used the same source code several times...
    obj = bpy.ops.mesh.primitive_plane_add(size=2, 
    calc_uvs=True, 
    enter_editmode=False, 
    align='CURSOR', 
    location=location, 
    rotation=(0, 0, 0), 
    scale=(0,0,0)
    )
    
    # rename the object
    bpy.context.object.name = obj_name
    # return the object reference
    return bpy.context.object
It is easier to understand the steps taken and then move on to optimizing them in complex forms.
Obviously a presentation of the source code in this tutorial will show you the differences.
I will add that the source code does not include scalar transformations and is limited to a box with size 1.
import bpy

def create_plane_XYZ(loc, obj_name):
    #define the pi 
    pi = 3.1415926
    # this is a definition like a tuple
    rot = (0,0,0)
    # need to convert it to a list in order to add new values
    rot_list = list(rot)
    # this ang variable will rotate obj to the 90-degree angle 
    ang = -90*(pi/180)
    ang_inc = 45*(pi/180)
    if loc[0] < 0:
        rot_list[1]=ang

    if loc[0] > 0: 
        rot_list[1]=ang

    if loc[1] < 0:
        rot_list[0]=ang
        
    if loc[1] > 0: 
        rot_list[0]=ang
    # this check if the two value from position of plane is not zero
    if loc[1] != loc[2] != 0: 
        rot_list[0]=ang_inc
    # this convert a list back to tuple 
    rot=tuple(rot_list)
    # this create the plane 
    obj = bpy.ops.mesh.primitive_plane_add(size=2, 
    calc_uvs=True, 
    enter_editmode=False, 
    align='CURSOR', 
    location=loc, 
    rotation= rot, 
    scale=(0,0,0)
    )
    # rename the object
    bpy.context.object.name = obj_name
    # return the object reference
    return bpy.context.object

# this will create a plane on X and translate with -1 on Y 
planeX001 = create_plane_XYZ((0,-1,0), "Plane-X")
# this will create a plane on X and translate with 1 on Y 
planeX002 = create_plane_XYZ((0,1,0), "Plane+X")
# this will create a plane on Y and translate with -1 on X 
planeY001 = create_plane_XYZ((-1,0,0), "Plane-Y")
# this will create a plane on X and translate with 1 on Y 
planeY002 = create_plane_XYZ((1,0,0), "Plane+Y")
# this will create a plane with 45 degree because two value on tuple is not zero
planeZ001 = create_plane_XYZ((0,-0.25,1.66), "Plane-Y+Z")

Monday, May 23, 2022

Blender 3D and python scripting - part 004.

In this tutorial, I will show you how to create a box from planes, see the screenshot:
You can see I used the math python package and I created rotation by radians and rotation object for three custom planes.
This is the source code:
import bpy

import math

def DegToRad(angle):
    """convert to radians"""
    return angle*(math.pi/180)


def RotOBJ(name, angles):
    """rotate obj to the specified angles"""
    rotation = [DegToRad(angle) for angle in angles]
    bpy.data.objects[name].rotation_euler = rotation
    
def create_plane_X(location, obj_name):

    obj = bpy.ops.mesh.primitive_plane_add(size=2, 
    calc_uvs=True, 
    enter_editmode=False, 
    align='CURSOR', 
    location=location, 
    rotation=(0, 0, 0), 
    scale=(0,0,0)
    )
    
    # rename the object
    bpy.context.object.name = obj_name
    # return the object reference
    return bpy.context.object

def create_plane_Y(location, obj_name):

    obj = bpy.ops.mesh.primitive_plane_add(size=2, 
    calc_uvs=True, 
    enter_editmode=False, 
    align='CURSOR', 
    location=location, 
    rotation=(0, 0, 0), 
    scale=(0,0,0)
    )
    
    # rename the object
    bpy.context.object.name = obj_name
    # return the object reference
    return bpy.context.object

def create_plane_Z(location, obj_name):

    obj = bpy.ops.mesh.primitive_plane_add(size=2, 
    calc_uvs=True, 
    enter_editmode=False, 
    align='CURSOR', 
    location=location, 
    rotation=(0, 0, 0), 
    scale=(0,0,0)
    )
    
    # rename the object
    bpy.context.object.name = obj_name
    # return the object reference
    return bpy.context.object

n = 1

planeX001 = create_plane_X((0,-1,0), "PlaneX-{:02d}".format(n))
RotOBJ(planeX001.name, [-90, 0, 0])
planeX002 = create_plane_X((0,1,0), "PlaneX-{:02d}".format(n))
RotOBJ(planeX002.name, [-90, -0, 0])

planeY001 = create_plane_Y((-1,0,0), "PlaneY-{:02d}".format(n))
RotOBJ(planeY001.name, [0, -90, 0])
planeY002 = create_plane_Y((1,0,0), "PlaneY-{:02d}".format(n))
RotOBJ(planeY002.name, [0, -90, 0])

planeZ001 = create_plane_Z((0,-0.25,1.66), "PlaneZ-{:02d}".format(n))
RotOBJ(planeZ001.name, [45, 0, 0])

Sunday, May 22, 2022

Blender 3D and python scripting - part 003.

In the first tutorial I presented a simple script and in this one I improved it with a way to create lines with a number of points, to use pressurization and coloring according to these points.
I added comments in the source code to make it easier to understand.
Here is the result obtained for nineteen points:
This is the source code:
import bpy 
import random

#this is a for lines with N poins 
N = 19 

# this is default python script from the first tutorial
gpencil_data = bpy.data.grease_pencils.new("GPencil")
gpencil = bpy.data.objects.new(gpencil_data.name, gpencil_data)
bpy.context.collection.objects.link(gpencil)

gp_layer = gpencil_data.layers.new("lines")

gp_frame = gp_layer.frames.new(bpy.context.scene.frame_current)

gp_stroke = gp_frame.strokes.new()

gp_stroke.points.add(count=N)

# let's create a new material for pencil stroke 
gp_material_001 = bpy.data.materials.new(name="Grease pencil material 001")

# if you want to use Nodes 
gp_material_001.use_nodes = True

#this will add a diffuse color for this material 
gp_material_001.diffuse_color = (0.0, 0.0, 0.0, 1)

# create a new material for this grease pencil
bpy.data.materials.create_gpencil_data(gp_material_001)
# add the material to the grese pencil defined like gpencil 
gpencil.data.materials.append(gp_material_001)

for i in range (N):
    rand1 = random.randint(-3, 3)
    rand2 = random.randint(-3, 3)
    rand_size = random.randint(70, 76)
    gp_stroke.line_width = rand_size
    gp_stroke.points[i].co = (rand1,rand2,rand1)
    gp_stroke.points[i].co = (rand2,rand1,rand2)

    #this will create a random pressure 
    rand_pressure = random.randint(-3, 3) * 3
    #create random color for Red Green and Blue 
    rand_color_R = random.randint(0, 1)
    rand_color_G = random.randint(0, 1)
    rand_color_B = random.randint(0, 1)
    # set the pressure 
    gp_stroke.points[i].pressure = rand_pressure
    # set the color RGB with transparency 1
    gp_stroke.points[i].vertex_color = (rand_color_R,rand_color_G,rand_color_B, 1) 

Thursday, May 19, 2022

Blender 3D and python scripting - part 002.

In today's tutorial I will show you how to create a sphere and how to add a material to it.
The source code is very simple with two functions one is for the sphere and the second one is the material of this, see:
import bpy

def create_sphere(radius, distance_to_center, obj_name):

    obj = bpy.ops.mesh.primitive_uv_sphere_add(
        radius=radius,
        location=(distance_to_center, 0, 0),
        scale=(1, 1, 1)
    )
    # rename the object
    bpy.context.object.name = obj_name
    # return the object reference
    return bpy.context.object


def create_emission_shader(color, strength, mat_name):
    # create a new material shader
    mat = bpy.data.materials.new(mat_name)
    # enable the node-graph edition mode
    mat.use_nodes = True
    
    # clear all starter nodes
    nodes = mat.node_tree.nodes
    nodes.clear()

    # add the Emission node
    node_emission = nodes.new(type="ShaderNodeEmission")
    # (input[0] is the color)
    node_emission.inputs[0].default_value = color
    # (input[1] is the strength)
    node_emission.inputs[1].default_value = strength
    
    # add the Output node
    node_output = nodes.new(type="ShaderNodeOutputMaterial")
    
    # link the two nodes
    links = mat.node_tree.links
    link = links.new(node_emission.outputs[0], node_output.inputs[0])

    # return the material reference
    return mat

n = 1
r = 1.0
d = 1.5

sphere001 = create_sphere(r, d, "Sphere-{:02d}".format(n))

sphere001.data.materials.append(
    create_emission_shader(
        (1, 1, 1, 1), 100, "SphereMat001"
    )
)

Wednesday, May 18, 2022

Blender 3D and python scripting - part 001.

Today I started a series of tutorials on python scripting and Blender 3D.
The first tutorial is how to draw using the Blender 3D features with the grease pencil utility using the Python scripting language.
Open Blender 3D in the scripting section and enter the source code below.
import bpy 
import random
rand1 = random.randint(-3, 3)
rand2 = random.randint(-3, 3)
rand_size = random.randint(70, 76)

gpencil_data = bpy.data.grease_pencils.new("GPencil")
gpencil = bpy.data.objects.new(gpencil_data.name, gpencil_data)
bpy.context.collection.objects.link(gpencil)

gp_layer = gpencil_data.layers.new("lines")

gp_frame = gp_layer.frames.new(bpy.context.scene.frame_current)

gp_stroke = gp_frame.strokes.new()
gp_stroke.line_width = rand_size

gp_stroke.points.add(count=4)

gp_stroke.points[0].co = (rand1,rand2,rand1)
gp_stroke.points[1].co = (rand2,rand1,rand2)
Run the script several times to see the effect produced.
Here is the result of running this script: