analitics

Pages

Tuesday, May 26, 2020

Python Qt5 : PyQt5 and PyGame compatibility with source code.

This tutorial tries to solve from the objectives related to solving and stabilizing compatibility errors between PyQt4 and PyQt5 and creating a common interface between PyQt5 and PyGame.
There is always the same problem in programming when the developer for some reason has to change classes, methods and functions and reusing the old code is no longer valid.
In this case, common or other errors occur, which leads to a waste of time.
I will present a simple way to solve these problems.
I really like to use the PyQt5 module to create interfaces for my python programs and scripts.
Like any programmer who hasn't fully used all A.P.I, I always use the old source code I programmed in the past.
What the developer says about the transition from PyQt4 to PyQt5 we can see on the official page.
Obviously, you will have to move on to things to know but it is quite difficult to always come back and read this content when you have programming errors.
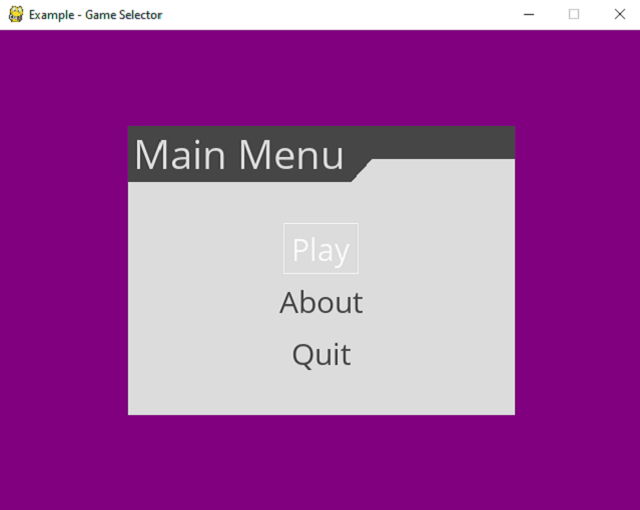
Today, I wanted to make a simple drawing interface in PyGame that would be included in a PyQt5 interface.
I tried to use an old code created by me in PyQt4 but I realized that I had encountered errors before switching to the new PyQt5.
This compatibility problem generates errors and can be solved as follows: by knowing the exact solution and fixing errors in real time, studying the changes created by the developer or the classic search for errors.
My solution comes with the help of these solutions and requires a simple step using the commented source code.
To show you how simple it is to understand I will show you the source code for the interface I built that simply to solves the problem of understanding compatibility by reading the developer source code with simple and useful comments.
#the old import for PyQt4
#from PyQt4 import QtGui

#the new import for PyQt5
#from PyQt5 import QtCore, QtGui, QtWidgets
#class MainWindow(QtWidgets.QMainWindow, UI.MainUI.Ui_MainWindow):

from PyQt5 import QtGui
from PyQt5 import QtWidgets
import pygame
import sys

# old definition for PyQt4 for QWidget
#class ImageWidget(QtGui.QWidget):
class ImageWidget(QtWidgets.QWidget):   
    def __init__(self,surface,parent=None):
        super(ImageWidget,self).__init__(parent)
        w=surface.get_width()
        h=surface.get_height()
        self.data=surface.get_buffer().raw
        self.image=QtGui.QImage(self.data,w,h,QtGui.QImage.Format_RGB32)

    def paintEvent(self,event):
        my_paint=QtGui.QPainter()
        # the definitions for PyQt4 and PyQt5 use QtGui.QPainter()     
        my_paint.begin(self)
        my_paint.drawImage(0,0,self.image)
        my_paint.end()
        
# old definition for PyQt4 for QMainWindow
#class MainWindow(QtGui.QMainWindow):
class MainWindow(QtWidgets.QMainWindow):
    def __init__(self,surface,parent=None):
        super(MainWindow,self).__init__(parent)
        self.setFixedSize(640, 480)
        self.setCentralWidget(ImageWidget(surface))
# this part of source code need to be updated if you want to use animation        
# init PyGame 
pygame.init()
# define a surface 
my_surface=pygame.Surface((640,480))
# fill the surface, see https://www.pygame.org/docs/ref/surface.html#pygame.Surface.fill
my_surface.fill((0,0,255,176))
# draw circle see https://www.pygame.org/docs/ref/draw.html#pygame.draw.circle
pygame.draw.circle(my_surface,(0,0,127,255),(76,76),76)
# draw ellipse (surface, color(R,G,B), size (x,y,x+dx, y+y+dy) )
pygame.draw.ellipse(my_surface,(127,0,0,0),(0,0,12,76))
 
# this part of source code will show 
# the my_surface created with PyGame in PyQt5
# old definition for PyQt4
#app=QtGui.QApplication(sys.argv)
app=QtWidgets.QApplication(sys.argv)
my_window=MainWindow(my_surface)
my_window.show()
app.exec_()

Sunday, May 24, 2020

Python 3.8.3 : A brief introduction to the Celery python package.

The development team tells us:
Celery is a simple, flexible, and reliable distributed system to process vast amounts of messages, while providing operations with the tools required to maintain such a system.
To do that Celery uses tasks.
These task queues are used as a mechanism to distribute work across threads or machines using brokers.
A task a client puts a message on the queue and the broker then delivers the message to a worker.
The install of this python package is simple:
Celery can run on a single machine, on multiple machines, or even across datacenters.
pip3 install -U Celery
Collecting Celery
...
Installing collected packages: pytz, billiard, vine, amqp, kombu, Celery
Successfully installed Celery-4.4.2 amqp-2.5.2 billiard-3.6.3.0 kombu-4.6.8 pytz-2020.1 vine-1.3.0
The Celery library must be instantiated before use like an application.
First, I tested with a simple example application from the official website.
from celery import Celery
app = Celery()

@app.task
def add(x, y): return x + y

if __name__ == '__main__':
    app.worker_main()
When I run it this application the output is this:
python.exe .\example_tasks.py
 
 -------------- celery@DESKTOP-9DSLSMF v4.4.2 (cliffs)
--- ***** ----- 
-- ******* ---- Windows-10-10.0.18362-SP0 2020-05-24 18:30:04
- *** --- * --- 
- ** ---------- [config]
- ** ---------- .> app:         __main__:0x1c697187940
- ** ---------- .> transport:   amqp://guest:**@localhost:5672//
- ** ---------- .> results:     disabled://
- *** --- * --- .> concurrency: 6 (prefork)
                .> celery           exchange=celery(direct) key=celery


[2020-05-24 18:30:06,273: ERROR/MainProcess] consumer: Cannot connect to amqp://guest:**@127.0.0.1:5672//:
[WinError 10061] No connection could be made because the target machine actively refused it.
Trying again in 2.00 seconds... (1/100)

[2020-05-24 18:30:10,296: ERROR/MainProcess] consumer: Cannot connect to amqp://guest:**@127.0.0.1:5672//:
[WinError 10061] No connection could be made because the target machine actively refused it.
Trying again in 4.00 seconds... (2/100)

[2020-05-24 18:30:16,323: ERROR/MainProcess] consumer: Cannot connect to amqp://guest:**@127.0.0.1:5672//:
[WinError 10061] No connection could be made because the target machine actively refused it.
Trying again in 6.00 seconds... (3/100)


worker: Hitting Ctrl+C again will terminate all running tasks!

worker: Warm shutdown (MainProcess)
This error is show because I trying to connect to a local instance of default broker named RabbitMQ .
RabbitMQ is most popular open source message broker and can be download it from the official webpage.
If you want to install RabbitMQ, then you need to install Erlang, see screenshot:
python RabbitMQ Erlang
This is not the only one option, you have many features like for example Redis.
The development team try experimental support for a myriad of other solutions, including using SQLite for local development.
A full list with all supported brokers can be found here.
Celery is easy to integrate with web frameworks, some of them even have integration packages:
  • Pyramid  with pyramid_celery;
  • Pylons with celery-pylons;
  • Flask not needed;
  • web2py with web2py-celery;
  • Tornado with tornado-celery;
  • Tryton with celery_tryton;
  • and Django also no not needed because works well.
Maybe I will make another tutorial about this python module and how works with Redis or Django.

Monday, May 18, 2020

News : Microsoft Build digital event for Python users.

We in the Python team are excited to be joining Microsoft Build 2020, which is starting next Tuesday, May 19. During a global pandemic, Build has turned into a digital-only event, running for 48 continuous hours, that is open to anyone around the world, at no cost.

At Build, we’ll demo the new capabilities we’ve been building recently. We’ll also showcase the work we have been doing to enable Python developers to build applications and analyze data using Visual Studio Code. Lastly, we’ll show how you can run Python web apps and machine learning models on the cloud with Azure.

Our friends across Microsoft will also present services and tools that developers, including those working with Python, can leverage to remain productive and continue collaborating even in remote, distributed teams.

You can participate in a live Q&A stream session:
This event can be found at the official webpage.

Sunday, May 17, 2020

Python 3.8.3 : Simple example to fix maximum recursion depth exceeded.

This short tutorial try to solve simple and easy the stack limit for recursion without using advanced programming techniques.
sys.setrecursionlimit(limit)
    Set the maximum depth of the Python interpreter stack to limit. 
This limit prevents infinite recursion from causing an overflow of the C stack
and crashing Python.
This can be done in most cases with:
import sys
sys.setrecursionlimit(1976)
Let's test with an simple example for a given number.
input_number = 1234567890987654321
I create a script for the next function to print the result:
def split_input(n):
    return split_input(n // 10) + [n % 10]
The result of this function is:
python flow_001.py
Traceback (most recent call last):
  File "flow_001.py", line 12, in 
    input_list = split_input(input_number)
  File "flow_001.py", line 10, in split_input
    return split_input(n // 10) + [n % 10]
  File "flow_001.py", line 10, in split_input
    return split_input(n // 10) + [n % 10]
  File "flow_001.py", line 10, in split_input
    return split_input(n // 10) + [n % 10]
  [Previous line repeated 996 more times]
RecursionError: maximum recursion depth exceeded
You can see I got an error. Let fix this function with a proper source code:
def split_nr(n):
    if n < 1:
        return [n]
    else:
        return split_nr(n // 10) + [n % 10] 
This will solve the recursion split function.
python flow_001.py
[1, 2, 3, 4, 5, 6, 7, 8, 9, 0, 9, 8, 7, 6, 5, 4, 3, 2, 1]

Friday, May 15, 2020

IronPython 2.7.7 : Intro on RevitPythonShell.

This is one of the several ways to use RevitPythonWrapper:
  • pyRevit;
  • RevitPythonShell;
  • Dynamo;
This tool help you to use python with the Revit tool and can be found at the GitHub webpage.
They say:
The RevitPythonShell adds an IronPython interpreter to Autodesk Revit and Vasari. The RevitPythonShell (RPS) lets you to write plugins for Revit in Python, my favourite scripting language! But even better, it provides you with an interactive shell that lets you see the results of your code as you type it. This is great for exploring the Revit API while writing your Revit Addins - use this in combination with the RevitLookup database exploration tool to become a Revit API Ninja :)
You need to install your instaler according with the Revit version.
You can start it from Main Menu - Add-Ins and you see it.
Is very easy to use it, let's see one simple example:
import clr
clr.AddReference("RevitAPI")
from Autodesk.Revit.DB import BuiltInCategory as Bic
from Autodesk.Revit.DB import FilteredElementCollector as Fec
from Autodesk.Revit.DB import Transaction
# reference to the current open revit model is
doc = __revit__.ActiveUIDocument.Document
Let's see a simple example on Revit with an wall and a simple door.
IronPython 2.7.7 (2.7.7.0) on .NET 4.0.30319.42000 (64-bit)
Type "help", "copyright", "credits" or "license" for more information.
>>> a = b = 1 
>>> c = a + b + 1
>>> print(c)
3
>>> from Autodesk.Revit.DB import FilteredElementCollector as Fec
>>> from Autodesk.Revit.DB import BuiltInCategory as Bic
>>> doors = Fec(doc).OfCategory(Bic.OST_Doors).WhereElementIsNotElementType().ToElements()
>>> print(dir(doors))
['Add', 'AddRange', 'AsReadOnly', 'BinarySearch', 'Capacity', 'Clear', 'Contains', 'ConvertAll', 'CopyTo',
'Count', 'Enumerator', 'Equals', 'Exists', 'Find', 'FindAll', 'FindIndex', 'FindLast', 'FindLastIndex', 
'ForEach', 'GetEnumerator', 'GetHashCode', 'GetRange', 'GetType', 'IndexOf', 'Insert', 'InsertRange', 
'IsReadOnly', 'IsSynchronized', 'Item', 'LastIndexOf', 'MemberwiseClone', 'ReferenceEquals', 'Remove', 
'RemoveAll', 'RemoveAt', 'RemoveRange', 'Reverse', 'Sort', 'SyncRoot', 'ToArray', 'ToString', 'TrimExcess', 
'TrueForAll', '__add__', '__class__', '__contains__', '__delattr__', '__doc__', '__format__', 
'__getattribute__', '__getitem__', '__hash__', '__init__', '__iter__', '__len__', '__new__', 
'__reduce__', '__reduce_ex__', '__repr__', '__setattr__', '__setitem__', '__sizeof__', 
'__str__', '__subclasshook__']
>>> for each_door in doors:
... 	print(each_door.Id)
... 	print(each_door.Mirrored)
... 	print(each_door.Symbol.LookupParameter("Type Name").ToString())
... 
840590
False
Autodesk.Revit.DB.Parameter
>>> 
Let's see the output of this code on Revit.


Thursday, May 14, 2020

Python 3.8.3 : Pyxel free game engine.

Pyxel is a free game engine is build for create old fashioned pixel art style games easily.
Pyxel is published under MIT License.
This allow you to use 2D sprites, sound and interactions.
The project can be found at the GitHub webpage.
The basic features are:
  • Run on Windows, Mac, and Linux
  • Code writing with Python3
  • Fixed 16 color palette
  • 256x256 sized 3 image banks
  • 256x256 sized 8 tilemaps
  • 4 channels with 64 definable sounds
  • 8 musics which can combine arbitrary sounds
  • Keyboard, mouse, and gamepad inputs
  • Image and sound editor
The instalation is easy.
pip3 install pyxel
Collecting pyxel
...
Successfully installed altgraph-0.17 pefile-2019.4.18 pyinstaller-3.6 pywin32-ctypes-0.2.0 pyxel-1.3.7
Use this command to start the tool for create sprites and sounds.
pyxeleditor
You can test many examples on GitHub.
The basic example from the web is simple:
import pyxel

class App:
    def __init__(self):
        pyxel.init(160, 120, caption="Hello Pyxel")
        pyxel.image(0).load(0, 0, "assets/pyxel_logo_38x16.png")
        pyxel.run(self.update, self.draw)

    def update(self):
        if pyxel.btnp(pyxel.KEY_Q):
            pyxel.quit()

    def draw(self):
        pyxel.cls(0)
        pyxel.text(55, 41, "Hello, Pyxel!", pyxel.frame_count % 16)
        pyxel.blt(61, 66, 0, 0, 0, 38, 16)

App()

I start with a simple example. I don't find a collision system on Pyxel. Let's see the source code:
import pyxel
from pyxel import circ, cls, flip, init
from random import randint

# the position of the ball
x = y = 30  
# the speed of the ball
v = w = 3  
# create the screen as 160x120 size
pyxel.init(160, 112)  
#
data = [70, 60, 30, 70]


 # draw a line below the bar chart

while True:
    # erase the screen with color number 1 (blue)
    pyxel.cls(1)  

    # process the movement of the ball
    x += v
    y += w
    
    r = randint(0, 160)  
    a = randint(0, 112)
    rr = randint(0, 160) 
    aa = randint(0, 112)
    # create random lines on screen
    pyxel.line(a, aa, r, rr, 5)

    # set the border
    if x <= 7 or x >= 160:
        x = min(max(x, 7), 160)
        v = -v

    if y <= 7 or y >= 112:
        y = min(max(y, 7), 112)
        w = -w
  
    # draw the ball with different colors
    pyxel.circ(x, y, 4, pyxel.frame_count % 8) 
 
    # create a simple chart
    for i, d in enumerate(data):
        pyxel.rect(i * 33 + 10, 120 - d, 10, d, 8 + i) 

    # draw the game
    pyxel.flip()

Tuesday, May 12, 2020

Python 3.8.3 : Create shortcuts and add python to the context menu.

The tutorial for today is a simple script for python user.
If you run this python script in your folder you will get an python shortcut to the python and the python to the Context Menu in Windows 10.
The Context Menu can be used with right click from your mouse, see the screenshot.

This script can also be used with any executable if you make some changes.
import os
import pythoncom
from win32com.shell import shell

dirpath = os.getcwd()
if not os.path.exists(dirpath):
    os.makedirs(dirpath)

win_user = os.getenv('username')
shortcut_path = dirpath + r"\python.lnk"

shortcut_path = str(r"C:\\Users\\")+win_user+str("\\AppData\\Roaming\\Microsoft\\Windows\\SendTo\\python.lnk")

target_path = r"D:\\Python38_64\\python.exe"

shortcut_instance = pythoncom.CoCreateInstance(
    shell.CLSID_ShellLink, None, pythoncom.CLSCTX_INPROC_SERVER, shell.IID_IShellLink)
persist_file = shortcut_instance.QueryInterface(pythoncom.IID_IPersistFile)
shortcut_instance.SetPath(target_path)
persist_file.Save (shortcut_path, 0)

Monday, May 11, 2020

Python Qt5 : Simple text editor with QPlainTextEdit.

I haven't played python in a long time. It can be seen after the last article.
Today I installed Python 3.8.3 and my favorite PyQt5 and started to see how much I forgot from what I knew.
Installing PyQt5 python mode was simple.
pip3 install PyQt5
Collecting PyQt5
  Downloading PyQt5-5.14.2-5.14.2-cp35.cp36.cp37.cp38-none-win_amd64.whl (52.9 MB)
     |████████████████████████████████| 52.9 MB 80 kB/s
Collecting PyQt5-sip<13>=12.7
  Downloading PyQt5_sip-12.7.2-cp38-cp38-win_amd64.whl (59 kB)
     |████████████████████████████████| 59 kB 4.1 MB/s
Installing collected packages: PyQt5-sip, PyQt5
Successfully installed PyQt5-5.14.2 PyQt5-sip-12.7.2

The next step was to use QPlainTextEdit so the task was simple: an editor.
Because I created another article about a publisher, see this tutorial, I decided to attach a main menu with submenus and customize it.
The source code is simple to understand and is commented for a better understanding.
# -*- coding: utf-8 -*-
"""
@author: catafest
"""
import sys
import sys, os
from PyQt5 import QtCore, QtWidgets
from PyQt5.QtWidgets import QMainWindow, QAction, qApp, QApplication, QDesktopWidget
from PyQt5.QtWidgets import QMenu, QPlainTextEdit, QSizePolicy
from PyQt5.QtGui import QIcon
from PyQt5.QtCore import Qt,QSize

class Example(QMainWindow):
    #init the example class to draw the window application    
    def __init__(self, parent = None):
        super(Example,self).__init__(parent)  
        size_policy = self.sizePolicy()
        size_policy.setHeightForWidth(True)
        size_policy.setVerticalPolicy(QSizePolicy.Preferred)
        self.setSizePolicy(size_policy)  
        self.initUI()

    #create the def center to select the center of the screen         
    def center(self):
        # geometry of the main window
        qr = self.frameGeometry()
        
        # center point of screen
        cp = QDesktopWidget().availableGeometry().center()
        # move rectangle's center point to screen's center point
        qr.moveCenter(cp)
        # top left of rectangle becomes top left of window centering it
        self.move(qr.topLeft())

    #create the init UI to draw the application
    def initUI(self):               
        #create the action for the exit application with shortcut and icon
        #you can add new action for File menu and any actions you need
        #self.setMinimumSize(QSize(440, 240))    
        self.setWindowTitle("parse sensors output - catafest")
        self.editor_text = QPlainTextEdit(self)
        # font
        default_font = self.editor_text.font()
        default_font.setPointSize(9)
        self.editor_text.setFont(default_font)

        self.setCentralWidget(self.editor_text)
        #self.editor_text.setMinimumSize(400,600)

        self.editor_text.setVerticalScrollBarPolicy(QtCore.Qt.ScrollBarAsNeeded)
        self.editor_text.setHorizontalScrollBarPolicy(QtCore.Qt.ScrollBarAsNeeded)
        
        self.editor_text.setObjectName("editor_text")
        self.editor_text.setEnabled(True)
        
        openAct = QAction(QIcon('open.png'), '&Open', self)        
        openAct.setShortcut('Ctrl+O')
        openAct.setStatusTip('Open file')
        openAct.triggered.connect(self.my_OpenDialog)

        exitAct = QAction(QIcon('exit.png'), '&Exit', self)        
        exitAct.setShortcut('Ctrl+Q')
        exitAct.setStatusTip('Exit application')
        exitAct.triggered.connect(qApp.quit)
        #create the status bar for menu 
        self.statusBar()
        #create the menu with the text File , add the exit action 
        #you can add many items on menu with actions for each item
        menubar = self.menuBar()
        fileMenu = menubar.addMenu('&File')
        # create open 
        fileMenu.addAction(openAct)
        # create exit 
        fileMenu.addAction(exitAct)
        
        # add submenu to menu 
        submenu = QMenu('Submenu',self)

        # some dummy actions
        submenu.addAction('Submenu 1')
        submenu.addAction('Submenu 2')
        
        # allow adding a sphere
        meshMenu = submenu.addMenu('Mesh')
        self.add_sphere_action = QAction('Add Sphere', self)
        self.add_sphere_action.triggered.connect(self.add_sphere)
        meshMenu.addAction(self.add_sphere_action)

        # add to the top menu
        menubar.addMenu(submenu)

        #layout = QtWidgets.QGridLayout(self)
        #layout.addWidget(self.editor_text)
        self.editor_text

        #resize the window application 
        self.resize(960, 720)
        #draw on center of the screen 
        self.center()
        #add title on windows application 
        self.setWindowTitle('Simple menu')
        #show the application
        self.show()
        #close the UI class

    def my_OpenDialog(self):
        path = QtWidgets.QFileDialog.getOpenFileName(
            self, 'Open file', '',
            'Text files (*.txt);;HTML files (*.html)')[0]
        if path:
            file = QtCore.QFile(path)
            if file.open(QtCore.QIODevice.ReadOnly):
                stream = QtCore.QTextStream(file)
                text = stream.readAll()
                info = QtCore.QFileInfo(path)
                if info.completeSuffix() == 'txt':
                    #self.editor_text.setHtml(text)
                    self.editor_text.insertPlainText(text)
                else:
                    self.editor_text.setPlainText(text)
                file.close()

    def add_sphere(self):
        """ add text with sphere """
        print("sphere")
        
if __name__ == '__main__':
    #create the application 
    app = QApplication(sys.argv)
    #use the UI with new  class
    ex = Example()
    #run the UI 
    sys.exit(app.exec_())

Tuesday, April 28, 2020

Python : Open any Jupiter notebook from GitHub in Colab.

In this tutorial I will show you how to open any Jupiter notebook from GitHub in the Google online Colab area.
First, go to the jupyter notebook in GitHub project.
Example:
https://github.com/catafest/colab_google/blob/master/catafest_001.ipynb
Change the link by adding the world tocolab after github, see the following example:
https://githubtocolab.com/catafest/colab_google/blob/master/catafest_001.ipynb
This will open the google colab notebook with the content of Jupiter notebook.
For more information about using Google Colab with GitHub, see this notebook from the Google Colab research.

Tuesday, April 21, 2020

Python 3.7.4 : A simple addon for Blender 3D version 2.8 .

Today I tested the python from Blender 3D software.
This software named Blender 3D come with python version 3.7.4 .
The version of this 3D tool is 2.82a .
This is a default addon with these python files: __init__.py , build.py, catafest_addon_start.py.
You can see a folder and images, but is not part of these tutorial.
The full source code of this addon can be found on my GitHub account on this project.
First python file named build.py will create the addon using this command:
python .\build.py
The source code for this python file is:
#!/usr/bin/env python

from os.path import abspath, dirname, join as pjoin
import zipfile

SRC_DIR = dirname(abspath(__file__))

with zipfile.ZipFile('catafest_addon_start.zip', 'w', zipfile.ZIP_DEFLATED) as arch:
    for filename in [
            '__init__.py',
            'catafest_addon_start.py',
            'textures/texture_001.png']:
        arch.write(pjoin(SRC_DIR, filename), 'add_mesh_catafest_blender_start/'+filename)

print('created file: catafest_addon_start.zip')
The next file named __init__.py will install the addon:
bl_info = {
    "name": "catafest addon start",
    "author": "Catalin George Festila",
    "license": "GPL",
    "version": (1, 1, 1),
    "blender": (2, 82, 0),
    "location": "View3D > Add > Mesh",
    "description": "Procedurally generate 3D catafest_addon_start from a random seed.",
    "warning": "",
    "wiki_url": "https://github.com/catafest/catafest_blender_start/blob/master/README.md",
    "tracker_url": "https://github.com/catafest/catafest_blender_start/issues",
    "category": "Add Mesh"
}

if "bpy" in locals():
    # reload logic (magic)
    import importlib
    importlib.reload(catafest_addon_start)
else:
    from . import catafest_addon_start

import bpy
from bpy.props import StringProperty, BoolProperty, IntProperty
from bpy.types import Operator

class Generate_catafest_mesh(Operator):
    """Procedurally generate a catafest 3D mesh from a random seed."""
    bl_idname = "mesh.generate_mesh"
    bl_label = "catafest_blender_start"
    bl_options = {'REGISTER', 'UNDO'}

    random_seed = StringProperty(default='', name='Seed')


    def execute(self, context):
        catafest_addon_start.generate_mesh(
            self.random_seed)
        return {'FINISHED'}

def menu_func(self, context):
    self.layout.operator(Generate_catafest_mesh.bl_idname, text="catafest_blender_start", icon="INFO")

def register():
    #bpy.utils.register_module(__name__)
    bpy.utils.register_class(Generate_catafest_mesh)
    #bpy.types.INFO_MT_mesh_add.append(menu_func)
    bpy.types.VIEW3D_MT_mesh_add.append(menu_func)

def unregister():
    #bpy.utils.unregister_module(__name__)
    bpy.utils.unregister_class(Generate_catafest_mesh)
    bpy.types.VIEW3D_MT_mesh_add.remove(menu_func)

if __name__ == "__main__":
    register()
The last one come with the addon features, for example to create a mesh.
This script will not create the mesh, but will show you how can be used, see generate_mesh.
You can change this generate_mesh to do your tasks.
# -*- coding:utf-8 -*-
#
# catafest_addon_start.py
#
# This is a Blender script that uses procedural generation to create
# a catafest 3D mesh from a random seed. Tested with Blender 2.77a.
#
# catalinfest@gmail.com
# https://github.com/catafest/catafest_blender_start
#
# ##### BEGIN GPL LICENSE BLOCK #####
#
#  This program is free software: you can redistribute it and/or modify
#  it under the terms of the GNU General Public License as published by
#  the Free Software Foundation, either version 3 of the License, or
#  (at your option) any later version.
#
#  This program is distributed in the hope that it will be useful,
#  but WITHOUT ANY WARRANTY; without even the implied warranty of
#  MERCHANTABILITY or FITNESS FOR A PARTICULAR PURPOSE.  See the
#  GNU General Public License for more details.
#
#  You should have received a copy of the GNU General Public License
#  along with this program.  If not, see .
#  All rights reserved.
#
# ##### END GPL LICENSE BLOCK #####

# 

#import all python modules 
import sys
import os
import os.path
import bpy
import bmesh
import datetime
from math import sqrt, radians, pi, cos, sin
from mathutils import Vector, Matrix
from random import random, seed, uniform, randint, randrange
from enum import IntEnum
from colorsys import hls_to_rgb

DIR = os.path.dirname(os.path.abspath(__file__))

# get resource path
def resource_path(*path_components):
    return os.path.join(DIR, *path_components)

# Deletes all existing catafest_addon_start and unused materials from the scene
def reset_scene():
    for item in bpy.data.objects:
        item.select = item.name.startswith('catafest_addon_start')
    bpy.ops.object.delete()
    for material in bpy.data.materials:
        if not material.users:
            bpy.data.materials.remove(material)
    for texture in bpy.data.textures:
        if not texture.users:
            bpy.data.textures.remove(texture)
# Generate mesh            
def generate_mesh(random_seed=''):
    if random_seed:
        seed(random_seed)

    # Let's start with a unit BMesh cube scaled randomly
    bm = bmesh.new()
    bmesh.ops.create_cube(bm, size=1)

if __name__ == "__main__":
    
    reset_scene()
    for area in bpy.context.screen.areas:
        if area.type == 'VIEW_3D':
            ctx = bpy.context.copy()
            ctx['area'] = area
            ctx['region'] = area.regions[-1]
            bpy.ops.view3d.view_selected(ctx)
    
    scene = bpy.data.scenes["Scene"]
    scene.render.resolution_x = res_x
    scene.render.resolution_y = res_y
    scene.camera.rotation_mode = 'XYZ'
    scene.camera.data.angle = radians(fov)
    frame = 0
    timestamp = datetime.datetime.now().strftime('%Y%m%d_%H%M%S')

Sunday, April 19, 2020

Python 3.6.9 : My colab tutorials - part 004.

Today, I tested the python module named imdbpy with Colab Google features.
This show you how easy can build and run a simple python script to take data from web sites.
You can see the full example on my GitHub account.

Python 3.8.2 : New release 2.3.2 for Pygame Menu.

Today, the development team come with this infos from the GitHub comes with a new release version 2.3.2.
Python library that can create a simple menu for the pygame application. Supports:
  • Textual menus
  • Buttons
  • Lists of values (selectors) that can trigger functions when pressing return or changing the value
  • Input text
  • Color input
NOTE: pygame-menu v2 will not provide new widgets or functionalities, consider upgrading to the lastest version.

Let's start the tutorial with python install on Windows 10 using the installer from here.
Use these settings from images:


Download get-pip.py to a folder on your computer.
Open a command prompt and navigate to the folder containing get-pip.py.
Run the following command:
python get-pip.py
Then update the path:
C:\Projects\Python\pygame-menu>python -m pip install --upgrade pip
Collecting pip
  Downloading https://files.pythonhosted.org/packages/54/0c/d01aa759fdc501a58f431
  eb594a17495f15b88da142ce14b5845662c13f3/pip-20.0.2-py2.py3-none-any.whl (1.4MB)
     |████████████████████████████████| 1.4MB 819kB/s
Installing collected packages: pip
  Found existing installation: pip 19.2.3
    Uninstalling pip-19.2.3:
      Successfully uninstalled pip-19.2.3
Successfully installed pip-20.0.2
You need to install pygame python module:
C:\Projects\Python\pygame-menu>pip install pygame
Collecting pygame
  Downloading pygame-1.9.6-cp38-cp38-win_amd64.whl (4.8 MB)
     |████████████████████████████████| 4.8 MB 819 kB/s
Installing collected packages: pygame
Successfully installed pygame-1.9.6
The last step is to install the Pygame Menu with git tool and documentation with pip tool:

$ git clone https://github.com/ppizarror/pygame-menu
Cloning into 'pygame-menu'...
remote: Enumerating objects: 9, done.
remote: Counting objects: 100% (9/9), done.
remote: Compressing objects: 100% (7/7), done.
remote: Total 5649 (delta 3), reused 7 (delta 2), pack-reused 5640
Receiving objects: 100% (5649/5649), 12.99 MiB | 5.52 MiB/s, done.
Resolving deltas: 100% (4289/4289), done.
...
C:\Projects\Python\pygame-menu>pip install -e .[doc]
The result with of how these python module with a simple example:
C:\Projects\Python\pygame-menu\pygame_menu\examples>python game_selector.py
pygame 1.9.6
Hello from the pygame community. https://www.pygame.org/contribute.html
...

Saturday, April 4, 2020

Python 2.7.8 : Using python scripts with Revit Dynamo.

Dynamo is a visual programming tool that extends the power of the Revit by providing access to Revit API (Application Programming Interface.
Dynamo works with node, each node have inputs and outputs and performs a specific task.
This is a short tutorial about how you can use your python skills with Revit and Dynamo software.
First, you need to start the Revit. I used Revit 2020 version.
Then from Main menu use Manage and click on Dynamo icon to open the Dynamo window and press on New project or Open an old project.
You can add node by typing in the left area named Library editbox the name o the node and click when is find it.
For example, type Watch and then double click to add to the work area.
Dynamo use Python version 2.7.8 and scripts works with python modules and Dynamo node.
For example, I add some node's to the working area and I link to see how these works using the click and drag mouse features.
If you want to test the python scripting issue, then use the editbox and type Python Script.
Use double click to add to working area.
Search again the Watch node and add it.
To see the editor , use right click on Python Script and select the Edit... .
Now, you can have a image like this with an editor and a node named Python Script and a node named Watch
Link the Python Script node with OUT with Watch, by click on OUT , drag with the mouse and then click on > input from Watch.

The script from the Python Script is this:
# Load the Python Standard and DesignScript Libraries
import sys
import clr
clr.AddReference('ProtoGeometry')
from Autodesk.DesignScript.Geometry import *

# The inputs to this node will be stored as a list in the IN variables.
dataEnteringNode = IN

# Place your code below this line

# Assign your output to the OUT variable.
OUT = 0

import time
from StringIO import StringIO
output = StringIO()
sys.stdout = output
t1 = time.time()
duration = time.time() - t1
print('Finished in {} seconds'.format(duration))
OUT = output.getvalue()

# let's the time module
print("Python version")
print (sys.version)
print("Version info.")
print (sys.version_info)

OUT = output.getvalue()
Press on Run button and you will see the result on Watch node: Finished in 0.0 seconds ...