analitics

Pages

Sunday, May 17, 2020

Python 3.8.3 : Simple example to fix maximum recursion depth exceeded.

This short tutorial try to solve simple and easy the stack limit for recursion without using advanced programming techniques.
sys.setrecursionlimit(limit)
    Set the maximum depth of the Python interpreter stack to limit. 
This limit prevents infinite recursion from causing an overflow of the C stack
and crashing Python.
This can be done in most cases with:
import sys
sys.setrecursionlimit(1976)
Let's test with an simple example for a given number.
input_number = 1234567890987654321
I create a script for the next function to print the result:
def split_input(n):
    return split_input(n // 10) + [n % 10]
The result of this function is:
python flow_001.py
Traceback (most recent call last):
  File "flow_001.py", line 12, in 
    input_list = split_input(input_number)
  File "flow_001.py", line 10, in split_input
    return split_input(n // 10) + [n % 10]
  File "flow_001.py", line 10, in split_input
    return split_input(n // 10) + [n % 10]
  File "flow_001.py", line 10, in split_input
    return split_input(n // 10) + [n % 10]
  [Previous line repeated 996 more times]
RecursionError: maximum recursion depth exceeded
You can see I got an error. Let fix this function with a proper source code:
def split_nr(n):
    if n < 1:
        return [n]
    else:
        return split_nr(n // 10) + [n % 10] 
This will solve the recursion split function.
python flow_001.py
[1, 2, 3, 4, 5, 6, 7, 8, 9, 0, 9, 8, 7, 6, 5, 4, 3, 2, 1]

Friday, May 15, 2020

IronPython 2.7.7 : Intro on RevitPythonShell.

This is one of the several ways to use RevitPythonWrapper:
  • pyRevit;
  • RevitPythonShell;
  • Dynamo;
This tool help you to use python with the Revit tool and can be found at the GitHub webpage.
They say:
The RevitPythonShell adds an IronPython interpreter to Autodesk Revit and Vasari. The RevitPythonShell (RPS) lets you to write plugins for Revit in Python, my favourite scripting language! But even better, it provides you with an interactive shell that lets you see the results of your code as you type it. This is great for exploring the Revit API while writing your Revit Addins - use this in combination with the RevitLookup database exploration tool to become a Revit API Ninja :)
You need to install your instaler according with the Revit version.
You can start it from Main Menu - Add-Ins and you see it.
Is very easy to use it, let's see one simple example:
import clr
clr.AddReference("RevitAPI")
from Autodesk.Revit.DB import BuiltInCategory as Bic
from Autodesk.Revit.DB import FilteredElementCollector as Fec
from Autodesk.Revit.DB import Transaction
# reference to the current open revit model is
doc = __revit__.ActiveUIDocument.Document
Let's see a simple example on Revit with an wall and a simple door.
IronPython 2.7.7 (2.7.7.0) on .NET 4.0.30319.42000 (64-bit)
Type "help", "copyright", "credits" or "license" for more information.
>>> a = b = 1 
>>> c = a + b + 1
>>> print(c)
3
>>> from Autodesk.Revit.DB import FilteredElementCollector as Fec
>>> from Autodesk.Revit.DB import BuiltInCategory as Bic
>>> doors = Fec(doc).OfCategory(Bic.OST_Doors).WhereElementIsNotElementType().ToElements()
>>> print(dir(doors))
['Add', 'AddRange', 'AsReadOnly', 'BinarySearch', 'Capacity', 'Clear', 'Contains', 'ConvertAll', 'CopyTo',
'Count', 'Enumerator', 'Equals', 'Exists', 'Find', 'FindAll', 'FindIndex', 'FindLast', 'FindLastIndex', 
'ForEach', 'GetEnumerator', 'GetHashCode', 'GetRange', 'GetType', 'IndexOf', 'Insert', 'InsertRange', 
'IsReadOnly', 'IsSynchronized', 'Item', 'LastIndexOf', 'MemberwiseClone', 'ReferenceEquals', 'Remove', 
'RemoveAll', 'RemoveAt', 'RemoveRange', 'Reverse', 'Sort', 'SyncRoot', 'ToArray', 'ToString', 'TrimExcess', 
'TrueForAll', '__add__', '__class__', '__contains__', '__delattr__', '__doc__', '__format__', 
'__getattribute__', '__getitem__', '__hash__', '__init__', '__iter__', '__len__', '__new__', 
'__reduce__', '__reduce_ex__', '__repr__', '__setattr__', '__setitem__', '__sizeof__', 
'__str__', '__subclasshook__']
>>> for each_door in doors:
... 	print(each_door.Id)
... 	print(each_door.Mirrored)
... 	print(each_door.Symbol.LookupParameter("Type Name").ToString())
... 
840590
False
Autodesk.Revit.DB.Parameter
>>> 
Let's see the output of this code on Revit.


Thursday, May 14, 2020

Python 3.8.3 : Pyxel free game engine.

Pyxel is a free game engine is build for create old fashioned pixel art style games easily.
Pyxel is published under MIT License.
This allow you to use 2D sprites, sound and interactions.
The project can be found at the GitHub webpage.
The basic features are:
  • Run on Windows, Mac, and Linux
  • Code writing with Python3
  • Fixed 16 color palette
  • 256x256 sized 3 image banks
  • 256x256 sized 8 tilemaps
  • 4 channels with 64 definable sounds
  • 8 musics which can combine arbitrary sounds
  • Keyboard, mouse, and gamepad inputs
  • Image and sound editor
The instalation is easy.
pip3 install pyxel
Collecting pyxel
...
Successfully installed altgraph-0.17 pefile-2019.4.18 pyinstaller-3.6 pywin32-ctypes-0.2.0 pyxel-1.3.7
Use this command to start the tool for create sprites and sounds.
pyxeleditor
You can test many examples on GitHub.
The basic example from the web is simple:
import pyxel

class App:
    def __init__(self):
        pyxel.init(160, 120, caption="Hello Pyxel")
        pyxel.image(0).load(0, 0, "assets/pyxel_logo_38x16.png")
        pyxel.run(self.update, self.draw)

    def update(self):
        if pyxel.btnp(pyxel.KEY_Q):
            pyxel.quit()

    def draw(self):
        pyxel.cls(0)
        pyxel.text(55, 41, "Hello, Pyxel!", pyxel.frame_count % 16)
        pyxel.blt(61, 66, 0, 0, 0, 38, 16)

App()

I start with a simple example. I don't find a collision system on Pyxel. Let's see the source code:
import pyxel
from pyxel import circ, cls, flip, init
from random import randint

# the position of the ball
x = y = 30  
# the speed of the ball
v = w = 3  
# create the screen as 160x120 size
pyxel.init(160, 112)  
#
data = [70, 60, 30, 70]


 # draw a line below the bar chart

while True:
    # erase the screen with color number 1 (blue)
    pyxel.cls(1)  

    # process the movement of the ball
    x += v
    y += w
    
    r = randint(0, 160)  
    a = randint(0, 112)
    rr = randint(0, 160) 
    aa = randint(0, 112)
    # create random lines on screen
    pyxel.line(a, aa, r, rr, 5)

    # set the border
    if x <= 7 or x >= 160:
        x = min(max(x, 7), 160)
        v = -v

    if y <= 7 or y >= 112:
        y = min(max(y, 7), 112)
        w = -w
  
    # draw the ball with different colors
    pyxel.circ(x, y, 4, pyxel.frame_count % 8) 
 
    # create a simple chart
    for i, d in enumerate(data):
        pyxel.rect(i * 33 + 10, 120 - d, 10, d, 8 + i) 

    # draw the game
    pyxel.flip()

Tuesday, May 12, 2020

Python 3.8.3 : Create shortcuts and add python to the context menu.

The tutorial for today is a simple script for python user.
If you run this python script in your folder you will get an python shortcut to the python and the python to the Context Menu in Windows 10.
The Context Menu can be used with right click from your mouse, see the screenshot.

This script can also be used with any executable if you make some changes.
import os
import pythoncom
from win32com.shell import shell

dirpath = os.getcwd()
if not os.path.exists(dirpath):
    os.makedirs(dirpath)

win_user = os.getenv('username')
shortcut_path = dirpath + r"\python.lnk"

shortcut_path = str(r"C:\\Users\\")+win_user+str("\\AppData\\Roaming\\Microsoft\\Windows\\SendTo\\python.lnk")

target_path = r"D:\\Python38_64\\python.exe"

shortcut_instance = pythoncom.CoCreateInstance(
    shell.CLSID_ShellLink, None, pythoncom.CLSCTX_INPROC_SERVER, shell.IID_IShellLink)
persist_file = shortcut_instance.QueryInterface(pythoncom.IID_IPersistFile)
shortcut_instance.SetPath(target_path)
persist_file.Save (shortcut_path, 0)

Monday, May 11, 2020

Python Qt5 : Simple text editor with QPlainTextEdit.

I haven't played python in a long time. It can be seen after the last article.
Today I installed Python 3.8.3 and my favorite PyQt5 and started to see how much I forgot from what I knew.
Installing PyQt5 python mode was simple.
pip3 install PyQt5
Collecting PyQt5
  Downloading PyQt5-5.14.2-5.14.2-cp35.cp36.cp37.cp38-none-win_amd64.whl (52.9 MB)
     |████████████████████████████████| 52.9 MB 80 kB/s
Collecting PyQt5-sip<13>=12.7
  Downloading PyQt5_sip-12.7.2-cp38-cp38-win_amd64.whl (59 kB)
     |████████████████████████████████| 59 kB 4.1 MB/s
Installing collected packages: PyQt5-sip, PyQt5
Successfully installed PyQt5-5.14.2 PyQt5-sip-12.7.2

The next step was to use QPlainTextEdit so the task was simple: an editor.
Because I created another article about a publisher, see this tutorial, I decided to attach a main menu with submenus and customize it.
The source code is simple to understand and is commented for a better understanding.
# -*- coding: utf-8 -*-
"""
@author: catafest
"""
import sys
import sys, os
from PyQt5 import QtCore, QtWidgets
from PyQt5.QtWidgets import QMainWindow, QAction, qApp, QApplication, QDesktopWidget
from PyQt5.QtWidgets import QMenu, QPlainTextEdit, QSizePolicy
from PyQt5.QtGui import QIcon
from PyQt5.QtCore import Qt,QSize

class Example(QMainWindow):
    #init the example class to draw the window application    
    def __init__(self, parent = None):
        super(Example,self).__init__(parent)  
        size_policy = self.sizePolicy()
        size_policy.setHeightForWidth(True)
        size_policy.setVerticalPolicy(QSizePolicy.Preferred)
        self.setSizePolicy(size_policy)  
        self.initUI()

    #create the def center to select the center of the screen         
    def center(self):
        # geometry of the main window
        qr = self.frameGeometry()
        
        # center point of screen
        cp = QDesktopWidget().availableGeometry().center()
        # move rectangle's center point to screen's center point
        qr.moveCenter(cp)
        # top left of rectangle becomes top left of window centering it
        self.move(qr.topLeft())

    #create the init UI to draw the application
    def initUI(self):               
        #create the action for the exit application with shortcut and icon
        #you can add new action for File menu and any actions you need
        #self.setMinimumSize(QSize(440, 240))    
        self.setWindowTitle("parse sensors output - catafest")
        self.editor_text = QPlainTextEdit(self)
        # font
        default_font = self.editor_text.font()
        default_font.setPointSize(9)
        self.editor_text.setFont(default_font)

        self.setCentralWidget(self.editor_text)
        #self.editor_text.setMinimumSize(400,600)

        self.editor_text.setVerticalScrollBarPolicy(QtCore.Qt.ScrollBarAsNeeded)
        self.editor_text.setHorizontalScrollBarPolicy(QtCore.Qt.ScrollBarAsNeeded)
        
        self.editor_text.setObjectName("editor_text")
        self.editor_text.setEnabled(True)
        
        openAct = QAction(QIcon('open.png'), '&Open', self)        
        openAct.setShortcut('Ctrl+O')
        openAct.setStatusTip('Open file')
        openAct.triggered.connect(self.my_OpenDialog)

        exitAct = QAction(QIcon('exit.png'), '&Exit', self)        
        exitAct.setShortcut('Ctrl+Q')
        exitAct.setStatusTip('Exit application')
        exitAct.triggered.connect(qApp.quit)
        #create the status bar for menu 
        self.statusBar()
        #create the menu with the text File , add the exit action 
        #you can add many items on menu with actions for each item
        menubar = self.menuBar()
        fileMenu = menubar.addMenu('&File')
        # create open 
        fileMenu.addAction(openAct)
        # create exit 
        fileMenu.addAction(exitAct)
        
        # add submenu to menu 
        submenu = QMenu('Submenu',self)

        # some dummy actions
        submenu.addAction('Submenu 1')
        submenu.addAction('Submenu 2')
        
        # allow adding a sphere
        meshMenu = submenu.addMenu('Mesh')
        self.add_sphere_action = QAction('Add Sphere', self)
        self.add_sphere_action.triggered.connect(self.add_sphere)
        meshMenu.addAction(self.add_sphere_action)

        # add to the top menu
        menubar.addMenu(submenu)

        #layout = QtWidgets.QGridLayout(self)
        #layout.addWidget(self.editor_text)
        self.editor_text

        #resize the window application 
        self.resize(960, 720)
        #draw on center of the screen 
        self.center()
        #add title on windows application 
        self.setWindowTitle('Simple menu')
        #show the application
        self.show()
        #close the UI class

    def my_OpenDialog(self):
        path = QtWidgets.QFileDialog.getOpenFileName(
            self, 'Open file', '',
            'Text files (*.txt);;HTML files (*.html)')[0]
        if path:
            file = QtCore.QFile(path)
            if file.open(QtCore.QIODevice.ReadOnly):
                stream = QtCore.QTextStream(file)
                text = stream.readAll()
                info = QtCore.QFileInfo(path)
                if info.completeSuffix() == 'txt':
                    #self.editor_text.setHtml(text)
                    self.editor_text.insertPlainText(text)
                else:
                    self.editor_text.setPlainText(text)
                file.close()

    def add_sphere(self):
        """ add text with sphere """
        print("sphere")
        
if __name__ == '__main__':
    #create the application 
    app = QApplication(sys.argv)
    #use the UI with new  class
    ex = Example()
    #run the UI 
    sys.exit(app.exec_())

Tuesday, April 28, 2020

Python : Open any Jupiter notebook from GitHub in Colab.

In this tutorial I will show you how to open any Jupiter notebook from GitHub in the Google online Colab area.
First, go to the jupyter notebook in GitHub project.
Example:
https://github.com/catafest/colab_google/blob/master/catafest_001.ipynb
Change the link by adding the world tocolab after github, see the following example:
https://githubtocolab.com/catafest/colab_google/blob/master/catafest_001.ipynb
This will open the google colab notebook with the content of Jupiter notebook.
For more information about using Google Colab with GitHub, see this notebook from the Google Colab research.

Tuesday, April 21, 2020

Python 3.7.4 : A simple addon for Blender 3D version 2.8 .

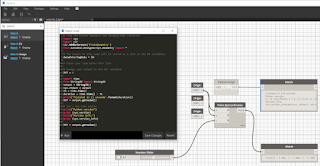
Today I tested the python from Blender 3D software.
This software named Blender 3D come with python version 3.7.4 .
The version of this 3D tool is 2.82a .
This is a default addon with these python files: __init__.py , build.py, catafest_addon_start.py.
You can see a folder and images, but is not part of these tutorial.
The full source code of this addon can be found on my GitHub account on this project.
First python file named build.py will create the addon using this command:
python .\build.py
The source code for this python file is:
#!/usr/bin/env python

from os.path import abspath, dirname, join as pjoin
import zipfile

SRC_DIR = dirname(abspath(__file__))

with zipfile.ZipFile('catafest_addon_start.zip', 'w', zipfile.ZIP_DEFLATED) as arch:
    for filename in [
            '__init__.py',
            'catafest_addon_start.py',
            'textures/texture_001.png']:
        arch.write(pjoin(SRC_DIR, filename), 'add_mesh_catafest_blender_start/'+filename)

print('created file: catafest_addon_start.zip')
The next file named __init__.py will install the addon:
bl_info = {
    "name": "catafest addon start",
    "author": "Catalin George Festila",
    "license": "GPL",
    "version": (1, 1, 1),
    "blender": (2, 82, 0),
    "location": "View3D > Add > Mesh",
    "description": "Procedurally generate 3D catafest_addon_start from a random seed.",
    "warning": "",
    "wiki_url": "https://github.com/catafest/catafest_blender_start/blob/master/README.md",
    "tracker_url": "https://github.com/catafest/catafest_blender_start/issues",
    "category": "Add Mesh"
}

if "bpy" in locals():
    # reload logic (magic)
    import importlib
    importlib.reload(catafest_addon_start)
else:
    from . import catafest_addon_start

import bpy
from bpy.props import StringProperty, BoolProperty, IntProperty
from bpy.types import Operator

class Generate_catafest_mesh(Operator):
    """Procedurally generate a catafest 3D mesh from a random seed."""
    bl_idname = "mesh.generate_mesh"
    bl_label = "catafest_blender_start"
    bl_options = {'REGISTER', 'UNDO'}

    random_seed = StringProperty(default='', name='Seed')


    def execute(self, context):
        catafest_addon_start.generate_mesh(
            self.random_seed)
        return {'FINISHED'}

def menu_func(self, context):
    self.layout.operator(Generate_catafest_mesh.bl_idname, text="catafest_blender_start", icon="INFO")

def register():
    #bpy.utils.register_module(__name__)
    bpy.utils.register_class(Generate_catafest_mesh)
    #bpy.types.INFO_MT_mesh_add.append(menu_func)
    bpy.types.VIEW3D_MT_mesh_add.append(menu_func)

def unregister():
    #bpy.utils.unregister_module(__name__)
    bpy.utils.unregister_class(Generate_catafest_mesh)
    bpy.types.VIEW3D_MT_mesh_add.remove(menu_func)

if __name__ == "__main__":
    register()
The last one come with the addon features, for example to create a mesh.
This script will not create the mesh, but will show you how can be used, see generate_mesh.
You can change this generate_mesh to do your tasks.
# -*- coding:utf-8 -*-
#
# catafest_addon_start.py
#
# This is a Blender script that uses procedural generation to create
# a catafest 3D mesh from a random seed. Tested with Blender 2.77a.
#
# catalinfest@gmail.com
# https://github.com/catafest/catafest_blender_start
#
# ##### BEGIN GPL LICENSE BLOCK #####
#
#  This program is free software: you can redistribute it and/or modify
#  it under the terms of the GNU General Public License as published by
#  the Free Software Foundation, either version 3 of the License, or
#  (at your option) any later version.
#
#  This program is distributed in the hope that it will be useful,
#  but WITHOUT ANY WARRANTY; without even the implied warranty of
#  MERCHANTABILITY or FITNESS FOR A PARTICULAR PURPOSE.  See the
#  GNU General Public License for more details.
#
#  You should have received a copy of the GNU General Public License
#  along with this program.  If not, see .
#  All rights reserved.
#
# ##### END GPL LICENSE BLOCK #####

# 

#import all python modules 
import sys
import os
import os.path
import bpy
import bmesh
import datetime
from math import sqrt, radians, pi, cos, sin
from mathutils import Vector, Matrix
from random import random, seed, uniform, randint, randrange
from enum import IntEnum
from colorsys import hls_to_rgb

DIR = os.path.dirname(os.path.abspath(__file__))

# get resource path
def resource_path(*path_components):
    return os.path.join(DIR, *path_components)

# Deletes all existing catafest_addon_start and unused materials from the scene
def reset_scene():
    for item in bpy.data.objects:
        item.select = item.name.startswith('catafest_addon_start')
    bpy.ops.object.delete()
    for material in bpy.data.materials:
        if not material.users:
            bpy.data.materials.remove(material)
    for texture in bpy.data.textures:
        if not texture.users:
            bpy.data.textures.remove(texture)
# Generate mesh            
def generate_mesh(random_seed=''):
    if random_seed:
        seed(random_seed)

    # Let's start with a unit BMesh cube scaled randomly
    bm = bmesh.new()
    bmesh.ops.create_cube(bm, size=1)

if __name__ == "__main__":
    
    reset_scene()
    for area in bpy.context.screen.areas:
        if area.type == 'VIEW_3D':
            ctx = bpy.context.copy()
            ctx['area'] = area
            ctx['region'] = area.regions[-1]
            bpy.ops.view3d.view_selected(ctx)
    
    scene = bpy.data.scenes["Scene"]
    scene.render.resolution_x = res_x
    scene.render.resolution_y = res_y
    scene.camera.rotation_mode = 'XYZ'
    scene.camera.data.angle = radians(fov)
    frame = 0
    timestamp = datetime.datetime.now().strftime('%Y%m%d_%H%M%S')

Sunday, April 19, 2020

Python 3.6.9 : My colab tutorials - part 004.

Today, I tested the python module named imdbpy with Colab Google features.
This show you how easy can build and run a simple python script to take data from web sites.
You can see the full example on my GitHub account.

Python 3.8.2 : New release 2.3.2 for Pygame Menu.

Today, the development team come with this infos from the GitHub comes with a new release version 2.3.2.
Python library that can create a simple menu for the pygame application. Supports:
  • Textual menus
  • Buttons
  • Lists of values (selectors) that can trigger functions when pressing return or changing the value
  • Input text
  • Color input
NOTE: pygame-menu v2 will not provide new widgets or functionalities, consider upgrading to the lastest version.

Let's start the tutorial with python install on Windows 10 using the installer from here.
Use these settings from images:


Download get-pip.py to a folder on your computer.
Open a command prompt and navigate to the folder containing get-pip.py.
Run the following command:
python get-pip.py
Then update the path:
C:\Projects\Python\pygame-menu>python -m pip install --upgrade pip
Collecting pip
  Downloading https://files.pythonhosted.org/packages/54/0c/d01aa759fdc501a58f431
  eb594a17495f15b88da142ce14b5845662c13f3/pip-20.0.2-py2.py3-none-any.whl (1.4MB)
     |████████████████████████████████| 1.4MB 819kB/s
Installing collected packages: pip
  Found existing installation: pip 19.2.3
    Uninstalling pip-19.2.3:
      Successfully uninstalled pip-19.2.3
Successfully installed pip-20.0.2
You need to install pygame python module:
C:\Projects\Python\pygame-menu>pip install pygame
Collecting pygame
  Downloading pygame-1.9.6-cp38-cp38-win_amd64.whl (4.8 MB)
     |████████████████████████████████| 4.8 MB 819 kB/s
Installing collected packages: pygame
Successfully installed pygame-1.9.6
The last step is to install the Pygame Menu with git tool and documentation with pip tool:

$ git clone https://github.com/ppizarror/pygame-menu
Cloning into 'pygame-menu'...
remote: Enumerating objects: 9, done.
remote: Counting objects: 100% (9/9), done.
remote: Compressing objects: 100% (7/7), done.
remote: Total 5649 (delta 3), reused 7 (delta 2), pack-reused 5640
Receiving objects: 100% (5649/5649), 12.99 MiB | 5.52 MiB/s, done.
Resolving deltas: 100% (4289/4289), done.
...
C:\Projects\Python\pygame-menu>pip install -e .[doc]
The result with of how these python module with a simple example:
C:\Projects\Python\pygame-menu\pygame_menu\examples>python game_selector.py
pygame 1.9.6
Hello from the pygame community. https://www.pygame.org/contribute.html
...

Saturday, April 4, 2020

Python 2.7.8 : Using python scripts with Revit Dynamo.

Dynamo is a visual programming tool that extends the power of the Revit by providing access to Revit API (Application Programming Interface.
Dynamo works with node, each node have inputs and outputs and performs a specific task.
This is a short tutorial about how you can use your python skills with Revit and Dynamo software.
First, you need to start the Revit. I used Revit 2020 version.
Then from Main menu use Manage and click on Dynamo icon to open the Dynamo window and press on New project or Open an old project.
You can add node by typing in the left area named Library editbox the name o the node and click when is find it.
For example, type Watch and then double click to add to the work area.
Dynamo use Python version 2.7.8 and scripts works with python modules and Dynamo node.
For example, I add some node's to the working area and I link to see how these works using the click and drag mouse features.
If you want to test the python scripting issue, then use the editbox and type Python Script.
Use double click to add to working area.
Search again the Watch node and add it.
To see the editor , use right click on Python Script and select the Edit... .
Now, you can have a image like this with an editor and a node named Python Script and a node named Watch
Link the Python Script node with OUT with Watch, by click on OUT , drag with the mouse and then click on > input from Watch.

The script from the Python Script is this:
# Load the Python Standard and DesignScript Libraries
import sys
import clr
clr.AddReference('ProtoGeometry')
from Autodesk.DesignScript.Geometry import *

# The inputs to this node will be stored as a list in the IN variables.
dataEnteringNode = IN

# Place your code below this line

# Assign your output to the OUT variable.
OUT = 0

import time
from StringIO import StringIO
output = StringIO()
sys.stdout = output
t1 = time.time()
duration = time.time() - t1
print('Finished in {} seconds'.format(duration))
OUT = output.getvalue()

# let's the time module
print("Python version")
print (sys.version)
print("Version info.")
print (sys.version_info)

OUT = output.getvalue()
Press on Run button and you will see the result on Watch node: Finished in 0.0 seconds ...

Tuesday, March 17, 2020

Python 3.6.9 : My colab tutorials - part 003.

This tutorial refers to a python module named cirq.
The documentation of this python module can be found on this website.
The development team comes with this intro:
Cirq is a software library for writing, manipulating, and optimizing quantum circuits and then running them against quantum computers and simulators. Cirq attempts to expose the details of hardware, instead of abstracting them away, because, in the Noisy Intermediate-Scale Quantum (NISQ) regime, these details determine whether or not it is possible to execute a circuit at all.
I try to install on Ubuntu but not work:
$ lsb_release -a
No LSB modules are available.
Distributor ID: Ubuntu
Description: Ubuntu 16.04.6 LTS
Release: 16.04
Codename: xenial
...
$ pip3 install cirq --user
Requirement already satisfied: cirq in ./.local/lib/python3.5/site-packages (0.5.556)
...
$ python3 -c 'import cirq; print(cirq.google.Foxtail)'
Traceback (most recent call last):
  File "", line 1, in 
ImportError: No module named 'cirq'
I use it with colab notebook and works very well and I add some basic information about quantum computing with a few examples of this python module.
See my GitHub account with the catafest_004.ipynb notebook example and basic pieces of information.
A very short intro into quantum computing area can be found on this video:

Monday, March 16, 2020

Python 3.5.2 : Detect motion and save images with opencv.

This script is simple to use it with a webcam or to parse a video file.
The main goal of this script is to see the difference in various frames of a video or webcam output.
The first frame of our video file will contain no motion and just background and then is compute the absolute difference.
There is no need to process the large, raw images straight from the video stream and this is the reason I convert the image to grayscale.
Some text is put on the window to show us the status string to indicate it is detection.
With this script I detect cars and peoples from my window, see the screenshot with these files:

Let's see the python script:
import argparse
import datetime
import imutils

import cv2

import time
from time import sleep

def saveJpgImage(frame):
    #process image
    img_name = "opencv_frame_{}.jpg".format(time)
    cv2.imwrite(img_name, frame)

def savePngImage():
    #process image
    img_name = "opencv_frame_{}.png".format(time)
    cv2.imwrite(img_name, frame)

# get argument parse
ap = argparse.ArgumentParser()
ap.add_argument("-v", "--video", help="path to the video file")
ap.add_argument("-s", "--size", type=int, default=480, help="minimum area size , default 480")
args = vars(ap.parse_args())

# if no video use webcam
if args.get("video", None) is None:
    camera = cv2.VideoCapture(0)
    #time.sleep(1.5)

# use video file
else:
    camera = cv2.VideoCapture(args["video"])


# frame from video is none 
first_frame = None

# loop into frames of the video
while True:
    # grab the current frame 
    (grabbed, frame) = camera.read()
    text = "undetected"

    # is no frame grabbed the is end of video 
    if not grabbed:
        break

    # resize the frame 
    frame = imutils.resize(frame, width=640)
    gray = cv2.cvtColor(frame, cv2.COLOR_BGR2GRAY)
    gray = cv2.GaussianBlur(gray, (21, 21), 0)

    # is first frame is none , make gray 
    if first_frame is None:
        first_frame = gray
        continue


    # compute difference from current frame and first frame 
    frameDelta = cv2.absdiff(first_frame, gray)
    first_frame = gray
    thresh = cv2.threshold(frameDelta, 1, 255, cv2.THRESH_BINARY)[1]

    # dilate the thresholded image to fill in holes
    # then find contours on thresholded image
    thresh = cv2.dilate(thresh, None, iterations=2)
    (cnts, _) = cv2.findContours(thresh.copy(), cv2.RETR_EXTERNAL,
                                 cv2.CHAIN_APPROX_SIMPLE)

    # loop contours 
    for c in cnts:
        # if the contour is too small, ignore it
        if cv2.contourArea(c) < args["size"]:
            continue

        # compute the bounding box for the contour
        # draw it on the frame,
        # and update the text
        (x, y, w, h) = cv2.boundingRect(c)
        cv2.rectangle(frame, (x, y), (x + w, y + h), (0, 255, 0), 0)
        roi = frame[y:y+h, x:x+w]
        ts = time.time()
        st = datetime.datetime.fromtimestamp(ts).strftime('%d-%m-%Y_%H-%M-%S')
        # if the detection is on sized then save the image 
        if (w > h ) and (y + h) > 50 and (y + h) < 550:
            cv2.imwrite(st+"opencv.jpg", roi)
        # set text to show on gui 
        text = "detected"
    
    # draw the text and timestamp on the frame
    cv2.putText(frame, "Detect: {}".format(text), (10, 20),
                cv2.FONT_HERSHEY_SIMPLEX, 0.5, (0, 0, 255), 2)
    cv2.putText(frame, datetime.datetime.now().strftime("%A %d %B %Y %I:%M:%S%p"),
                (10, frame.shape[0] - 10), cv2.FONT_HERSHEY_SIMPLEX, 0.35, (0, 0, 255), 1)

    #show frame , thresh and frame_Delta
    cv2.imshow("Security Feed", frame)
    cv2.imshow("Thresh", thresh)
    cv2.imshow("Frame Delta", frameDelta)
    key = cv2.waitKey(1) &  0xFF

    # break from loop with q key 
    if key == ord("q"):
        break

# close camera and windows 
camera.release()
cv2.destroyAllWindows()

Wednesday, March 4, 2020

Python 3.6.9 : My colab tutorials - part 002.

This is another notebook with the Altair python package.
The development team comes with this intro:
Altair is a declarative statistical visualization library for Python, based on Vega and Vega-Lite.

Altair offers a powerful and concise visualization grammar that enables you to build a wide range of statistical visualizations quickly. Here is an example of using the Altair API to quickly visualize a dataset with an interactive scatter plot:

See the notebook at my GitHub account.