The first step is shown in the next image:
08/17/2017  11:12 PM                98 app.yaml
08/17/2017  11:12 PM               854 main.py
08/17/2017 11:12 PM 817 main_test.pyruntime: python27
api_version: 1
threadsafe: true
handlers:
- url: /.*
script: main.app
# Copyright 2016 Google Inc.
#
# Licensed under the Apache License, Version 2.0 (the "License");
# you may not use this file except in compliance with the License.
# You may obtain a copy of the License at
#
#     http://www.apache.org/licenses/LICENSE-2.0
#
# Unless required by applicable law or agreed to in writing, software
# distributed under the License is distributed on an "AS IS" BASIS,
# WITHOUT WARRANTIES OR CONDITIONS OF ANY KIND, either express or implied.
# See the License for the specific language governing permissions and
# limitations under the License.

import webapp2


class MainPage(webapp2.RequestHandler):
    def get(self):
        self.response.headers['Content-Type'] = 'text/plain'
        self.response.write('Hello, World!')


app = webapp2.WSGIApplication([
    ('/', MainPage),
], debug=True)# Copyright 2016 Google Inc. All rights reserved.
#
# Licensed under the Apache License, Version 2.0 (the "License");
# you may not use this file except in compliance with the License.
# You may obtain a copy of the License at
#
# http://www.apache.org/licenses/LICENSE-2.0
#
# Unless required by applicable law or agreed to in writing, software
# distributed under the License is distributed on an "AS IS" BASIS,
# WITHOUT WARRANTIES OR CONDITIONS OF ANY KIND, either express or implied.
# See the License for the specific language governing permissions and
# limitations under the License.
import webtest
import main
def test_get():
app = webtest.TestApp(main.app)
response = app.get('/')
assert response.status_int == 200
assert response.body == 'Hello, World!'
self.response.write('Hello, World!')C:\Python27\python-docs-samples\appengine\standard\hello_world>gcloud app deploy
C:\Python27\python-docs-samples\appengine\standard\hello_world>gcloud app browse
Welcome to the Google Cloud SDK! Run "gcloud -h" to get the list of available commands.
---
Welcome! This command will take you through the configuration of gcloud.

Your current configuration has been set to: [default]

You can skip diagnostics next time by using the following flag:
  gcloud init --skip-diagnostics

Network diagnostic detects and fixes local network connection issues.
Checking network connection...done.
Reachability Check passed.
Network diagnostic (1/1 checks) passed.

You must log in to continue. Would you like to log in (Y/n)?  Y
...
C:\Python27>git clone https://github.com/GoogleCloudPlatform/python-docs-samples
Cloning into 'python-docs-samples'...
remote: Counting objects: 12126, done.
remote: Compressing objects: 100% (16/16), done.
remote: Total 12126 (delta 1), reused 10 (delta 1), pack-reused 12106
Receiving objects: 100% (12126/12126), 3.37 MiB | 359.00 KiB/s, done.
Resolving deltas: 100% (6408/6408), done.

C:\Python27>cd python-docs-samples/appengine/standard/hello_worldC:\Python27\python-docs-samples\appengine\standard\hello_world>gcloud app deploy app.yaml --project encoded-metrics-147522
Services to deploy:
descriptor: [C:\Python27\python-docs-samples\appengine\standard\hello_world\app.yaml]
source: [C:\Python27\python-docs-samples\appengine\standard\hello_world]
target project: [encoded-metrics-147522]
target service: [default]
target version: [20170817t234925]
target url: [https://encoded-metrics-147522.appspot.com]
Do you want to continue (Y/n)? Y
Beginning deployment of service [default]...
#============================================================#
#= Uploading 5 files to Google Cloud Storage =#
#============================================================#
File upload done.
Updating service [default]...done.
Waiting for operation [apps/encoded-metrics-147522/operations/XXXXXX] to complete...done.
Updating service [default]...done.
Deployed service [default] to [https://XXXXXX.appspot.com]
You can stream logs from the command line by running:
$ gcloud app logs tail -s default
To view your application in the web browser run:
$ gcloud app browse
C:\Python27\python-docs-samples\appengine\standard\hello_world>gcloud app browse
Opening [https://XXXXXX.appspot.com] in a new tab in your default browser.
C:\Python27\python-docs-samples\appengine\standard\hello_world>C:\DreamPie>dreampie.exe --hide-console-window c:\Python27\python.exe
C:\DreamPie>tree
Folder PATH listing for volume free-tutorials
Volume serial number is 000000FF 0EB1:091D
C:.
├───data
│   ├───language-specs
│   ├───subp-py2
│   │   └───dreampielib
│   │       ├───common
│   │       └───subprocess
│   └───subp-py3
│       └───dreampielib
│           ├───common
│           └───subprocess
├───gtk-2.0
│   ├───cairo
│   ├───gio
│   ├───glib
│   ├───gobject
│   ├───gtk
│   └───runtime
│       ├───bin
│       ├───etc
│       │   ├───bash_completion.d
│       │   ├───fonts
│       │   ├───gtk-2.0
│       │   └───pango
│       ├───lib
│       │   ├───gdk-pixbuf-2.0
│       │   │   └───2.10.0
│       │   │       └───loaders
│       │   ├───glib-2.0
│       │   │   └───include
│       │   └───gtk-2.0
│       │       ├───2.10.0
│       │       │   └───engines
│       │       ├───include
│       │       └───modules
│       └───share
│           ├───aclocal
│           ├───dtds
│           ├───glib-2.0
│           │   ├───gdb
│           │   ├───gettext
│           │   │   └───po
│           │   └───schemas
│           ├───gtk-2.0
│           ├───gtksourceview-2.0
│           │   ├───language-specs
│           │   └───styles
│           ├───icon-naming-utils
│           ├───themes
│           │   ├───Default
│           │   │   └───gtk-2.0-key
│           │   ├───Emacs
│           │   │   └───gtk-2.0-key
│           │   ├───MS-Windows
│           │   │   └───gtk-2.0
│           │   └───Raleigh
│           │       └───gtk-2.0
│           └───xml
│               └───libglade
└───share
    ├───applications
    ├───man
    │   └───man1
    └───pixmaps
C:\>cd Python27

C:\Python27>cd Scripts

C:\Python27\Scripts>pip install flickrapi
Collecting flickrapi
  Downloading flickrapi-2.3-py2-none-any.whl
...
  Running setup.py install for oauthlib ... done
Successfully installed flickrapi-2.3 oauthlib-2.0.2 requests-oauthlib-0.8.0 requests-toolbelt-0.8.0
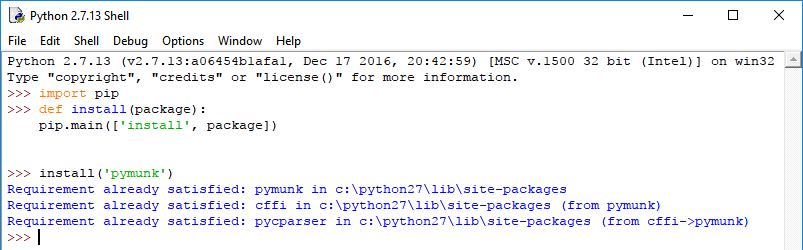
>>>import flickrapi
>>>
>>>api_key = u'XXXXXXXXXXXXXXXXXXXXXXXXXXXXXXXX'
>>>api_secret = u'YYYYYYYYYYYYYYYYYYYYYYY'
>>>
>>>flickr = flickrapi.FlickrAPI(api_key, api_secret)
>>>photos = flickr.photos.search(user_id='xxxxxxxx@Nxx', per_page='10')
>>>sets = flickr.photosets.getList(user_id='xxxxxxxx@Nxx')
>>> dir(sets)
['__class__', '__contains__', '__copy__', '__deepcopy__', '__delattr__', '__delitem__', '__doc__',
 '__format__', '__getattribute__', '__getitem__', '__hash__', '__init__', '__iter__', '__len__',
'__new__', '__nonzero__', '__reduce__', '__reduce_ex__', '__repr__', '__reversed__', '__setattr__',
 '__setitem__', '__sizeof__', '__str__', '__subclasshook__', '_init', 'addnext', 'addprevious',
'append', 'attrib', 'base', 'clear', 'cssselect', 'extend', 'find', 'findall', 'findtext', 'get',
'getchildren', 'getiterator', 'getnext', 'getparent', 'getprevious', 'getroottree', 'index', 'insert',
 'items', 'iter', 'iterancestors', 'iterchildren', 'iterdescendants', 'iterfind', 'itersiblings',
'itertext', 'keys', 'makeelement', 'nsmap', 'prefix', 'remove', 'replace', 'set', 'sourceline',
'tag', 'tail', 'text', 'values', 'xpath']
>>> print sets.attrib['stat']
ok
>>> sets.find('photosets').attrib
{'total': '4', 'perpage': '4', 'page': '1', 'pages': '1'}
>>> print "upload a photo via browser - set permisions"
upload a photo via browser - set permisions
>>> flickr.authenticate_via_browser(perms='write')
127.0.0.1 - - [12/Aug/2017 22:05:00] "GET /?oauth_token=xxxxxx-xxxxx&oauth_verifier=xxxxxxxxx HTTP/1.1" 200 -
>>> flickr.upload("0001.gif")

>>> print "try show title of my photos and id"
try show title of my photos and id
for child in photos:
  for i in child:
    photo_set = []
    try:
      title = i.attrib['title']
      print title
    except Exception, e:
      print e
    sets = flickr.photos_getAllContexts(photo_id = i.attrib["id"])
    for j in sets:
      if j.tag == "set":
        photo_set.append(j.attrib["id"])
        print photo_set
C:\Python27>cd ..

C:\>cd Python362

C:\Python362>cd Scripts

C:\Python362\Scripts>pip install flickrapi
Collecting flickrapi
  Downloading flickrapi-2.3-py3-none-any.whl
Collecting requests>=2.2.1 (from flickrapi)
  Downloading requests-2.18.3-py2.py3-none-any.whl (88kB)
    100% |████████████████████████████████| 92kB 1.4MB/s
Collecting six>=1.5.2 (from flickrapi)
  Using cached six-1.10.0-py2.py3-none-any.whl
...
Successfully installed certifi-2017.7.27.1 chardet-3.0.4 flickrapi-2.3 idna-2.5 oauthlib-2.0.2 requests-2.18.3
requests-oauthlib-0.8.0 requests-toolbelt-0.8.0 six-1.10.0 urllib3-1.22C:\Python27\Scripts>pip install pysolar
...
Successfully built pysolar
Installing collected packages: pysolar
Successfully installed pysolar-0.7
C:\Python362\Scripts>pip install pysolar
Collecting pysolar
  Using cached pysolar-0.7.tar.gz
Installing collected packages: pysolar
  Running setup.py install for pysolar ... done
Successfully installed pysolar-0.7C:\Python362>python.exe
Python 3.6.2 (v3.6.2:5fd33b5, Jul 8 2017, 04:57:36) [MSC v.1900 64 bit (AMD64)] on win32
Type "help", "copyright", "credits" or "license" for more information.
>>> from pysolar.solar import *
>>> import datetime
>>> my_data = datetime.datetime.now()
>>> print (my_data)
2017-08-10 18:12:01.997373
>>> get_altitude_fast(47.4616,26.3015,datetime.datetime.now())
-6.393190003993212>>> latitude_deg =47.2741
>>> longitude_deg = 26.185
>>> my_data = datetime.datetime.now()
>>> altitude_deg = get_altitude(latitude_deg, longitude_deg,my_data)
C:\Python362\lib\site-packages\pysolar\time.py:105: UserWarning: I don't know about leap seconds after 2015
(leap_seconds_base_year + len(leap_seconds_adjustments) - 1)
>>> azimuth_deg = get_azimuth(latitude_deg, longitude_deg, my_data)
>>> radiation.get_radiation_direct(my_data, altitude_deg)
634.4916522219954C:\Python27\Scripts>pip install Flask
Collecting Flask
Downloading Flask-0.11.1-py2.py3-none-any.whl (80kB)
100% |################################| 81kB 564kB/s
Collecting click>=2.0 (from Flask)
Downloading click-6.6-py2.py3-none-any.whl (71kB)
100% |################################| 71kB 1.3MB/s
Collecting Werkzeug>=0.7 (from Flask)
Downloading Werkzeug-0.11.11-py2.py3-none-any.whl (306kB)
100% |################################| 307kB 231kB/s
Collecting Jinja2>=2.4 (from Flask)
Downloading Jinja2-2.8-py2.py3-none-any.whl (263kB)
100% |################################| 266kB 890kB/s
Collecting itsdangerous>=0.21 (from Flask)
Downloading itsdangerous-0.24.tar.gz (46kB)
100% |################################| 51kB 1.3MB/s
Collecting MarkupSafe (from Jinja2>=2.4->Flask)
Downloading MarkupSafe-0.23.tar.gz
Installing collected packages: click, Werkzeug, MarkupSafe, Jinja2, itsdangerous
, Flask
Running setup.py install for MarkupSafe ... done
Running setup.py install for itsdangerous ... done
Successfully installed Flask-0.11.1 Jinja2-2.8 MarkupSafe-0.23 Werkzeug-0.11.11
click-6.6 itsdangerous-0.24from flask import Flask
app = Flask(__name__)
@app.route("/")
def hello():
return "Hello World!"
if __name__ == "__main__":
app.run()C:\Python27>python.exe hello.py
* Running on http://127.0.0.1:5000/ (Press CTRL+C to quit)C:\Python27\Scripts>pip install Flask-WTF
Collecting Flask-WTF
Downloading Flask_WTF-0.14.2-py2.py3-none-any.whl
Collecting WTForms (from Flask-WTF)
Downloading WTForms-2.1.zip (553kB)
100% |################################| 563kB 1.7MB/s
Requirement already satisfied: Flask in c:\python27\lib\site-packages (from Flask-WTF)
Requirement already satisfied: click>=2.0 in c:\python27\lib\site-packages (from Flask->Flask-WTF)
Requirement already satisfied: Werkzeug>=0.7 in c:\python27\lib\site-packages (from Flask->Flask-WTF)
Requirement already satisfied: Jinja2>=2.4 in c:\python27\lib\site-packages (from Flask->Flask-WTF)
Requirement already satisfied: itsdangerous>=0.21 in c:\python27\lib\site-packages (from Flask->Flask-WTF)
Requirement already satisfied: MarkupSafe>=0.23 in c:\python27\lib\site-packages (from Jinja2>=2.4->Flask->Flask-WTF)
Installing collected packages: WTForms, Flask-WTF
Running setup.py install for WTForms ... done
Successfully installed Flask-WTF-0.14.2 WTForms-2.1C:\Python362\Scripts>pip3.6.exe install flask
...
Successfully installed Jinja2-2.9.6 MarkupSafe-1.0 Werkzeug-0.12.2 click-6.7 flask-0.12.2 itsdangerous-0.24
C:\Python362\Scripts>Flask-WTF
'Flask-WTF' is not recognized as an internal or external command,
operable program or batch file.
C:\Python362\Scripts>pip3.6.exe install Flask-WTF
...
Successfully installed Flask-WTF-0.14.2 WTForms-2.1
C:\Python27\Scripts>pip install gtts
Collecting gtts
  Downloading gTTS-1.2.0.tar.gz
Requirement already satisfied: six in c:\python27\lib\site-packages (from gtts)
Requirement already satisfied: requests in c:\python27\lib\site-packages (from gtts)
Collecting gtts_token (from gtts)
  Downloading gTTS-token-1.1.1.zip
Requirement already satisfied: chardet<3 .1.0="">=3.0.2 in c:\python27\lib\site-packages (from requests->gtts)
Requirement already satisfied: certifi>=2017.4.17 in c:\python27\lib\site-packages (from requests->gtts)
Requirement already satisfied: idna<2 .6="">=2.5 in c:\python27\lib\site-packages (from requests->gtts)
Collecting urllib3<1 .22="">=1.21.1 (from requests->gtts)
  Using cached urllib3-1.21.1-py2.py3-none-any.whl
Installing collected packages: gtts-token, gtts, urllib3
  Running setup.py install for gtts-token ... done
  Running setup.py install for gtts ... done
  Found existing installation: urllib3 1.22
    Uninstalling urllib3-1.22:
      Successfully uninstalled urllib3-1.22
Successfully installed gtts-1.2.0 gtts-token-1.1.1 urllib3-1.21.1from gtts import gTTS
import os
import pygame.mixer
from time import sleep
user_text=input("Type your text: ")
translate=gTTS(text=user_text ,lang='en')
translate.save('output.wav')
pygame.mixer.init()
path_name=os.path.realpath('output.wav')
real_path=path_name.replace('\\','\\\\')
pygame.mixer.music.load(open(real_path,"rb"))
pygame.mixer.music.play()
while pygame.mixer.music.get_busy():
sleep(1)
import sys
from PIL import Image, ImageSequence
try:
        img = Image.open(sys.argv[1])
except IOError:
        print "Cant load", infile
        sys.exit(1)

pal = img.getpalette()
prev = img.convert('RGBA')
prev_dispose = True
for i, frame in enumerate(ImageSequence.Iterator(img)):
    dispose = frame.dispose

    if frame.tile:
        x0, y0, x1, y1 = frame.tile[0][1]
        if not frame.palette.dirty:
            frame.putpalette(pal)
        frame = frame.crop((x0, y0, x1, y1))
        bbox = (x0, y0, x1, y1)
    else:
        bbox = None

    if dispose is None:
        prev.paste(frame, bbox, frame.convert('RGBA'))
        prev.save('result_%03d.png' % i)
        prev_dispose = False
    else:
        if prev_dispose:
            prev = Image.new('RGBA', img.size, (0, 0, 0, 0))
        out = prev.copy()
        out.paste(frame, bbox, frame.convert('RGBA'))
out.save('result_%03d.png' % i)C:\Python27>python.exe convert_gif.py 0001.gif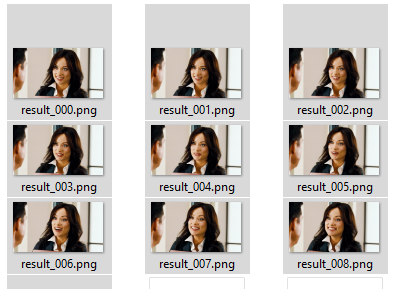
C:\>cd Python27

C:\Python27>cd Scripts

C:\Python27\Scripts>pip install py-translate
Collecting py-translate
  Downloading py_translate-1.0.3-py2.py3-none-any.whl (61kB)
    100% |################################| 61kB 376kB/s
Installing collected packages: py-translate
Successfully installed py-translate-1.0.3

C:\Python27\Scripts>>>> import translate
>>> dir(translate)
['TestLanguages', 'TestTranslator', '__author__', '__build__', '__builtins__', '__copyright__', '__doc__', '__file__', '__license__', '__name__', '__package__', '__path__', '__title__', '__version__', 'accumulator', 'coroutine', 'coroutines', 'languages', 'print_table', 'push_url', 'set_task', 'source', 'spool', 'tests', 'translation_table', 'translator', 'write_stream']
>>> from translate import translator
>>> translator('ro', 'en', 'Consider ca dezvoltarea personala este un pas important')
[[[u'I think personal development is an important step', u'Consider ca dezvoltarea personala este un pas important', None, None, 0]], None, u'ro']
>>>
# dumb recursive factorial
def fact(n):
    if (n <= 1):
        return 1
    else:
        return n * fact(n - 1)

print(fact(6))
# find primes using a for-else construct
for n in range(2, 10):
    x_range = range(2, n)
    for x in x_range:
        if n % x == 0:
            break
    else:
        # loop fell through without finding a factor
        print(n)
prefix = "Hello "

n1 = raw_input("Enter your name")

n2 = raw_input("Enter another name")

res = prefix + n1 + " and " + n2
print(res)
C:\Python27\Scripts>pip install speech
Collecting speech
  Downloading speech-0.5.2.tar.gz
Installing collected packages: speech
  Running setup.py install for speech ... done
Successfully installed speech-0.5.2
>>> dir(speech)
['Listener', '_ListenerBase', '_ListenerCallback', '__builtins__', '__doc__', '__file__', '__name__', '__package__'
, '_constants', '_ensure_event_thread', '_eventthread', '_handlerqueue', '_listeners', '_recognizer',
'_startlistening', '_voice', 'gencache', 'input', 'islistening', 'listenfor', 'listenforanything', 'pythoncom',
 'say', 'stoplistening', 'thread', 'time', 'win32com']>>> help(speech)
Help on module speech:

NAME
    speech - speech recognition and voice synthesis module.

FILE
    c:\python27\lib\site-packages\speech.py

DESCRIPTION
    Please let me know if you like or use this module -- it would make my day!

    speech.py: Copyright 2008 Michael Gundlach  (gundlach at gmail)
    License: Apache 2.0 (http://www.apache.org/licenses/LICENSE-2.0)

    For this module to work, you'll need pywin32 (http://tinyurl.com/5ezco9
    for Python 2.5 or http://tinyurl.com/5uzpox for Python 2.4) and
    the Microsoft Speech kit (http://tinyurl.com/zflb).


    Classes:
        Listener: represents a command to execute when phrases are heard.

    Functions:
        say(phrase): Say the given phrase out loud.
        input(prompt, phraselist): Block until input heard, then return text.
        stoplistening(): Like calling stoplistening() on all Listeners.
        islistening(): True if any Listener is listening.
        listenforanything(callback): Run a callback when any text is heard.
listenfor(phraselist, callback): Run a callback when certain text is heard.>>> speech.say('Hello Catalin George')